and one attempt to show the edge you can achieve in 5 minutes or so.
Doug Abbott's
Planer Blade Sharpening Jig
I
actually got the basic idea for the planer knife jig from a magazine several years ago,
though that recommended using it for touch up honing in between sharpening.
I have had great success using the "scary sharp" sandpaper on
glass method for sharpening, so I figured I could sharpen planer knives too.
The
first couple pics is of the Veritas jig for jointer knives,
and one attempt to show the edge you can achieve in 5 minutes or so.
Works
great.
You only use half sheets of paper with this because the tool slides on the
glass.
However, if you get one, use 600 sandpaper on glass to lap the surface of the Veritas tool flat where the knife sits - they paint them with that bumpy paint, and that can throw off the edge.
Also
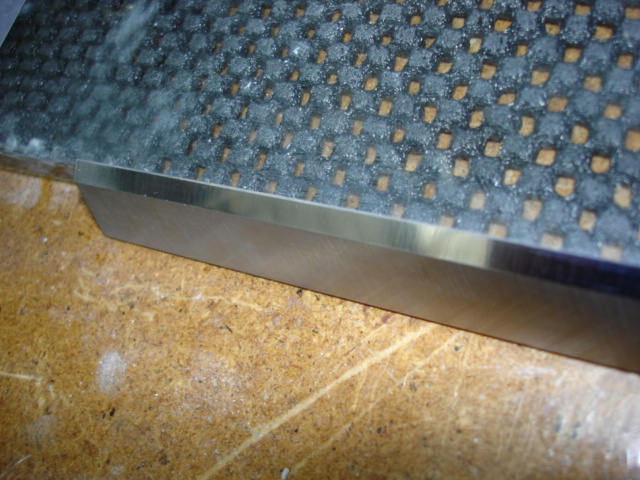
here is a photo of the backside of a jointer knife that has been
lapped with successive grits up to 2000.
If you lap the backside on glass, you can see how "unflat" they are
from the factory.
If you want a really good edge, the first time you sharpen them you
should lap them flat
on the back until you have a shiny spot all along the cutting edge.
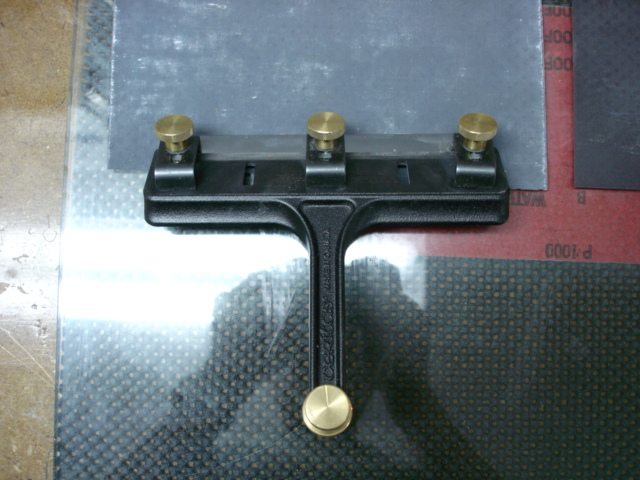
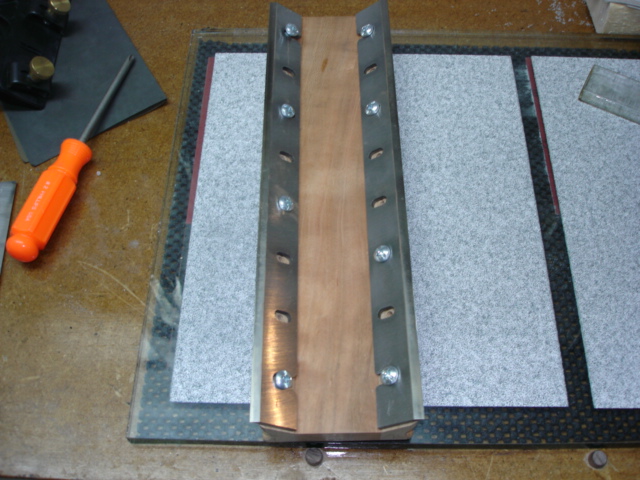
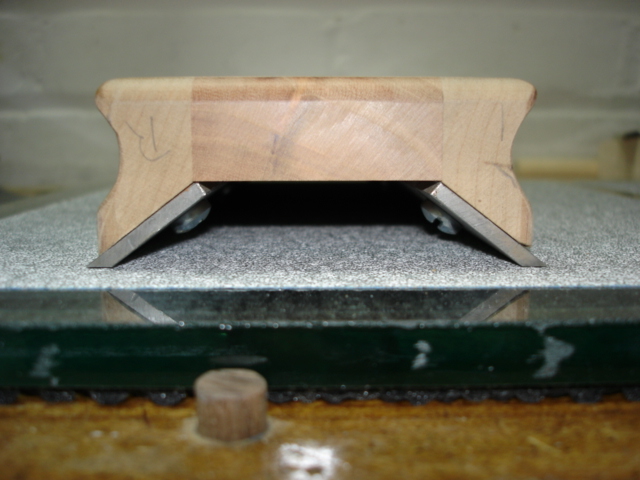
For the planer knife jig, you need three pieces of good stable hardwood jointed flat.
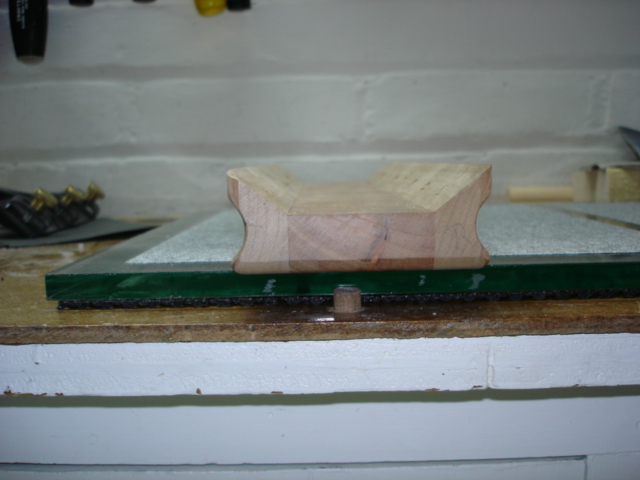
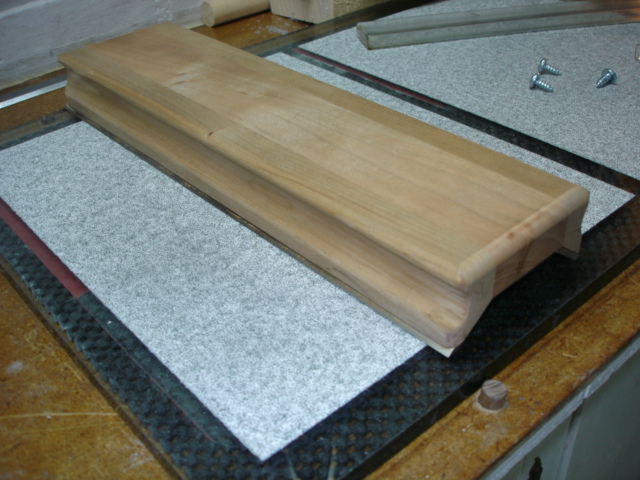
It's easy to see the three pieces in the photos.
I routed the coves in the sides just to make it more comfortable to hold.
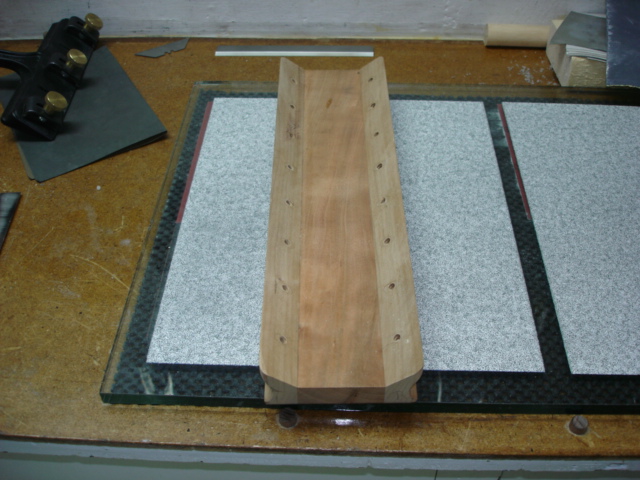
When I actually sharpen them, I put screws in every hole, but put in just a few for the pictures.
The
slope on the sides is equal to the bevel on the knives,
so that when the knives are mounted the bevel on both knives sits
perfectly
flat on the sandpaper surface.
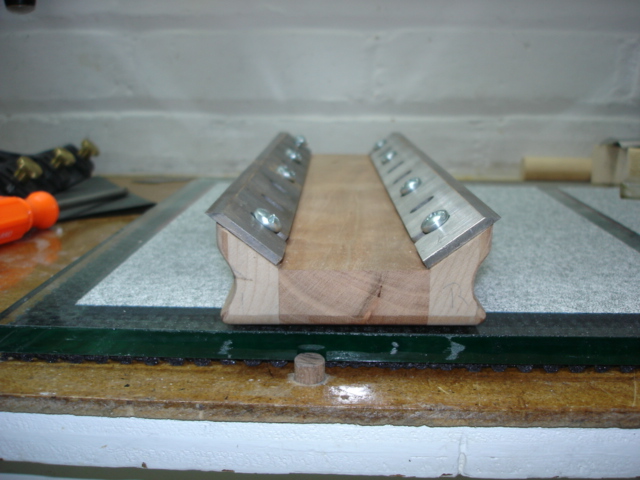
I
forget the angle, but its like 54 degrees.
You can measure it by putting the bevel on a flat surface and measuring
the angle of the knife.
I
actually made two of these jigs. The other is 2 degrees different so I can
do the secondary micro bevel.
I may experiment with putting a strip on the main one that I can use to
tilt it 2 degrees
so I can do the micro bevel without changing jigs.
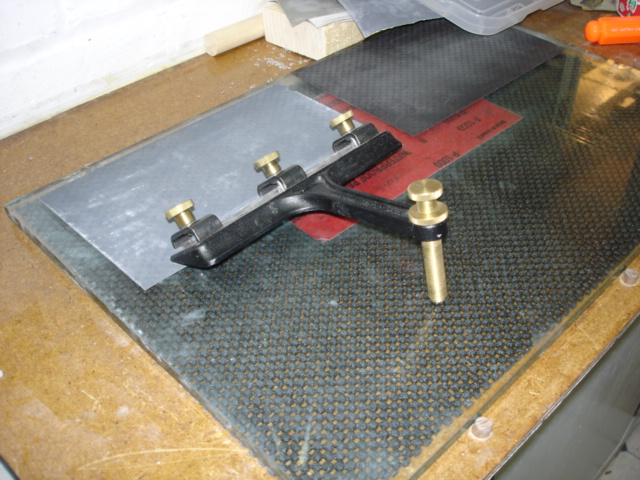
Anyway,
I have two sheets of glass big enough to hold two full sheets of sandpaper on a
side,
and a smaller piece that can hold one sheet on a side,
so I can have up to 10 grits glued down at once. Saves money on
sandpaper.
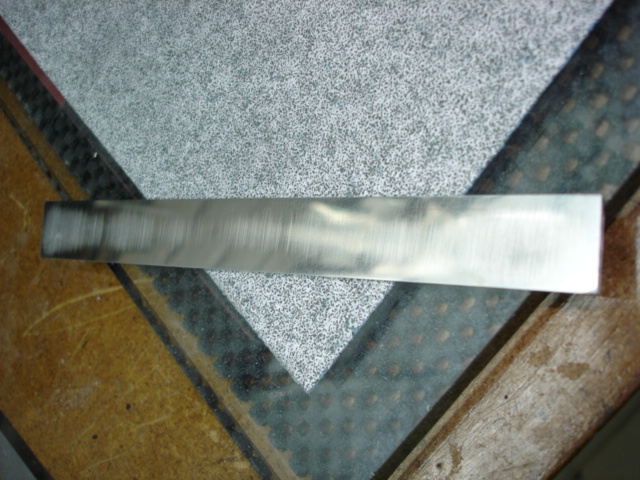
If I have really nicked knives, I usually use these grits
- 80, 120, 220 and 400 on the main bevel.
Use 80 until the nicks are pretty much gone.
The following grits go quickly. You will have a pretty darn shiny surface
by the 400 grit.
You don't need any finer unless you don't do a secondary bevel
because the main bevel doesn't cut anything anyway.
Then do a secondary bevel either with a second jig or by installing a a
stick on the bottom of the first one
that allows you to rock each knife two degrees.
For the secondary bevel use 1000 grit for just a few strokes then 2000 for
a few strokes to finish.
Then remove the knives from the jig and just lightly lap the back on the
2000 paper. You can shave with that.
If you do not skip any grits like I am suggesting, and go up to 2000 on the
main bevel,
the result will look like something a jeweler made rather than a tool.
The edges look liquid.
For that you will need 80, 120, 150, 220, 320, 400, 600, 800, 1000, 1500
and 2000.
Oh and if it is not clear from the photos, the rubbing action is perpendicular
to most sharpening operations.
In other words, you are rubbing the knives along their length, not
perpendicular to their length like you would be on a Tormek.
The most important thing is to make sure the back edge of the knives rest
in the flat bottom of the jig
so there is no rocking when the knives are put face down on the glass.
I do not do this to save money.
I do it because I know I end up with sharper knives than some commercial
operation would give me,
and in less time than I could drive there.