_____Stu's___Dungeon__
Joyful Honda
Treasure
Lesson Room Cabs
In the beginning
2
3 4 5
6 7 8
9
10 11
12 13 14
15
Jointer1
Jointer2
Router
Table1
Router Table 2
The Doors
Do
Pa
Give Me A Brake
Cyclone
Cyclone 2
Cyclone
3
Cyclone 4
Liquor
Shop Reno Tenjinsama Shrine Tree Tour
Beer Shelves
Wine Shelves
Five Cuts
Drill Press <NEW
DoPa 2007 <NEW
Turning
Jean Francious Escoulen
Eli Avisera Demo Day One
Eli Avisera Day Two
Lathe Stand!!
Turning
Roughing
It
Sharpening Station
Bowl Blank Processing
Captured Hollowing Rig
<NEW
Logging In Tokyo
Woodlot Woodlot
2006 Woodlot
3 Woodlot 4
Chainsaw Mill
Chainsaw
Mill Mk II
Time for a Router Table
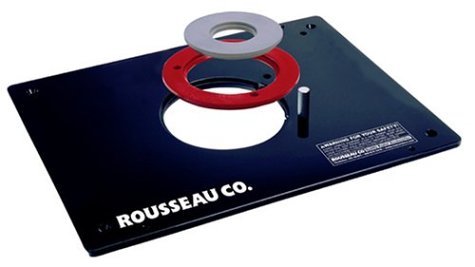
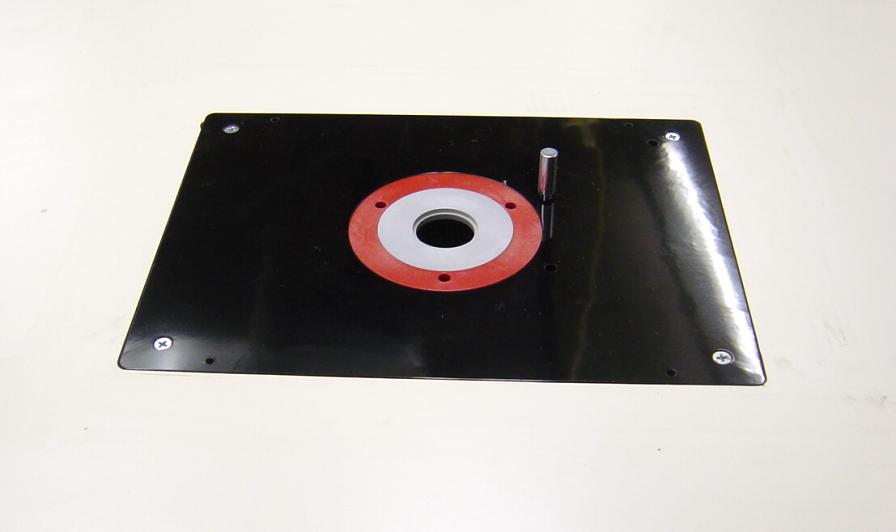
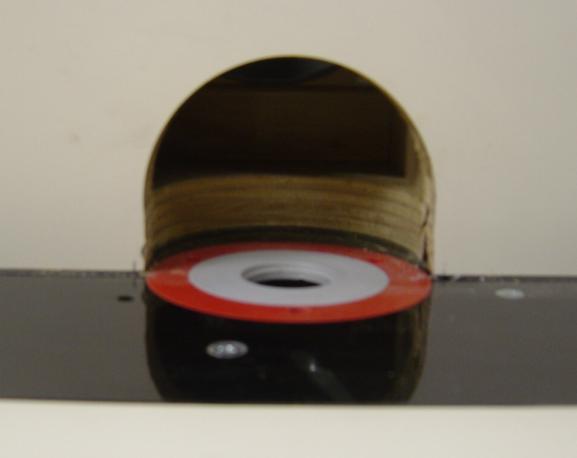
I bought a router table insert while in Canada on vacation
last summer.
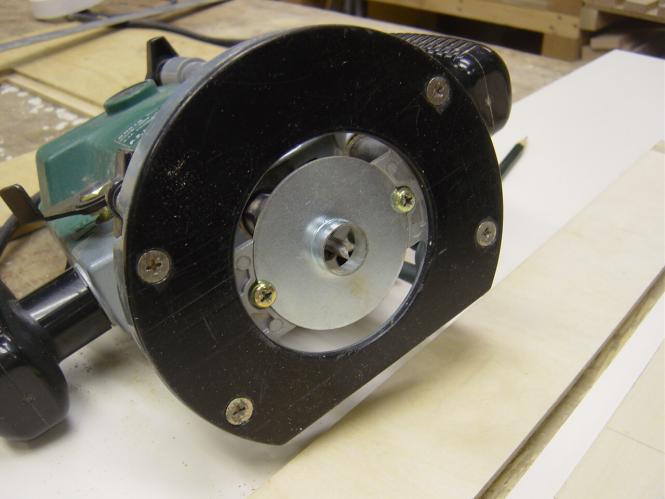
The insert is a Rousseau 3509 Deluxe Router
Base Plate
The table top will be about 3' by 2' and will go here....
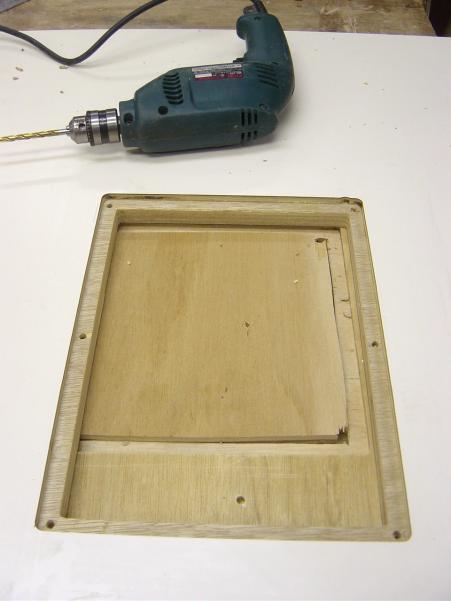
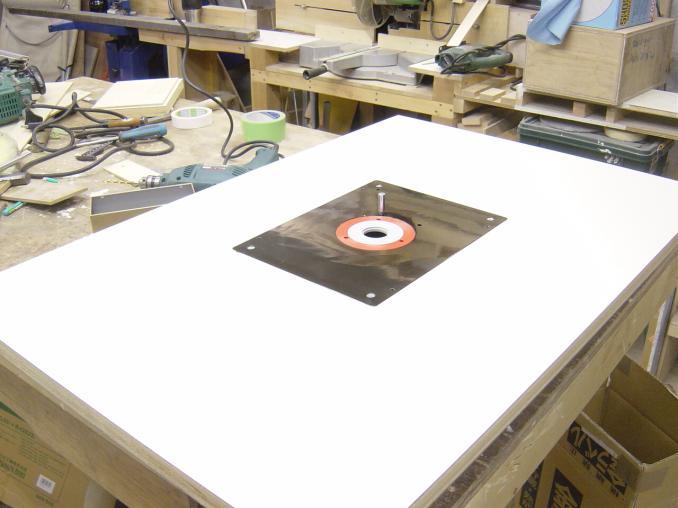
OK, now that I have the top laminated on both sides it is time to put the insert into the router table top.
![]()
There is the blank top, and you can see the test piece in the background...
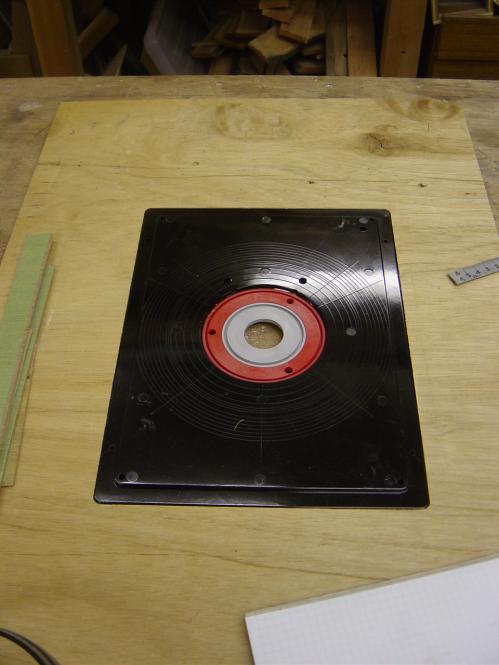
I made this up to test my jigs for the router insert, this was very useful....
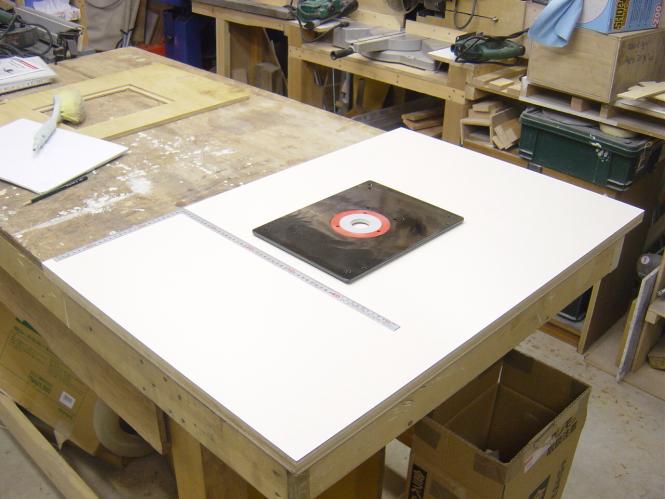
Here I'm trying to decide where the insert should be placed.
n the end it is in the center of the table top from right to left, and just
slightly off center to the back (about 2 cm)
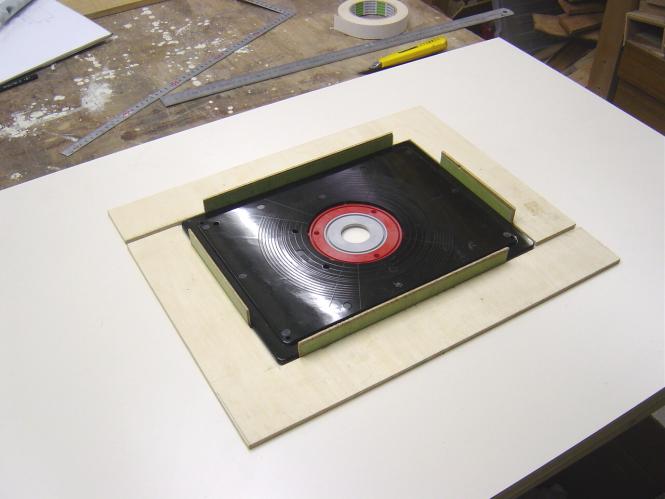
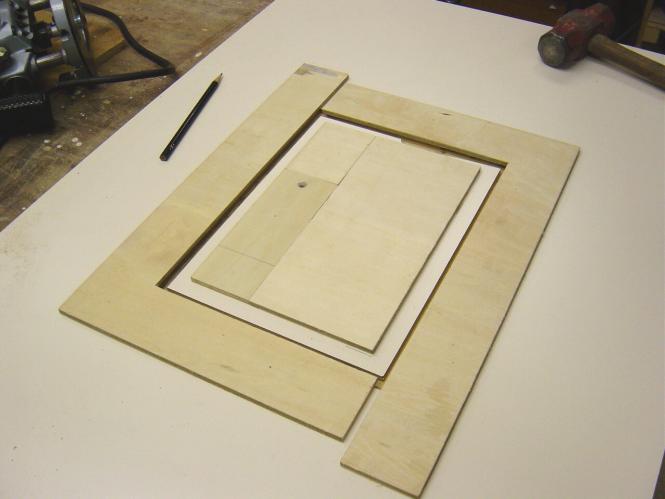
Here are the "L" jigs in place, I used shims to place them just the
right amount away from the insert, this was easier than following the
measurements that came with the insert, as they were in inches, and I'm working
in centimeters here in Japan. The jigs are all held in place by using double sided carpet tape, it worked great!
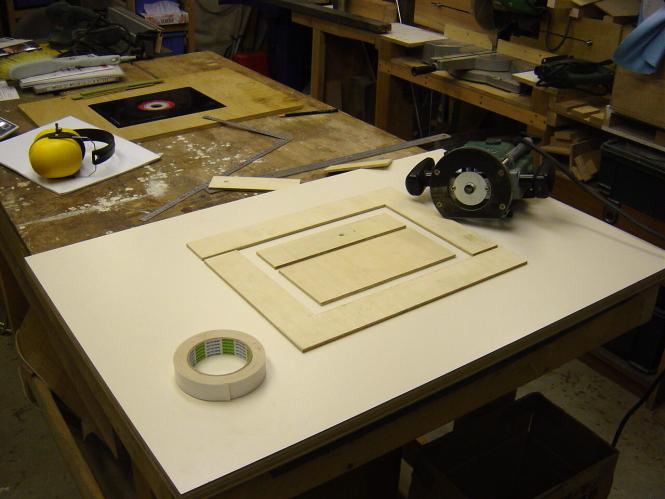
I'm now ready for the "Lip" cut, this is the cut that the insert will
end up resting on.
in the instructions they say to do the through cut first, but I did not think
this was going to work as well, as I'd have no support for the router in the
middle of the tabletop, so I did this cut first.
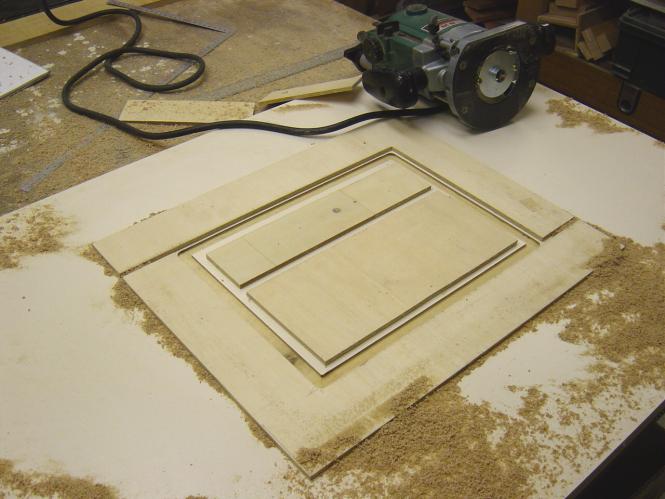
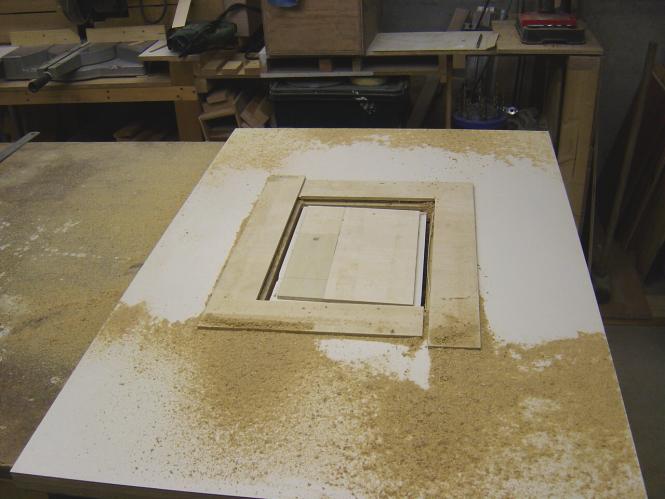
There is the lip cut done
(I got to get a vacuum cleaner attachment for my router, it makes
too much of a mess!!)
A closer look
I changed the bit to this thinner one for the through cut..
Here the jigs are lined up for the through cut, I just eyeballed this, and it
worked just fine.
man routers make a lot of mess!
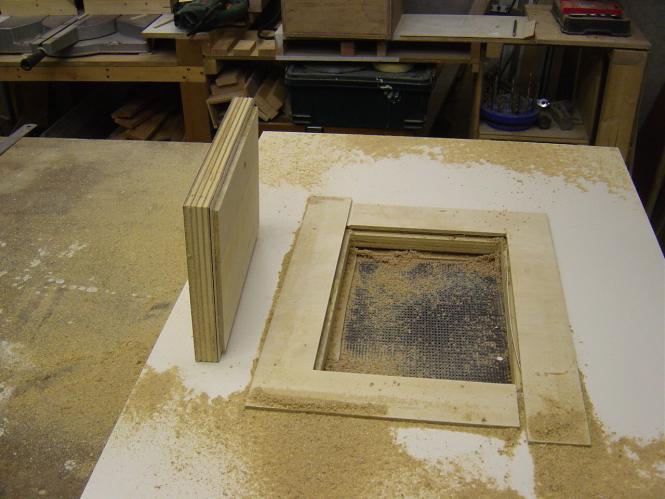
There we go, the through cut is finished!
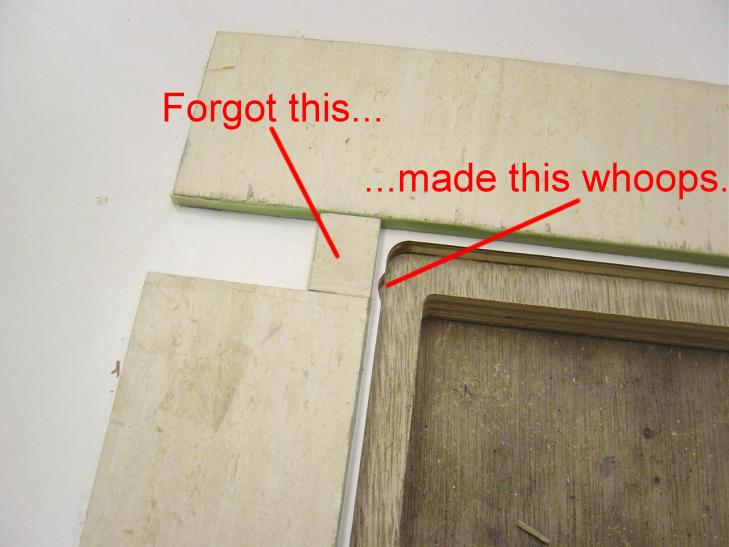
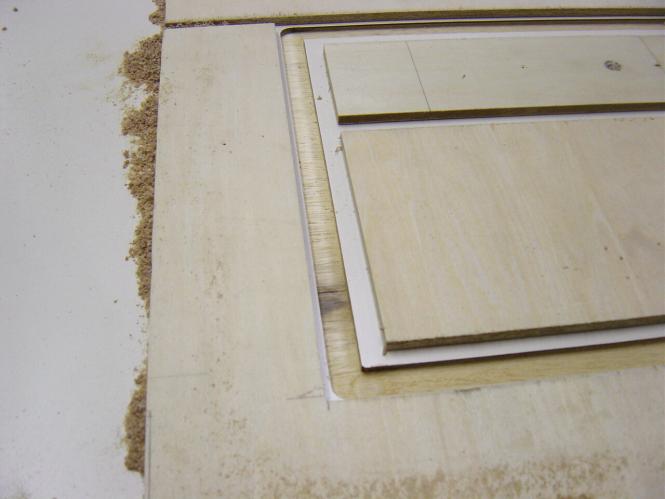
This insert has leveling screws, so I should have made sure I cut the lip a
little deep, but I ended up cutting it too shallow!
No big deal, I just set the jigs up again and I cut it a bit deeper...not so
fast! When I did the through cut the jigs were a little too long, so I cut a bit
off one leg of each "L" this left me with a gap on redoing the lip
cut, which I forgot to fill with a small block.
Yes it was going too smoothly, and I got this little "Whoops" to prove it!!
Going to have to live with it I guess.....
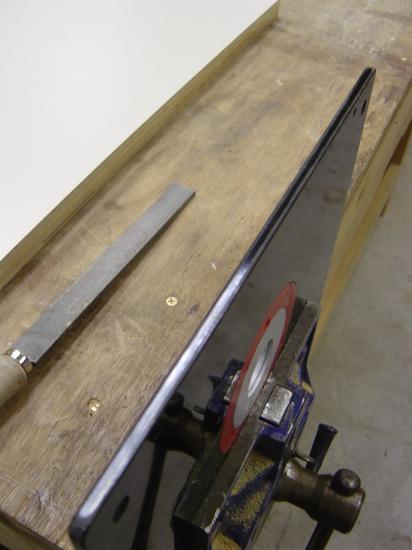
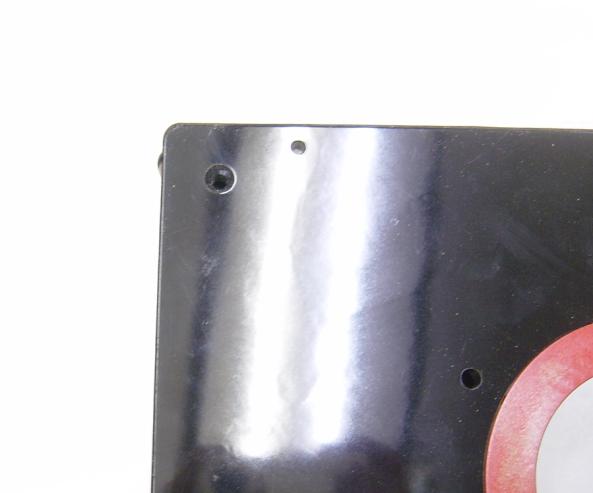
Before filing...
I found that the insert was just a touch too snug, it would not let the levelers
do their job, so I just lightly filled the edges of the inset.
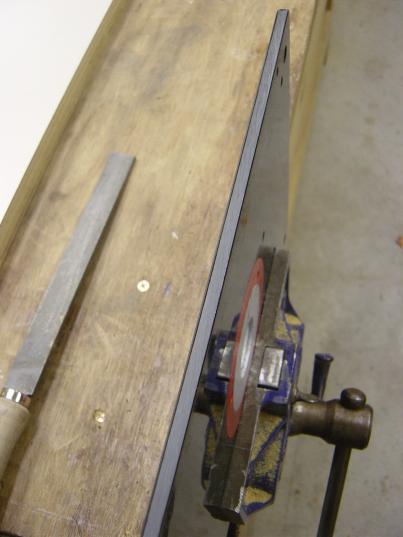
after filling.
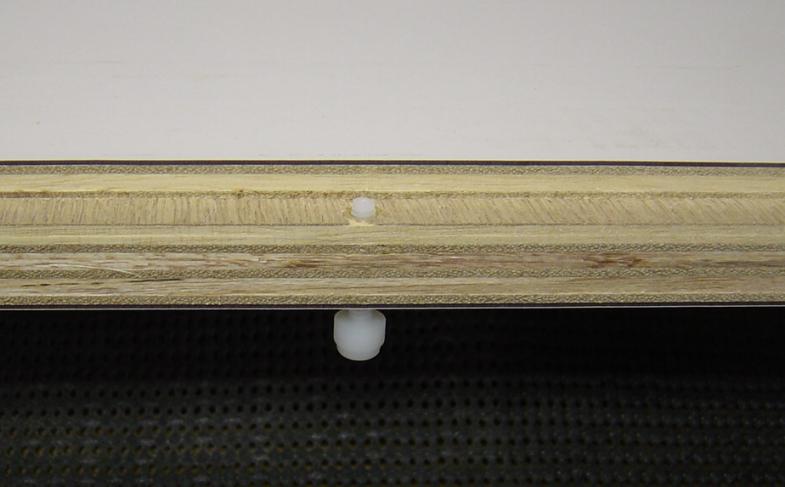
I've drilled the six holes for the leveling inserts
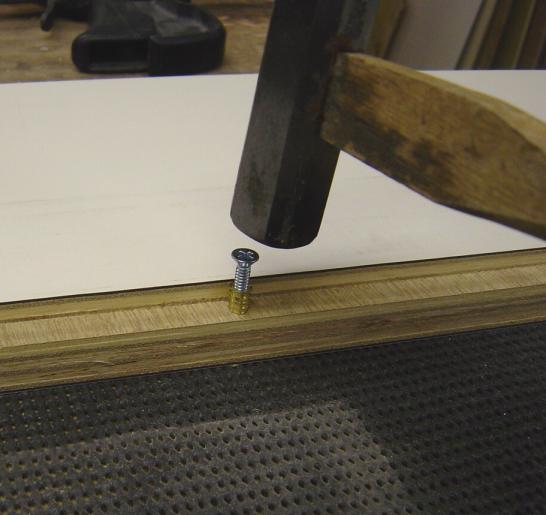
Using the steel screws that come with the kit for the corner snuggers you
lightly hammer the brass inserts to seat them from above
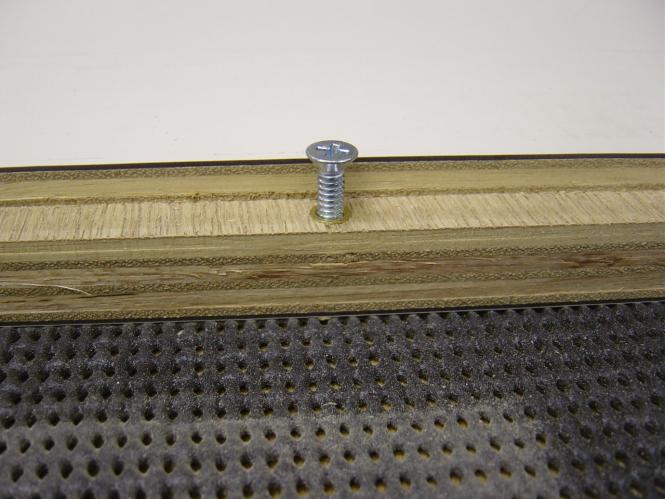
Hammered flush
Ready for the leveler to be inserted.
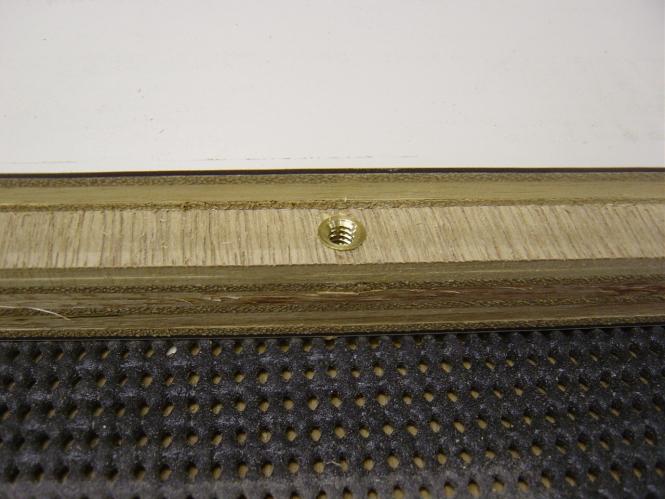
Leveler inserted
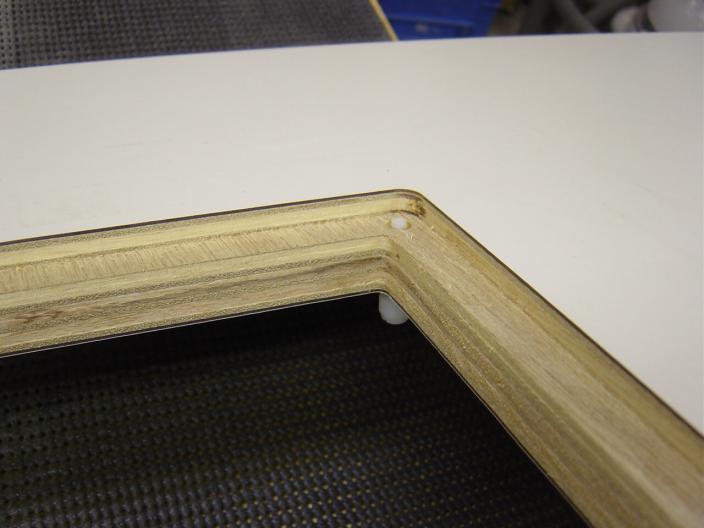
One in a corner
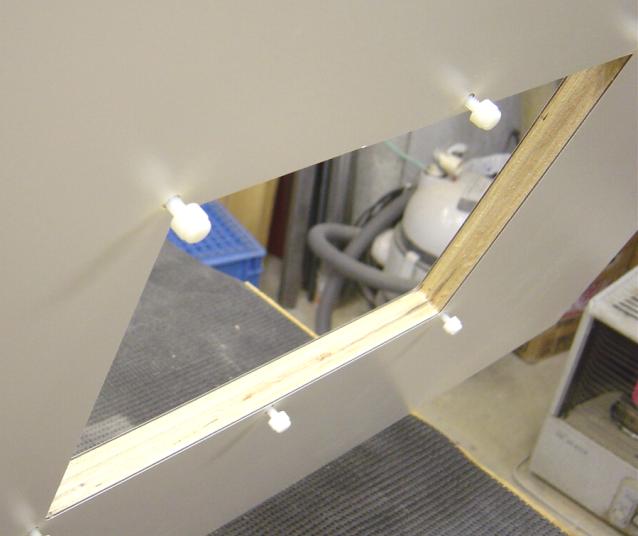
View of the levelers inserted from the bottom
There, all done...
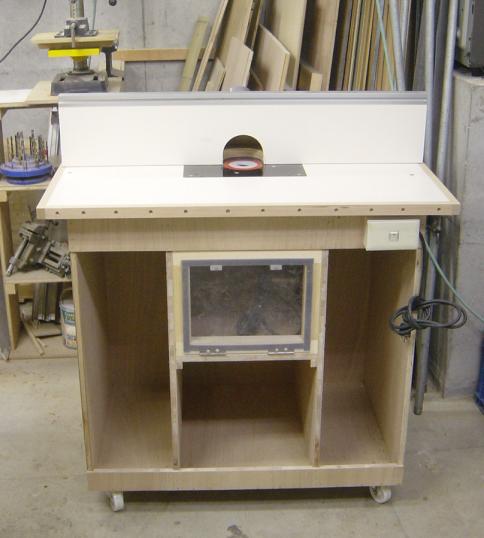
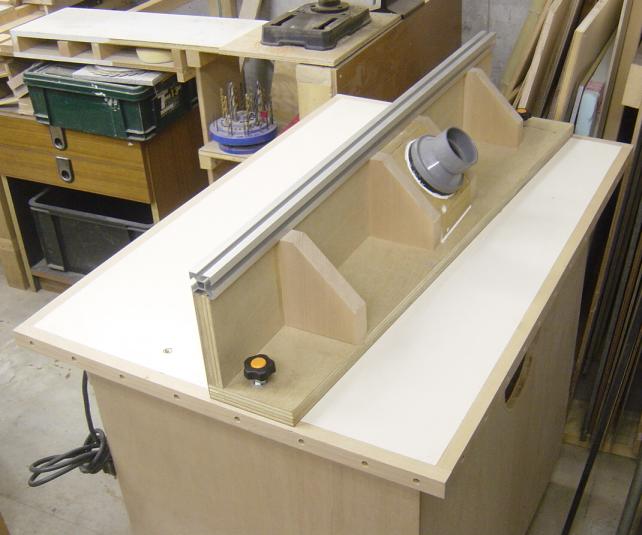
Looks OK I think, now I got to build the cabinet and mount the router, I'll be
using a Hitachi M12
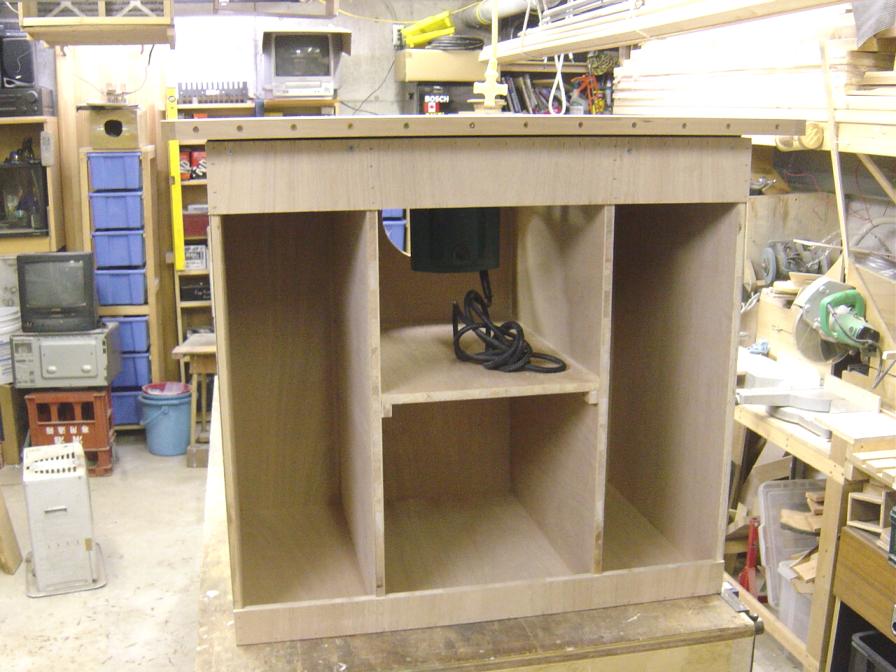
I put this cabinet together fairly quickly, I used the dado blade on my TS to
make dados and grooves for all the joints, I then glued it and shot it together
with staples. I seems really good and solid.
The area around the router will be all sealed up and so the DC can suck the dust
away. On either side of the cabinet I'll make up some drawers for storage, I'm
thinking 3 on a side, fairly shallow draws on the top, and deeper ones near the
bottom.
I've got to get some wheels for it as well.
The door on the front of the router compartment is going to be
made from clean Plexiglas, so I can see where the dust goes!!
I also need to wire it, put an outlet inside for plugging the router into, with
a switch on the outside to turn it on and off, and I'll borrow John Lucas's idea
for making a remote lock for plunge shaft function.
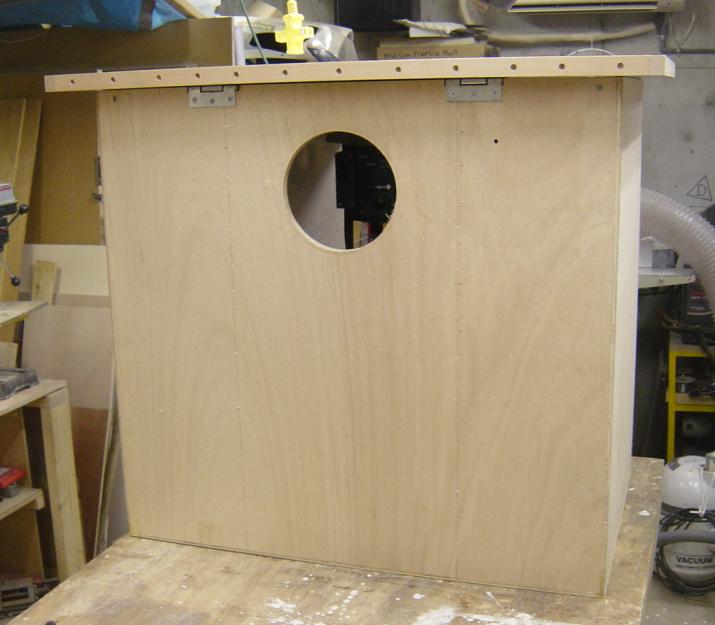
This is the backside of the cabinet, you can see the large hole for the DC that
I cut.
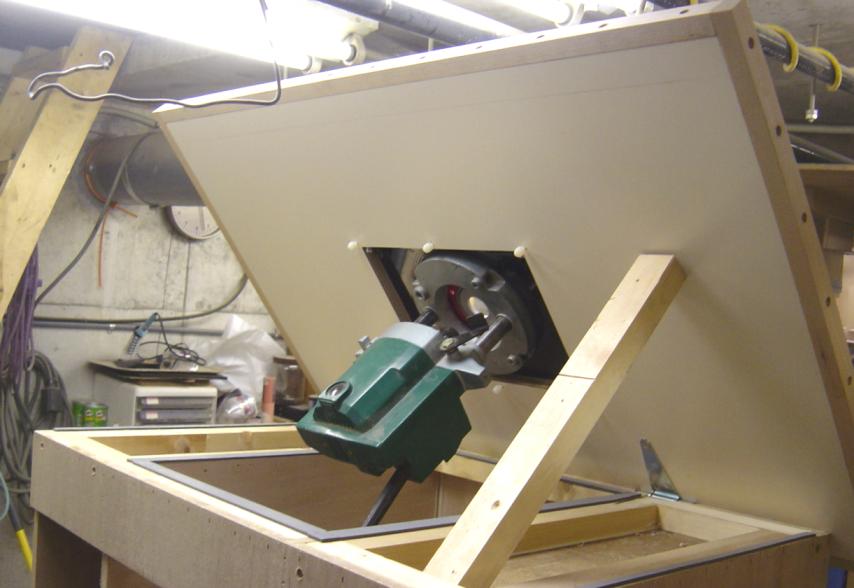
Here I'm just using a stick to prop up the top, this will be how I get to the
router to change bits..
This router is an older M12, there is no shaft lock for changing bits,
but I did
get the router on the cheap, so I'm not complaining.
The Fence!!
OK, I got the fence built, sorry I don't have pics of doing it, I kind of
misplaced our digital camera for a few days..
Here you can see the front, the fence is a bit tall, but I figured "why
not" saves me from building a taller one later.
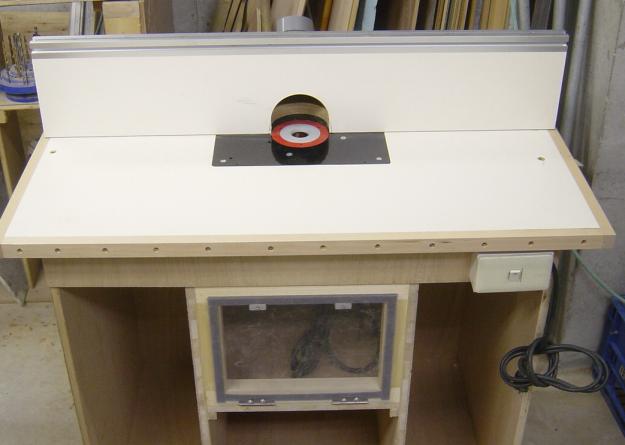
A bit of a closer view.
I have a router switch on order with Rockler.com, so that will replace the light
switch you see now.
An out of focus close up of the router fence cutout.
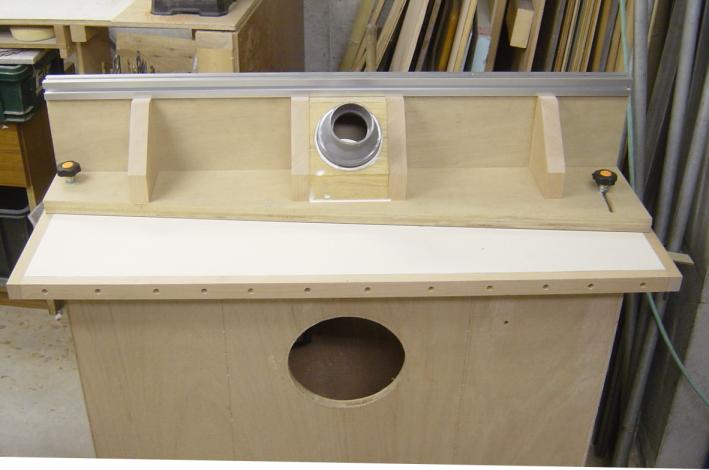
From the back side, the fence is wider on the base at one end, to give me more
room for adjustment.
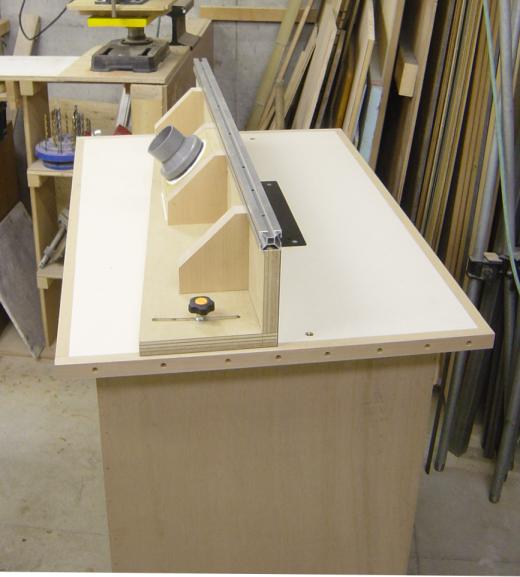
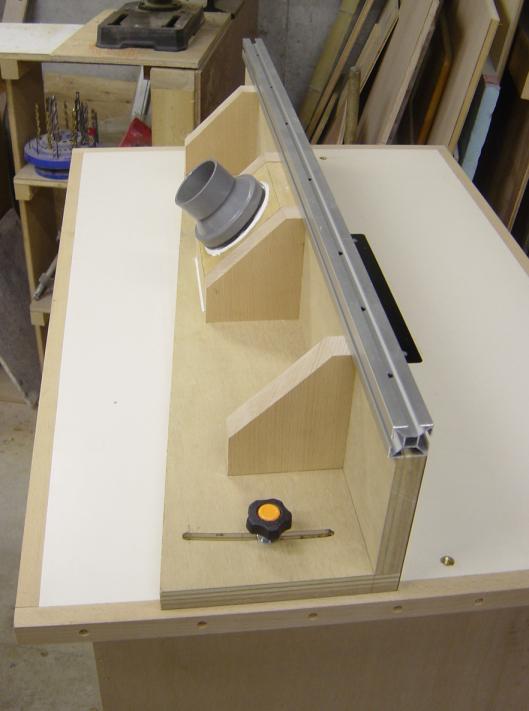
You can see the two dust ports, the large 6" one at the bottom, and the
smaller one on top.
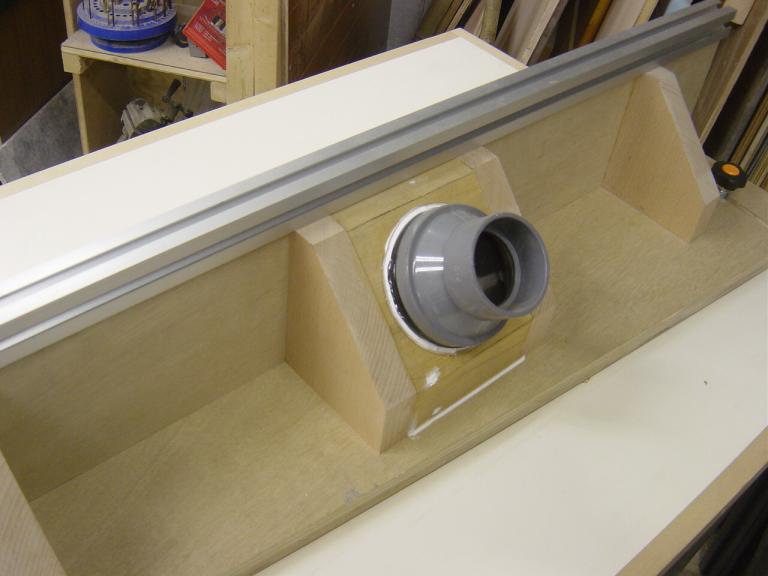
A close up view of the top DC port, all sealed up and waiting for some flex
hose.
The view from the left end of the table
This is the end that will swing right or left to expose more or cover up more of
the router bit from the fence.
The view from the right end.
This is the end that will pivot.
You can see I put some of that shelving bracket stuff on top of the fence, this
will let me put feather boards on the fence, I hope it works well....
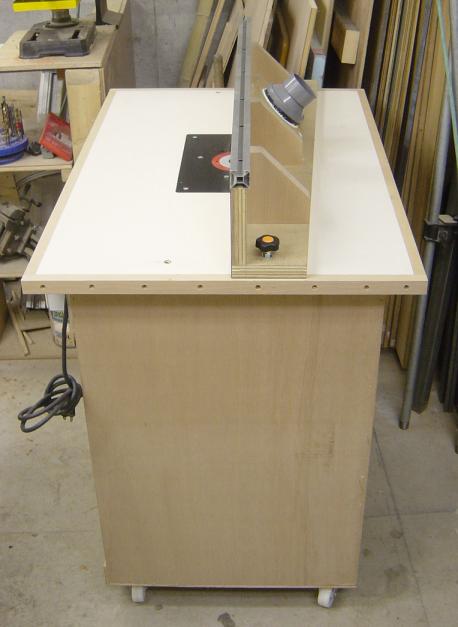
The casters on the table are just temps, I have some taller locking ones to go on, they will raise the router table to be near level with the SCMS bench.
I've still got some more work to do, but the majority of the work is done. The first job I'm going to use the new table for is building the drawers for the table!
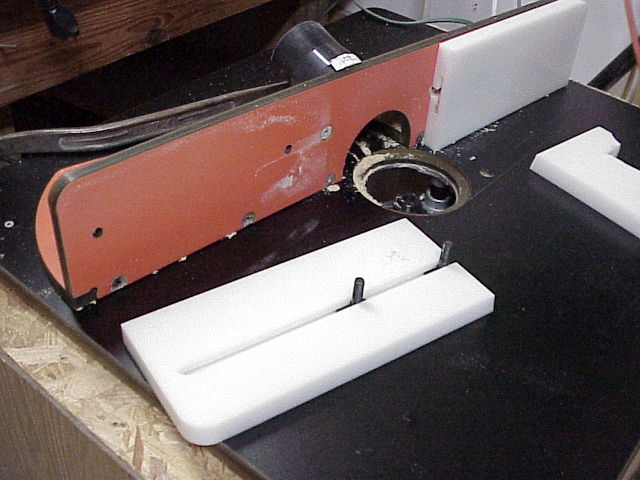
The white plastic cutting board stuff...
I went out to the home center place to get some things, while there I bought a nice fairly large cutting board, the white plastic stuff, cost me about $15.
From this I made the two wings that will make the fence faces and 4 pieces that will be the zero clearance inserts.
I also got the parking spot for the router table cleared up....
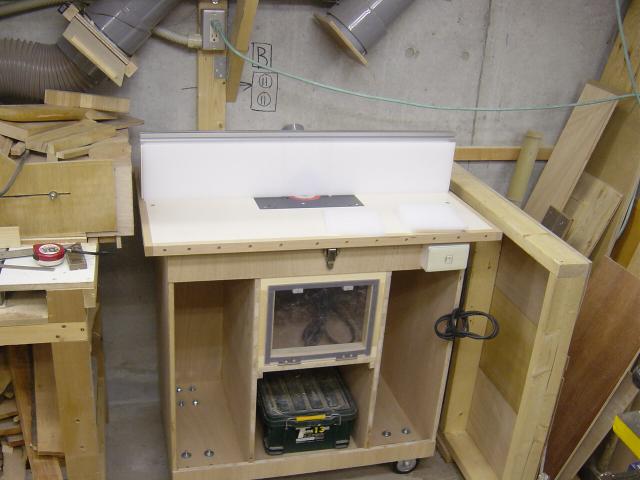
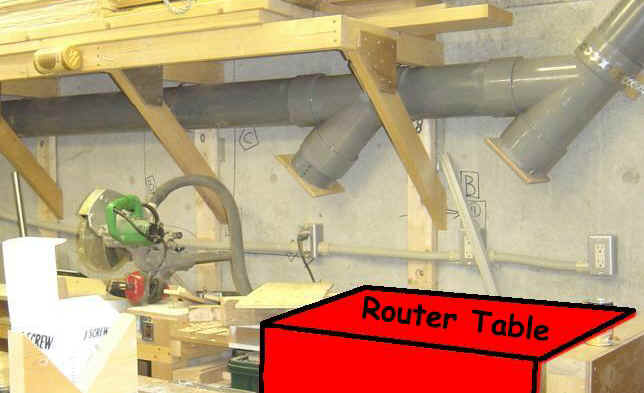
Here you can see where the router table will be, right beside the SCMS.
![]()
Here is a closer look at the face of the fence, you can see the 3 extra inserts
sitting on the right side of the table.
![]()
Here is one of the inserts, the two long sides will be attached to the main
fence from behind, and they will capture the insert.
My buddy Rob sent me pics of his Sommerfeld router table to get the idea...
Rob's router fence
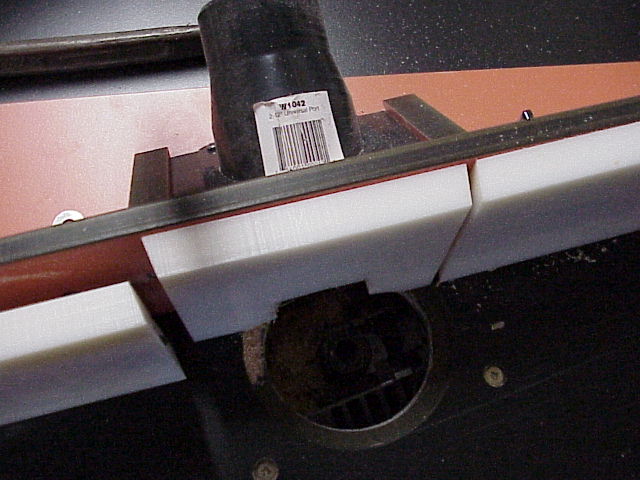
You can see here where I got the idea from

![]()
Here is a close up view of my set-up.
Now I wait for my FedEx shipment of parts from Rockler.com I hope they get here soon!