_____Stu's___Dungeon__
Joyful Honda
Treasure
Lesson Room Cabs
In the beginning
2
3 4 5
6 7 8
9
10 11
12 13 14
15
Jointer1
Jointer2
Router
Table1
Router Table 2
The Doors
Do
Pa
Give Me A Brake
Cyclone
Cyclone 2
Cyclone
3
Cyclone 4
Liquor
Shop Reno Tenjinsama Shrine Tree Tour
Beer Shelves
Wine Shelves
Five Cuts
Drill Press <NEW
DoPa 2007 <NEW
Turning
Jean Francious Escoulen
Eli Avisera Demo Day One
Eli Avisera Day Two
Lathe Stand!!
Turning
Roughing
It
Sharpening Station
Bowl Blank Processing
Captured Hollowing Rig
<NEW
Logging In Tokyo
Woodlot Woodlot
2006 Woodlot
3 Woodlot 4
Chainsaw Mill
Chainsaw
Mill Mk II
On To Page Ten
Wow, ten pages, I'm a bit surprised, but I got more to add, so here we go...
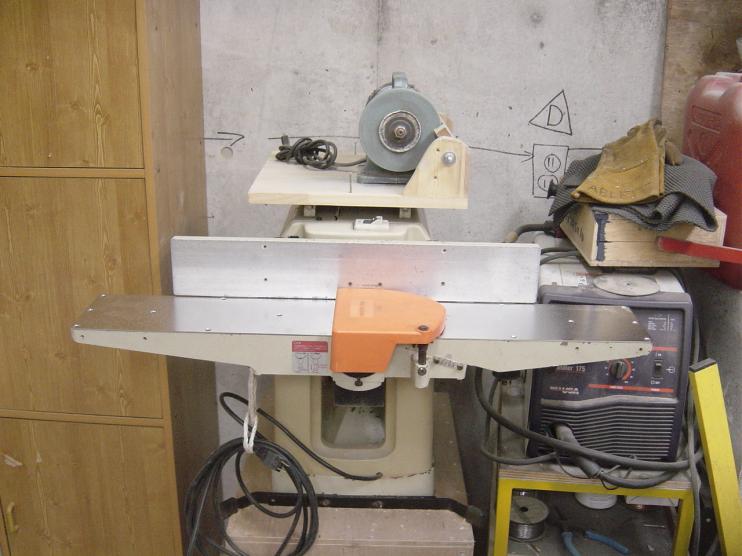
The Makita 2030 Jointer/Planner got new knives and new bedplates for the jointer, it is like a new machine now!!

all shinny and new!!
parked waiting for the next time!!
I got the Keller Dovetail Jig, the Model 1500.
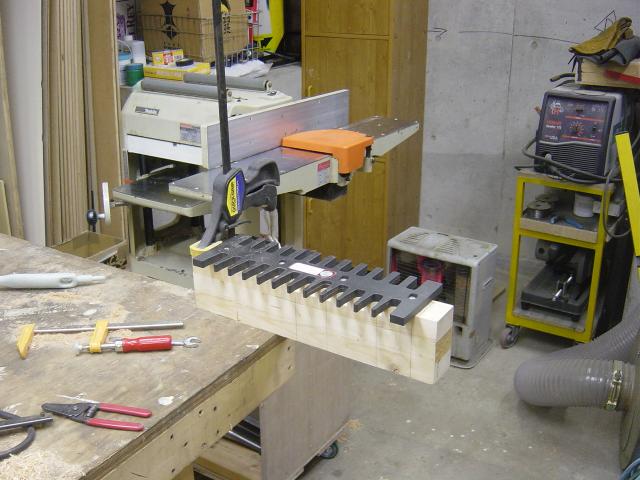
I don't have my Record wood vice installed in the bench yet,
so here is how I was using the Keller Jig.
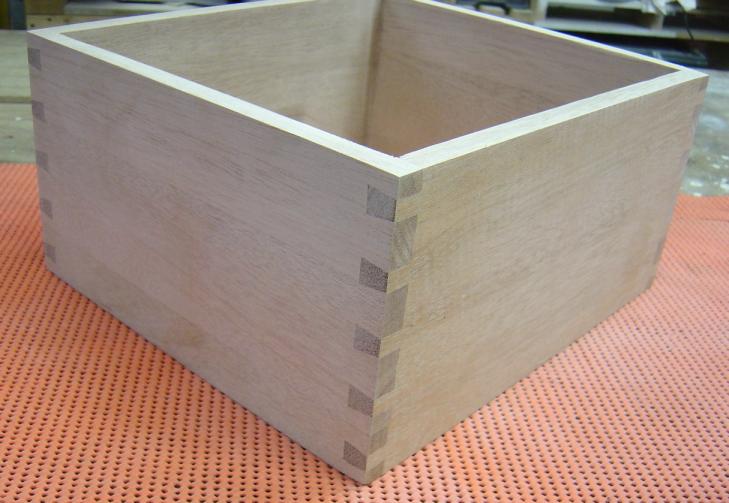
I made this box up just for practice, and to see how the Keller Jig worked,
I think it worked well.
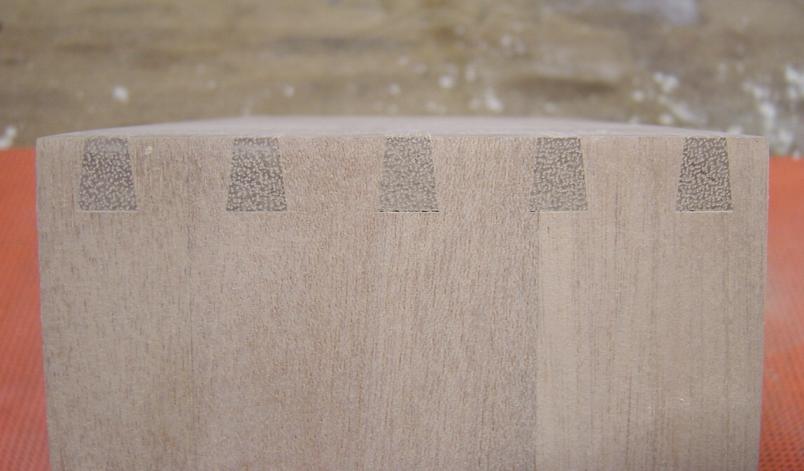
A close up of the pins, not perfect, but not bad for a first try
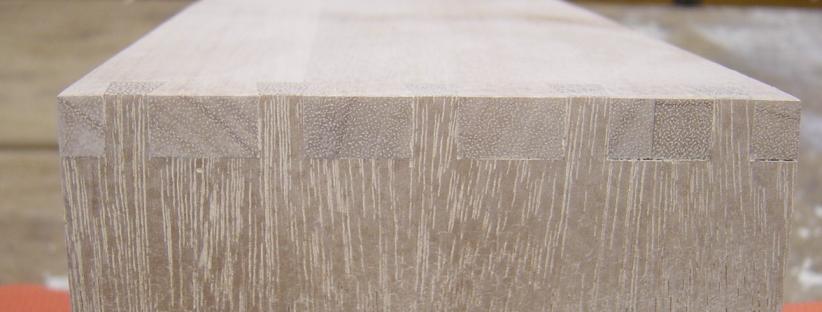
More close ups
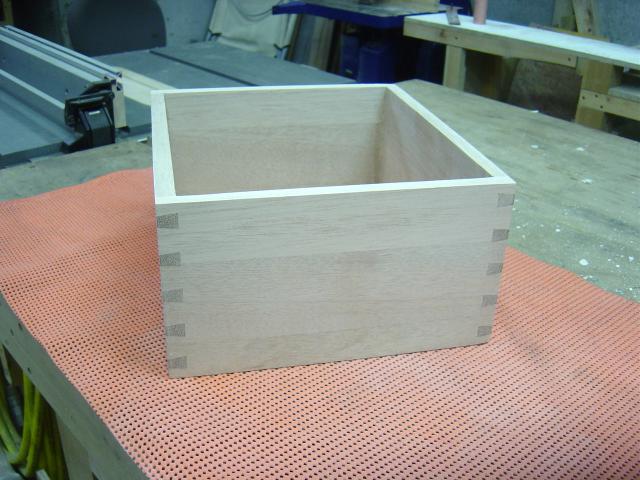
Another shot of the box.
The wood is something they call Philippines Mahogany, here in Japan,
I don't really know exactly what it is. It is fairly soft, has an
orange/brown color,
and machines well, very straight grain. It is not very strong, but is fairly
cheap (for Japan).
OK, I got tired of sweeping up the mess from the
Jointer/Planner,
so when I had to run a bunch of boards though it the other night I decided to
try a fix...

The first fix was decidedly LOW TECH, I just taped a 70L garbage bag to the
bottom of the Jointer,
it seems to work, gets all the shavings. Not to worry, I will make a dust hood
for it, but for now, it works.

The planner was a bit more of a challenge. I started cutting and slicing some
sheet metal I had laying around,
and this is what I came up with, thank goodness for Duct Tape!!
I know it looks a little rough, but it works, I'll just call this one the Beta
version :)
The sheet metal is a bit thin, when I build the cyclone, I'll make a better one
out of heavier gauge sheet metal.
The one problem with it is that it is LOUD the
kind of loud you can hear tomorrow!!
got to have the hearing protection on for sure!
The DC's new parking spot.....
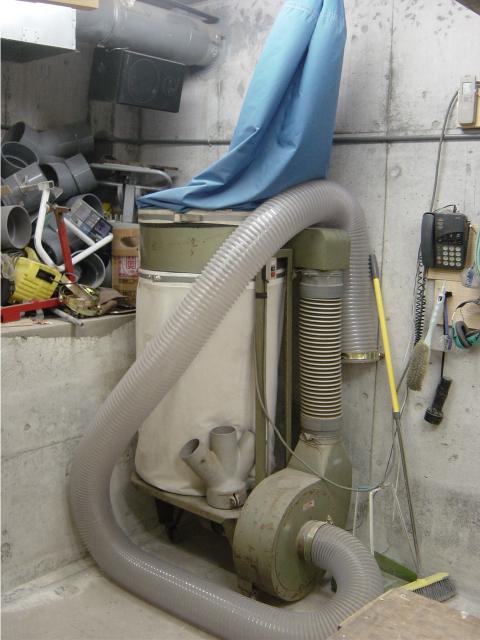
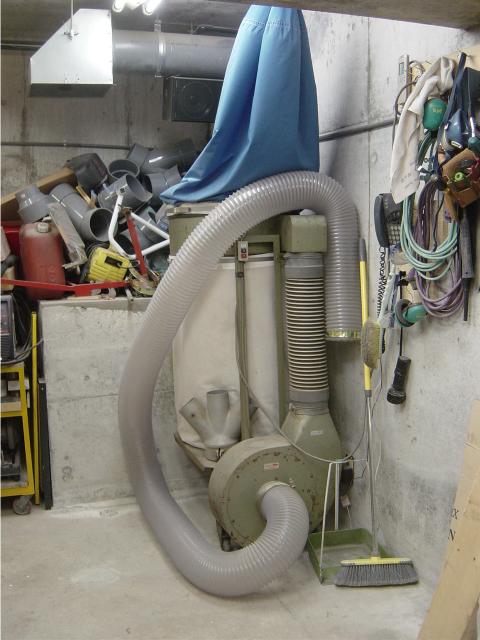
This will be the location of the Cyclone as well, when I get it built, that is!!
Cheers!
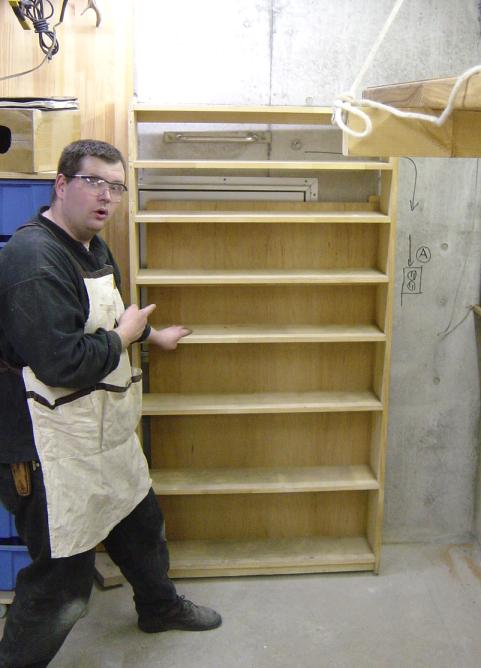
I
moved the shelf from the wall behind the new parking spot for the DC,
and I needed to put the shelf somewhere, so this is what I came up with!!
There I found a good spot for the shelf.....
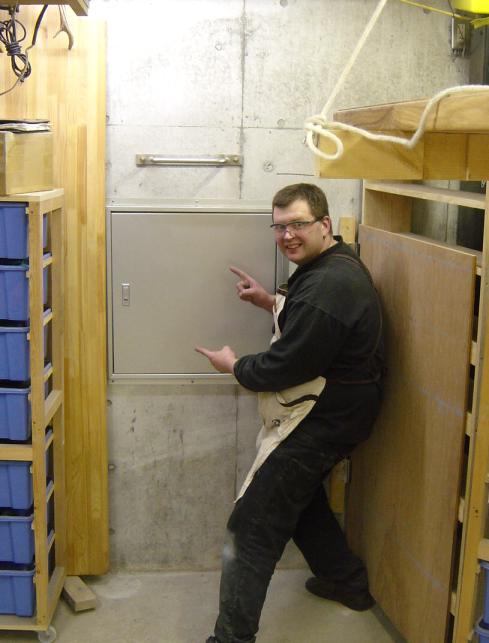
But now I seem to be missing something...
I seem to remember having a door here to get into the other storage area...?
If I just move this...
What could be back here....?

Hey this swings out...
I knew I had a door here somewhere...
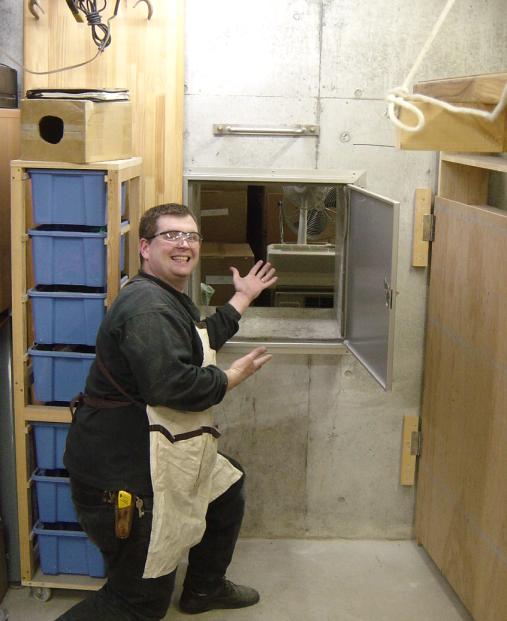
Tada!!
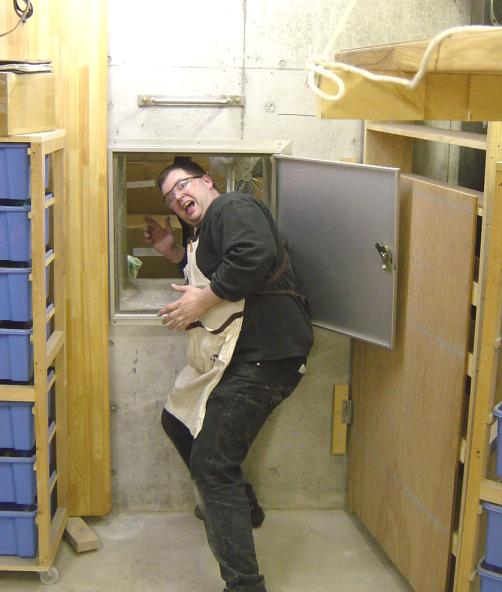
Exit stage center!!

Here's looking at you guys!
I'm finding more and more ways of
using the space I have.
The shelf is hinged to the wall, and then there is one swivel caster under the
non hinged end of the shelf.
Right now with nothing on it the caster just barely touches the concrete
floor,
I'm sure when I load this sucker up with stuff, the caster will have more work
to do.
I hope you enjoyed that!
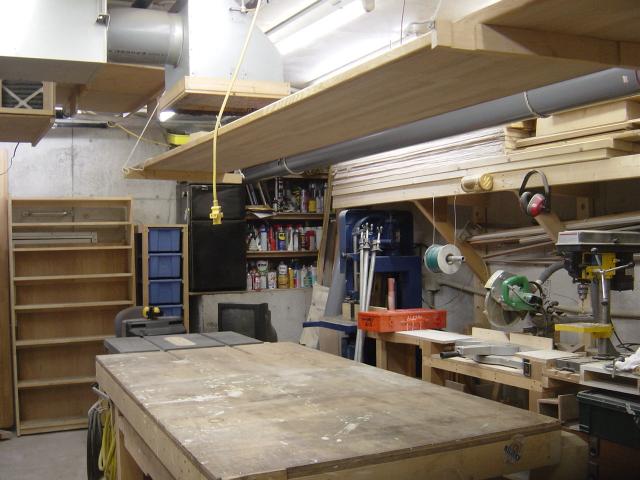
I've been working on the Summer Renovation project for a while now (like it is now December!) and the next thing to do is the cabinets that are going on the West wall. I'm going to do it backwards and put the countertop in first.
Here is the countertop hung out of the way, a couple of pulleys and some rope, and this is a good solution for a cramped shop.
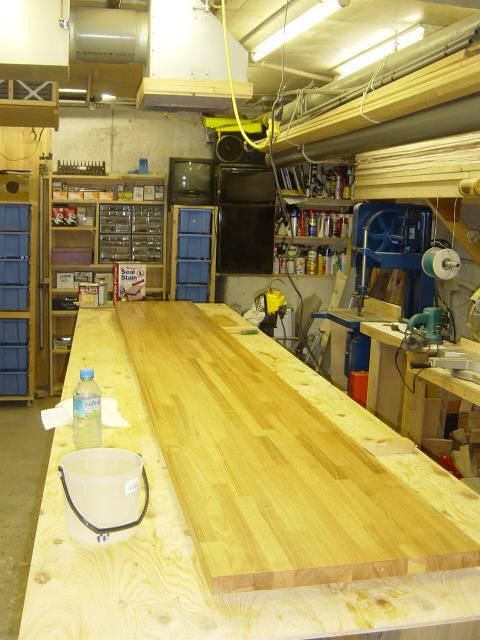
Here it is getting some stain and urethane.
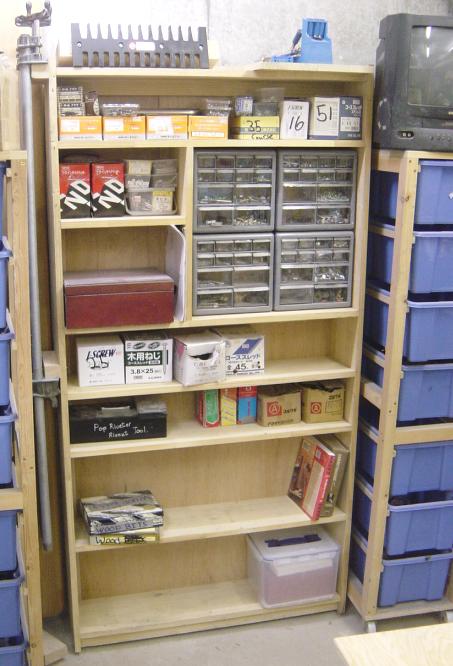
BTW you can see the hidden door shelf in the background, now full of my boxes of screws and nails, and I even put my 4 pipe clamps on the one end of it. Still opens and closes with ease, and now with the back completely finished, and all that stuff you really cannot see what is behind it.
Here is a better shot
OK I have a really crappy cheap
ROS, and it works and then it don't work,
so I broke down and bought myself an early Christmas present....
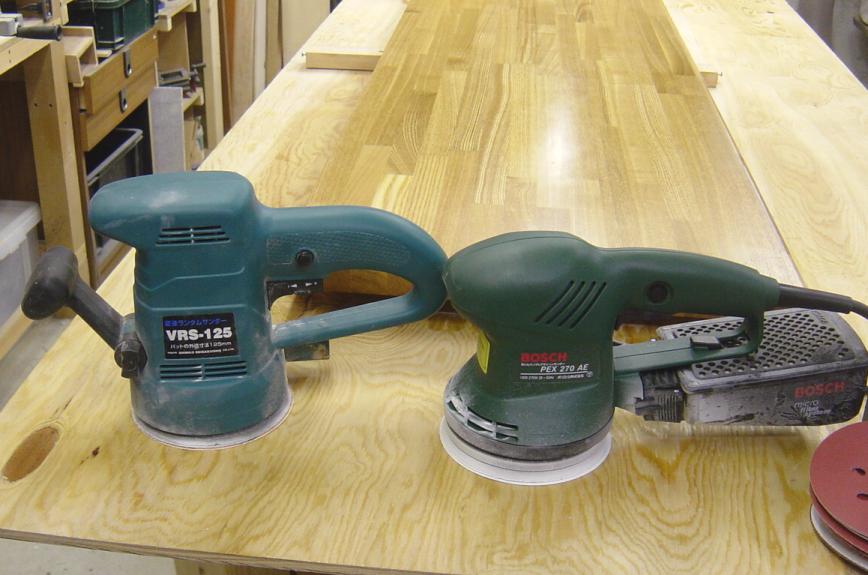
The old one is on the left.
This new Bosch PEX 270 AE, it has the new "Micro Filter" thing, it is a pleated paper filter, seems to work well.
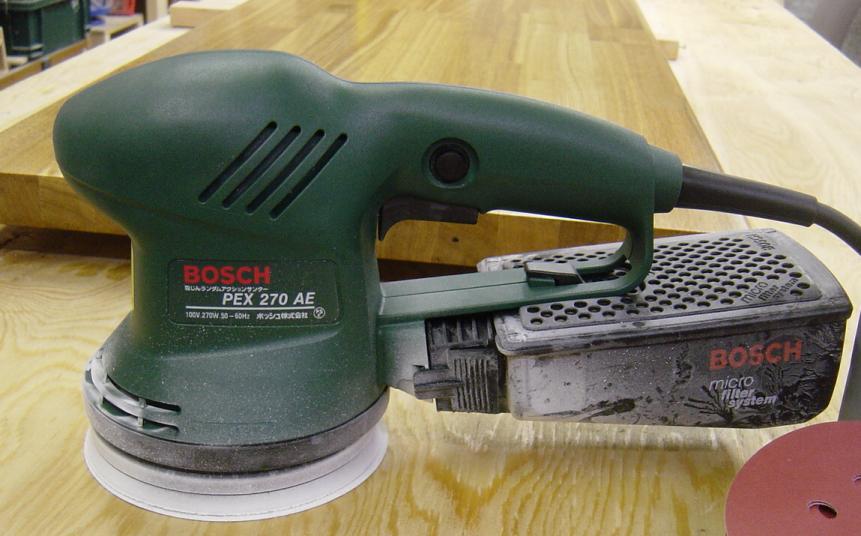
I think I got a fairly good deal, the Sander was 9800 yen, and I got the sales
rep
(Bosch is pushing big time here in Japan) to throw in double the number
of sanding packs and a special pad for buffing plastics, or cars etc, or,
in my case counter tops!
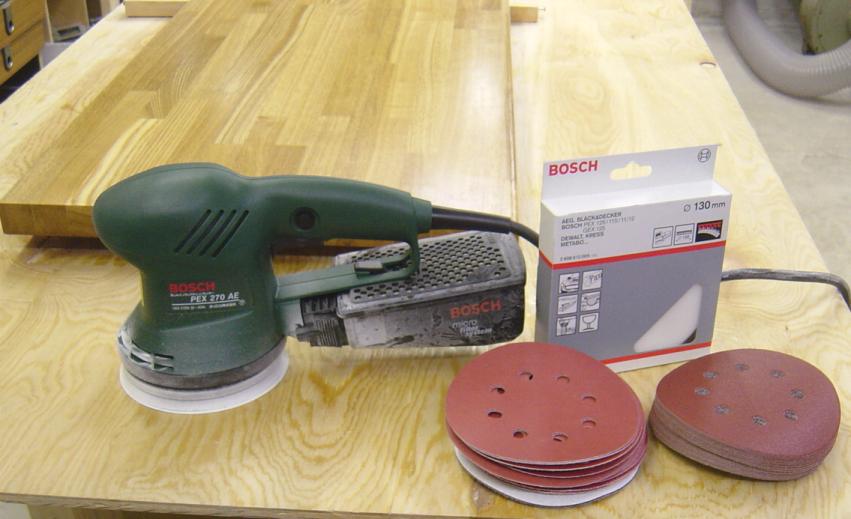
Not a bad deal for $100 US.
To finish the counter top, I wanted
to go with a wax, that is then buffed up to a nice shine.
I had a real tough time finding anything here in a paste form that was for wood,
most was for floors and in a liquid form.
The I went to Tokyu Hands, the same place I bought the Bosch ROS, their prices
can be high, but they often have stuff that no one else has...

This is supposed to be "THE" stuff...

This looks good too!

The cut-off from the counter-top will become a big cutting board/serving tray
for my lovely wife,
this stuff should be PERFECT for finishing it!!


I also found that they sell these two brands of paint, might make an interesting
addition to the finishes I can use!
Add to that I found clear lacquer, all be it in small bottles, but at least they have it, first time I've seen it in Japan, and they also sell sanding sealer.
All in all a good day!!
Cheers!