_____Stu's___Dungeon__
Joyful Honda
Treasure
Lesson Room Cabs
In the beginning
2
3 4 5
6 7 8
9
10 11
12 13 14
15
Jointer1
Jointer2
Router
Table1
Router Table 2
The Doors
Do
Pa
Give Me A Brake
Cyclone
Cyclone 2
Cyclone
3
Cyclone 4
Liquor
Shop Reno Tenjinsama Shrine Tree Tour
Beer Shelves
Wine Shelves
Five Cuts
Drill Press <NEW
DoPa 2007 <NEW
Turning
Jean Francious Escoulen
Eli Avisera Demo Day One
Eli Avisera Day Two
Lathe Stand!!
Turning
Roughing
It
Sharpening Station
Bowl Blank Processing
Captured Hollowing Rig
<NEW
Logging In Tokyo
Woodlot Woodlot
2006 Woodlot
3 Woodlot 4
Chainsaw Mill
Chainsaw
Mill Mk II
Router Table Page Two
OK the FedEx man showed up!
I did the Router Raizer first.
The only problem I've had is that the "Dust Cap" thing that you install into the router table insert plate, needs a 1/2" (12.7mm) hole drilled. I don't have a 1/2" or 12.7 mm drill bit!
I went to a place to buy one, they have lots of non-Japanese stuff, but they did not have the bit I needed. I then asked them to see if they could order one for me, they could, I stood there as the gal talked to the wholesaler on the phone. When she got off the phone she said "OK no problem, it will take 3 to 4 weeks to get it..."
"What?" I said in disbelief, "You were just talking to the wholesaler on the phone, are they in Tokyo?" I asked, "Yes" was the reply, "Why the 3 - 4 weeks then?" she did not know, just that is how long it takes.
Now for the kicker, they want 3980 yen for the stupid drill bit, that is near $40 US, I said "Thanks but no thanks" and left. $40 for a drill bit?
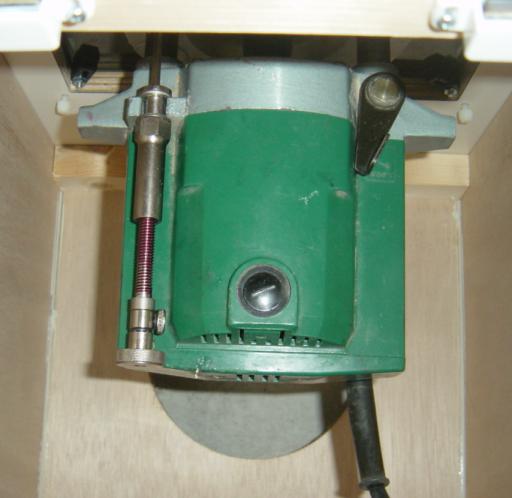
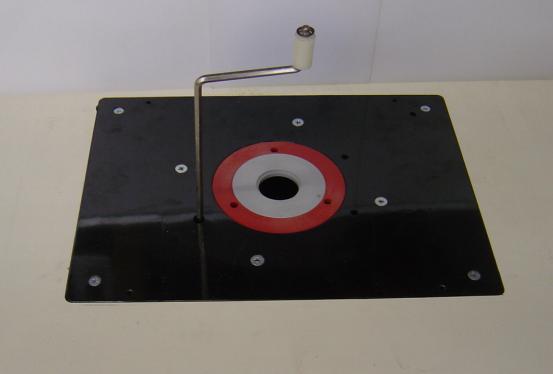
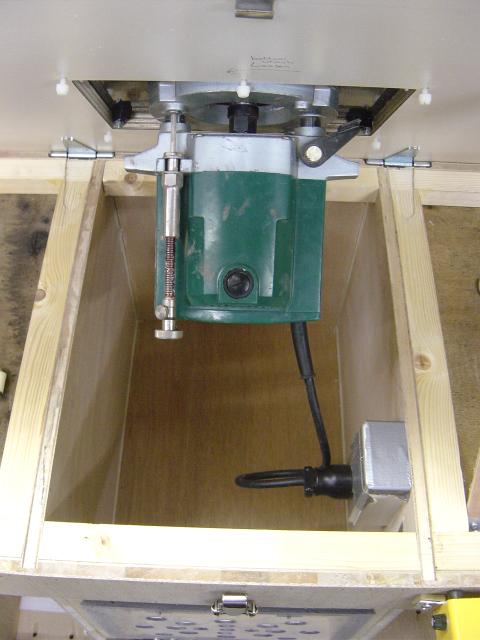
Here is the Router Raizer installed from the bottom view.
A very straight forward install, very easy to do, and looks like it will work
well too.
One thing that I missed was the handle for the Router Raizer
would hit the fence, so I used the cut off portion of the Router Raizer with an
adapter (a bolt I cut off and drilled a hole in)
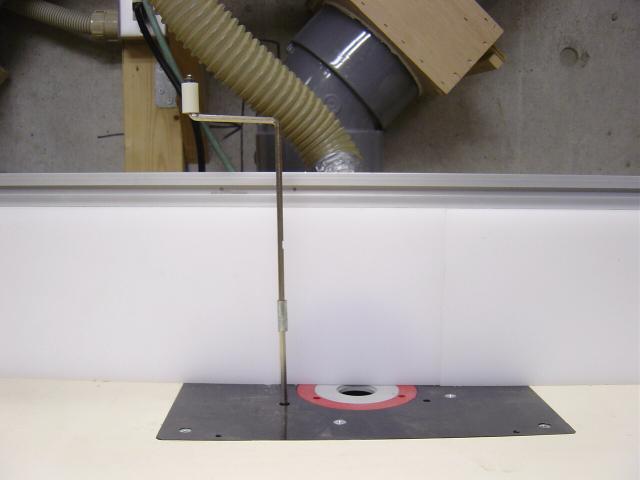
So now the handle clears the fence.
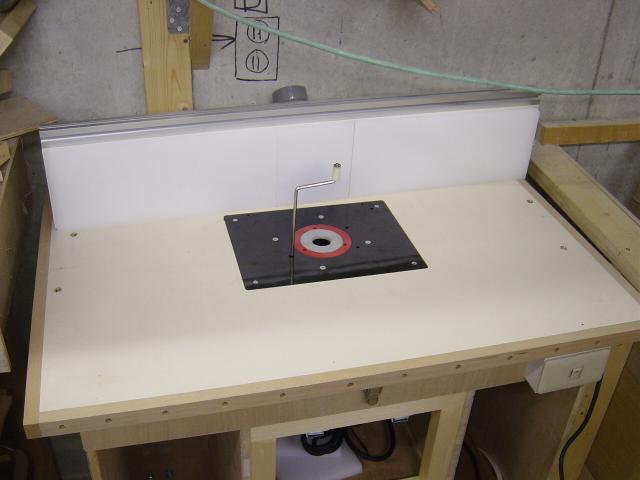
I also put the controls on the table I got from Rockler.com.
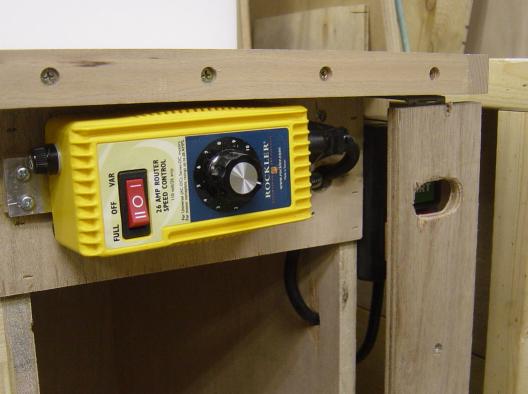
This is router speed contorler (which my older M12 does not have) and
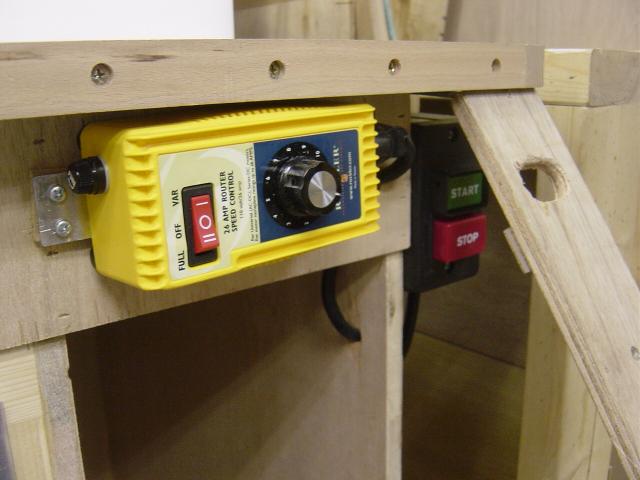
A router stop/start switch, that I put a knee bash board on. I can turn the router
on by sticking my finger through the hole to hit the on switch, but I can turn
it off by hitting the board over the switch with my hand, knee, foot, butt,
anything!
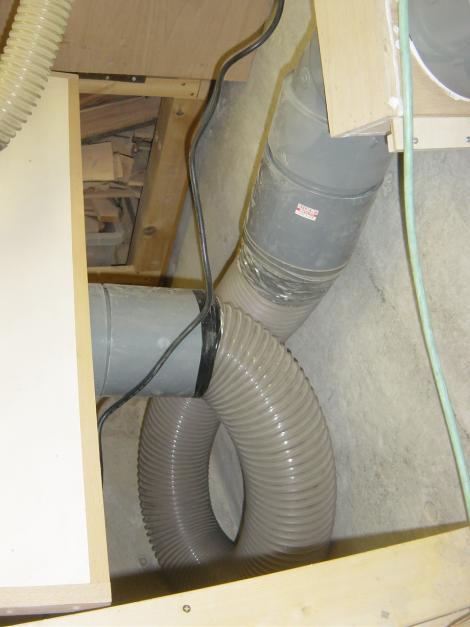
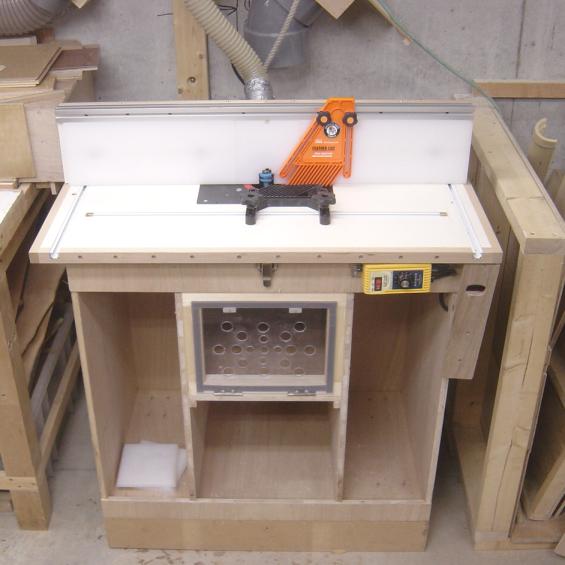
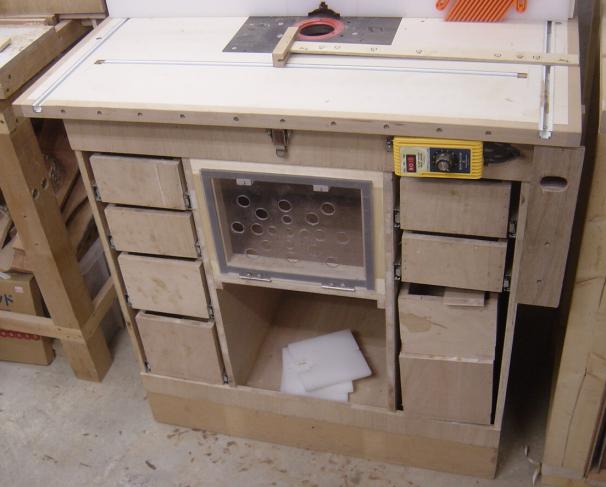
I also got the blast-gate-box done.........
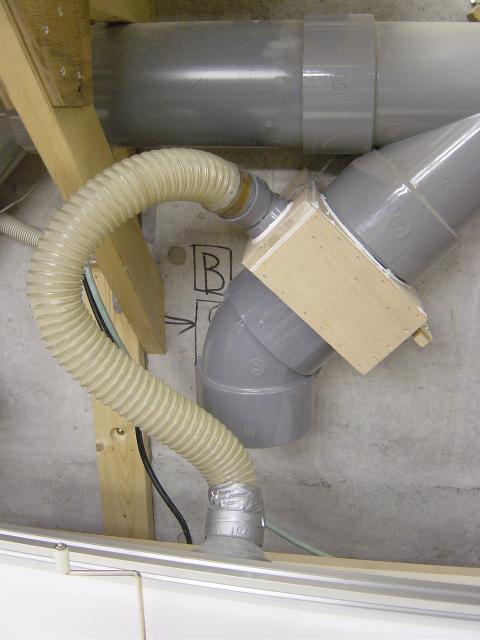
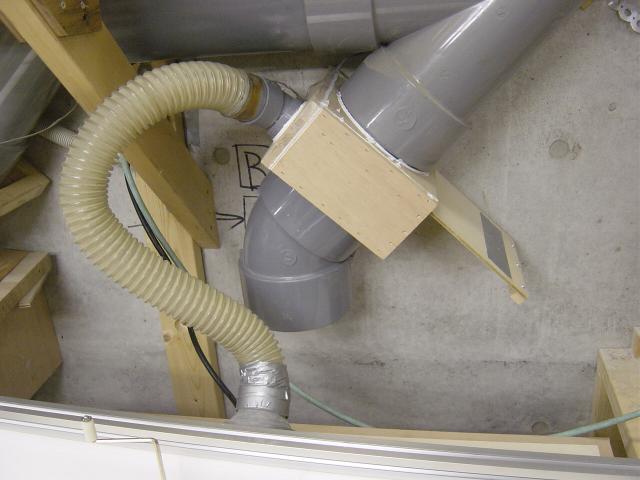
You can see I'm missing the 6" flex hose, I need about another meter or so....
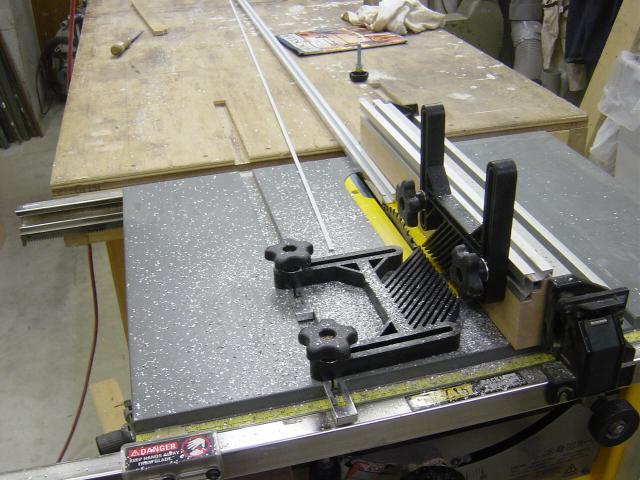
I got onto the T bolts, and cutting the T slots...
Here the two slots are cut, the T slot cutter worked very well.
My camera was just not taking good pics, the focus would not work well,
but anyway, that is the slot.
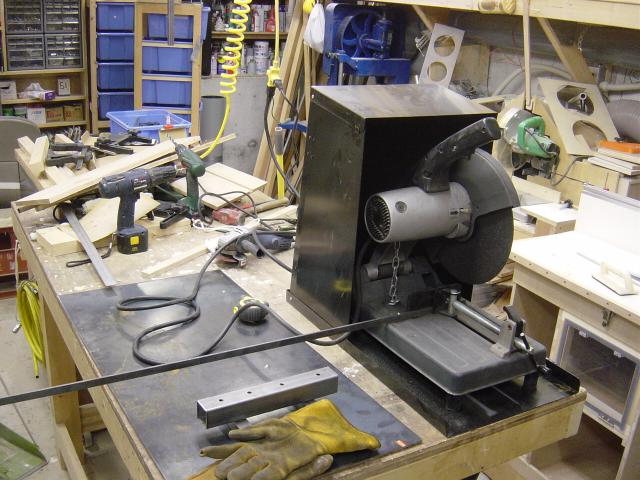
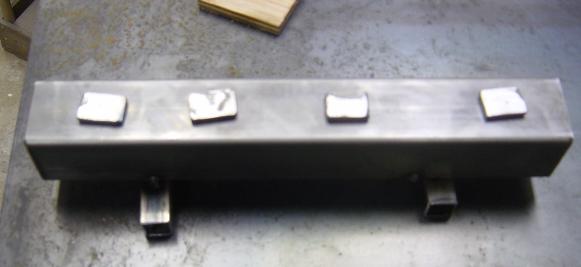
Here is my set-up for cutting steel, the black shroud thing folds up nice and
small when not in use, it sure cuts down on the mess in the wood shop from
cutting steel.
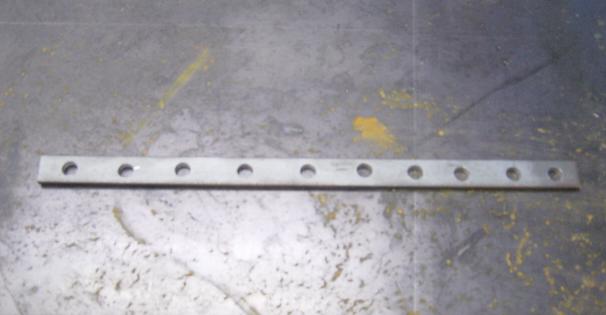
Here is the bar with the holes drilled in it, now I have to cut it up..
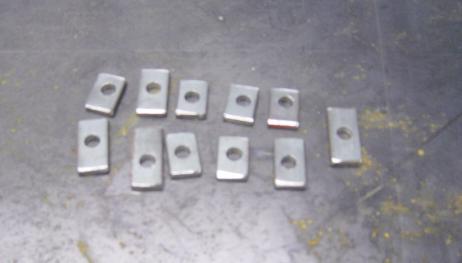
These will become the heads of the T bolts
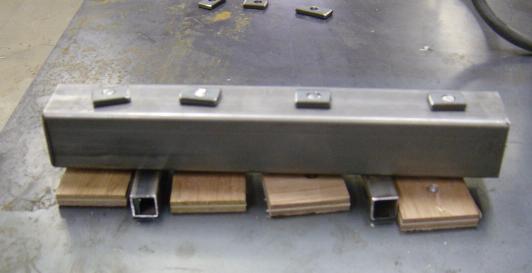
Here is the quickie jig I made to hold the ready rod and the T bolt heads in
place for welding
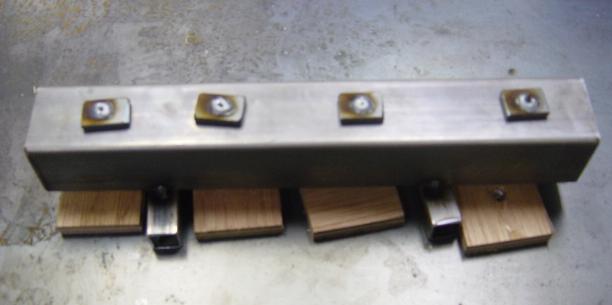
Here they are welded, just got to love that MIG welder!
All ground smooth, ready to go to work
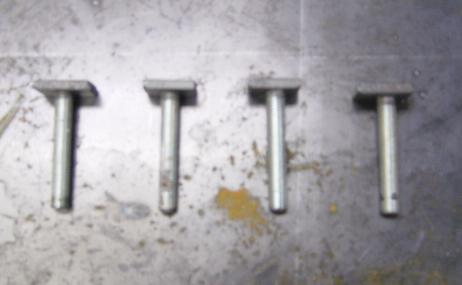
again, out of focus, but those are threaded..
There they are, now I need to drill the holes in the fence, and I'm just about
ready to start building drawers!
Ok, I got a few hours sleep and now I'm back at it...
One of the funny problems I was having was the DC just sucked too much!
It was like having a vacuum plate on the table, once the work piece got about
halfway past the bit, the amount of force needed to slide it any further was
just not safe, and the dust was not being picked up, a lot of it was ending us
in the cabinet. If I cracked the Plexiglas door just a bit, everything improved.
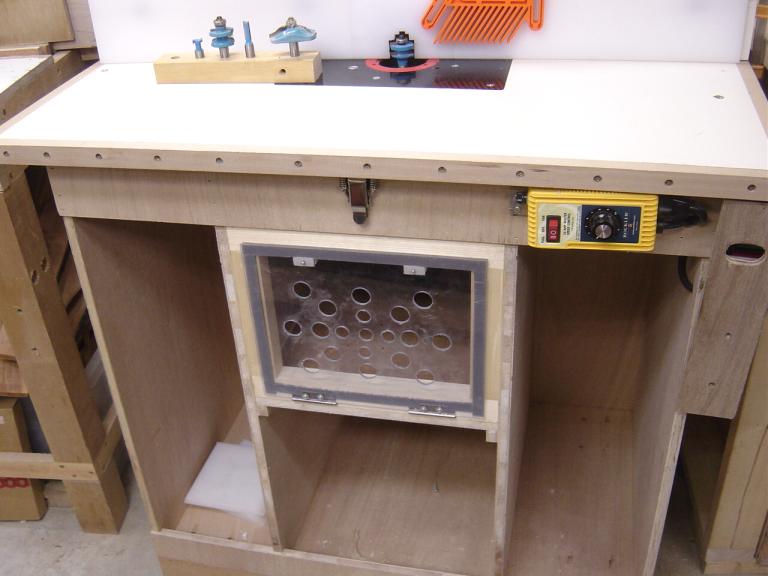
I decided that I need more air flow (I'd been told this would happen, and I was
thinking about how to do this ahead of time) so I drilled some holes in the
Plexiglas door. I started with a few holes and then kept adding them until I
could not see any difference in airflow. If I find it is too much, I'll just
cover up some holes.
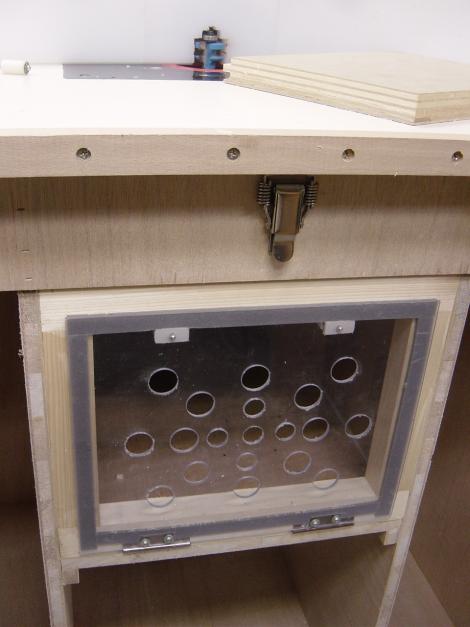
I have to open this every time I need to lock or unlock the plunge lock on the
router, so with the holes it is even easier!
I need to make the remote lock thing like John Lucas has on his table at Woodshopdems.com
I'll be doing that the next chance I get.
Because of the new face on the fence, I needed to move the top X holder rail out
even with the face of the fence
this was done by adding a strip of wood at the back, it worked out really
well.
that is how it sits for now.
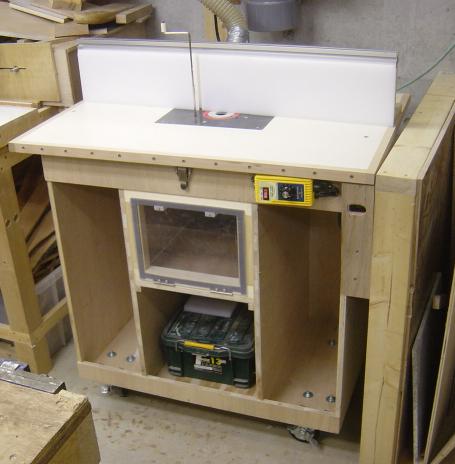
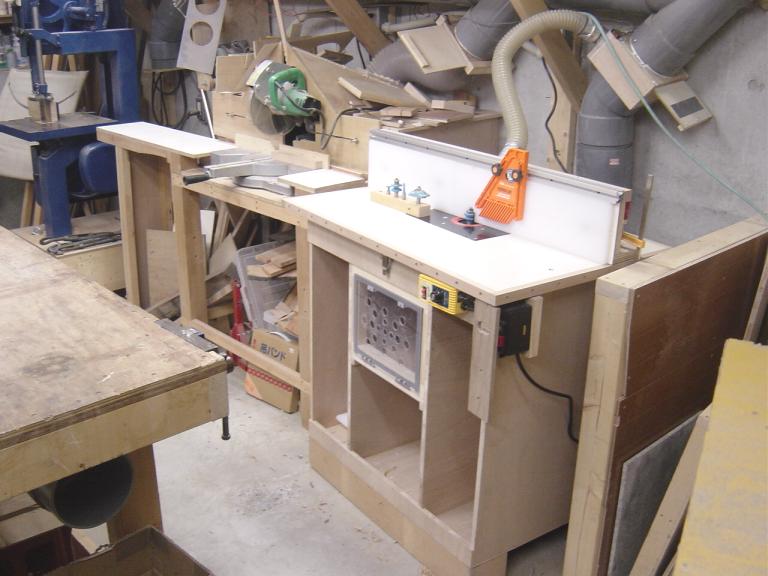
The whole table is out from the wall a bit, as I'm using the extra long 6" flex hose I have for the TS and the planer...
Just a bit too long!!
To change the insert, I just loosen one face, and slide it to the side, the
insert is then released.
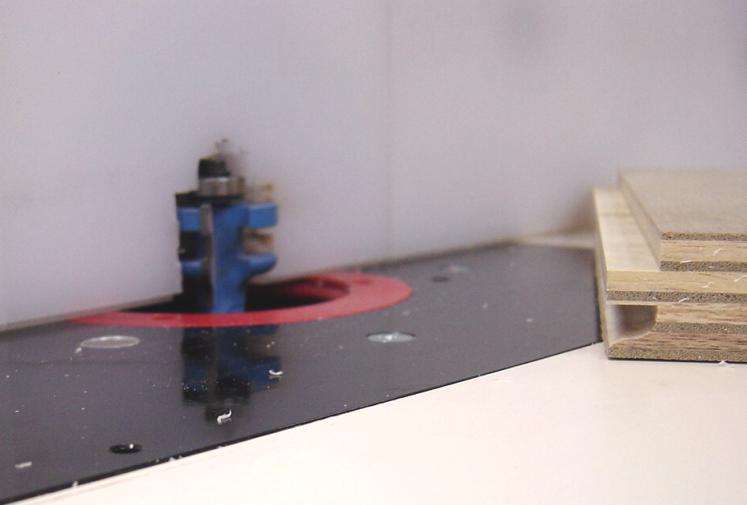
The only thicker stock I had laying around was this plywood, I think the new bit
did a nice clean cut, I took it in two passes.
The dust the cutter threw was just a bit at the very beginning of the cut and
then, not much at all.
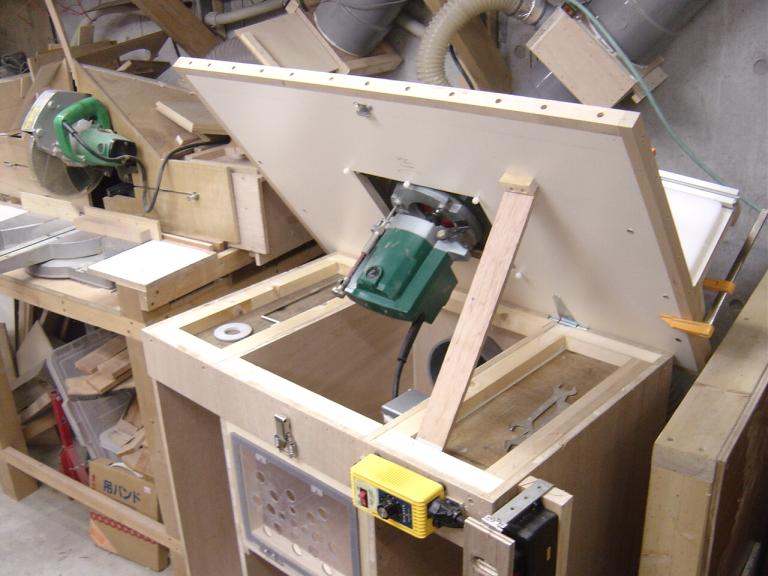
Here the top is flipped open, I would do this to change the bit. The spaces
beside the router in the top of the frame I put thin plywood, thus creating tool
trays.
A close up of the area around the router with the table flipped up.
I did not like the idea of the long cord being all coiled up in there, so I cut the cord really short, well it is long enough for the purpose here, which is to use in the router table.
Now I got to make me some doors, well maybe the drawers for this cabinet
first...
A slight change of plans...
You know, sometimes staring at the walls can get you somewhere...
You guys know that I'm having trouble getting any T slot stuff here, the X stuff I used on top of the router table fence and the TS fence works well, but, I really want to make a table for Big Blue, and I would like to put T slots in the router table as well, for the fence. I was fooling around with the router table, and moving the fence and stuff, and I found that the threaded inserts in two or three spots was OK, but it was not great. I really wanted a T slot on both ends, so moving the fence around would not involve clamps and such. Sure the clamp method works, but it seemed like I was selling myself short to do that after all the work I've put into this router table, but I've got no T slots....
I was sitting in the house having dinner with my kids, and my wife asked me to hang one of the kids pictures from school on the wall. Well not ON the wall, but from the picture hanging track we have in our house. You guys may have seen this stuff, it goes right against the wall, in the ceiling, it has a bunch of moveable hooks that are in it, and instead of putting holes in your walls you hang the pics from a wire or string from the track. I put some of this in the Summer Renovation, so I knew I had a bunch of it sitting around. Well as I sat down again I was staring at the ceiling, at this track and I thought "I've got a BUNCH of that stuff, I wonder..."
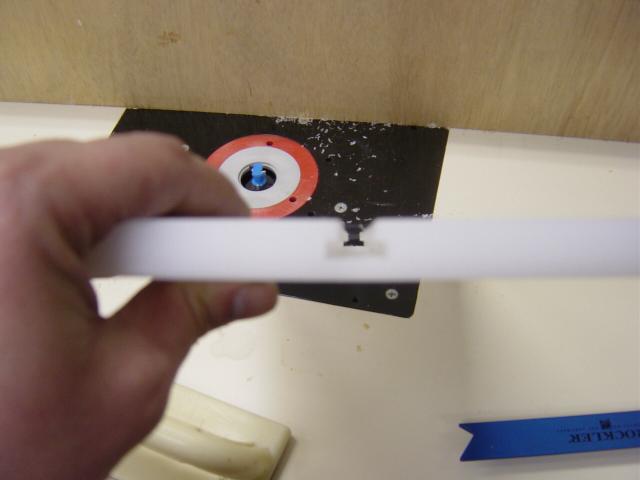
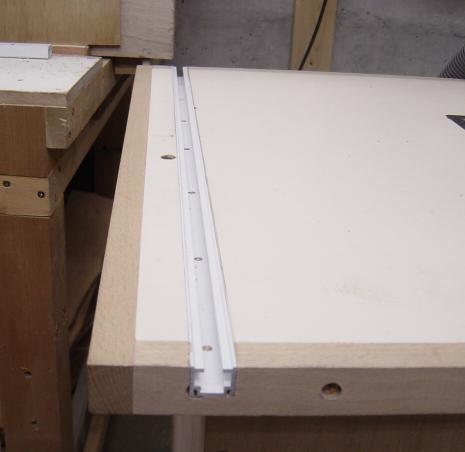
After dinner I went down and grabbed a shorter piece of it....
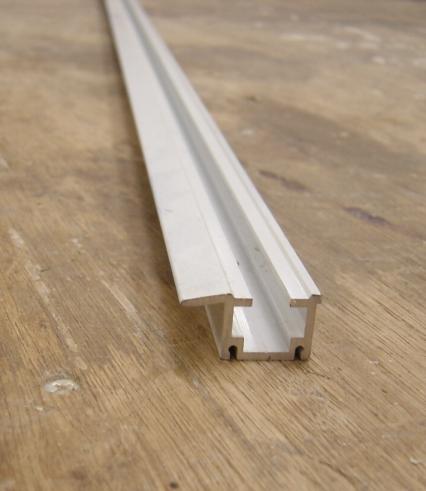
This is what it looks like. It is aluminum and very strong.
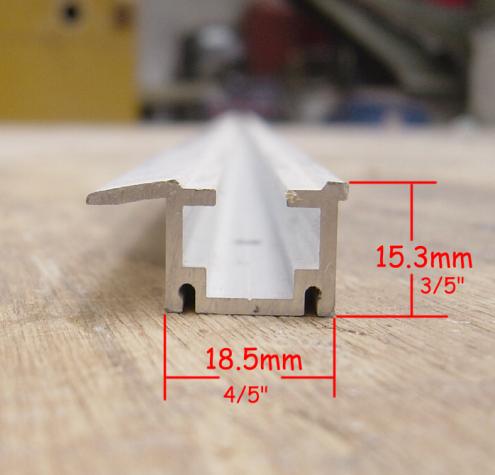
Sorry for the funny sizes, but that is the closest inch fractions I could come
up with.

So I've got to cut off the lip on both sides, and I hate cutting aluminum on the TS.
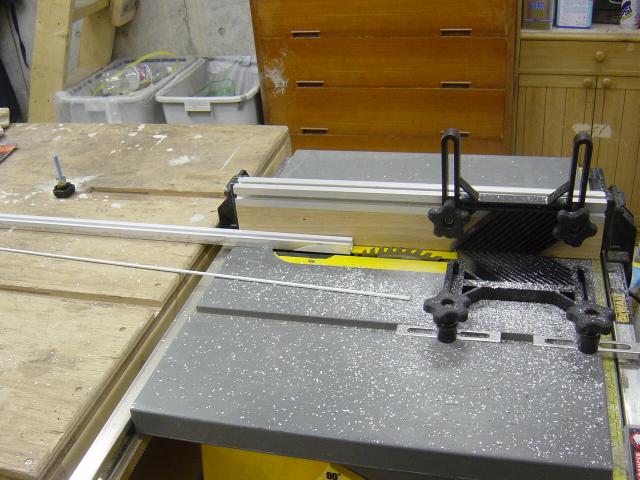
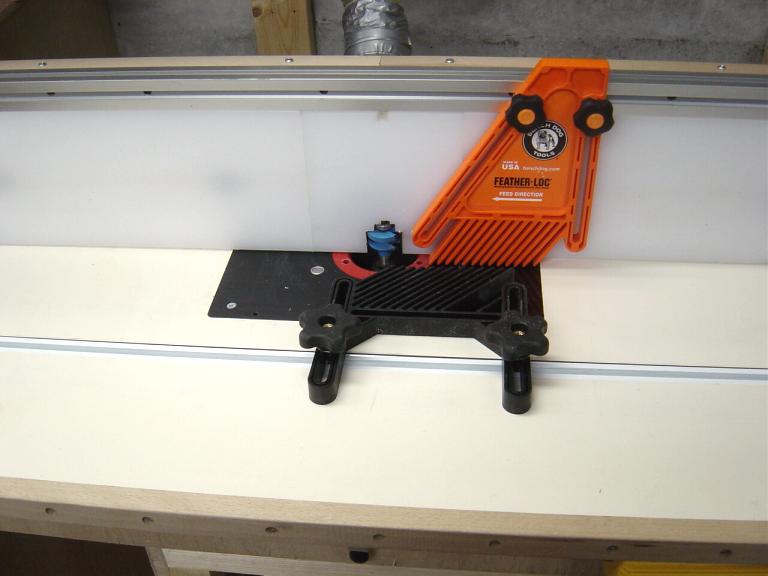
All I can say is thank goodness for feather boards!!
It cuts fairly easily, but I sure hate doing it, you get them chips EVERYWHERE,
and the noise is something else, plus the "man am I going to lose a finger
doing this" meter is way up there on the freak out scale.
But I got it done!
A few passes with the M8 router and a straight cut bit and there you go...
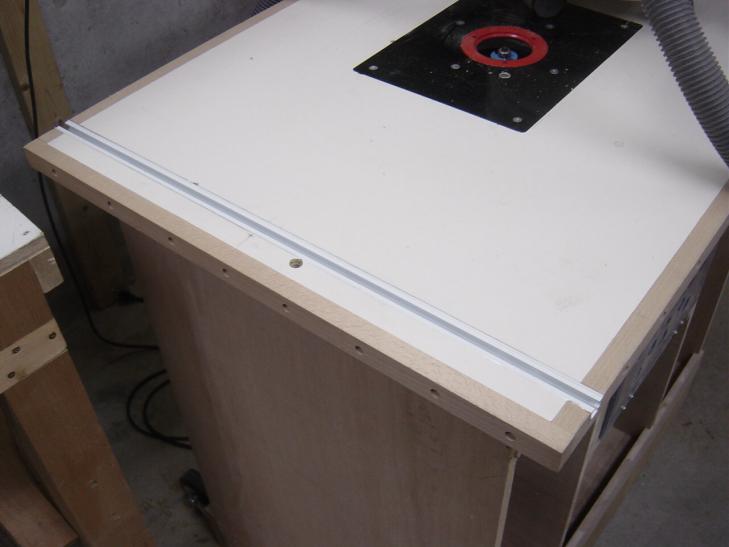
Looks good, and will be way better than the clamps or inserts, IMHO!
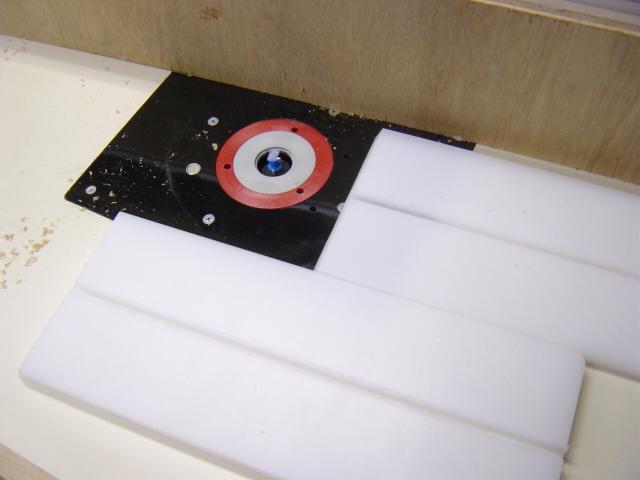
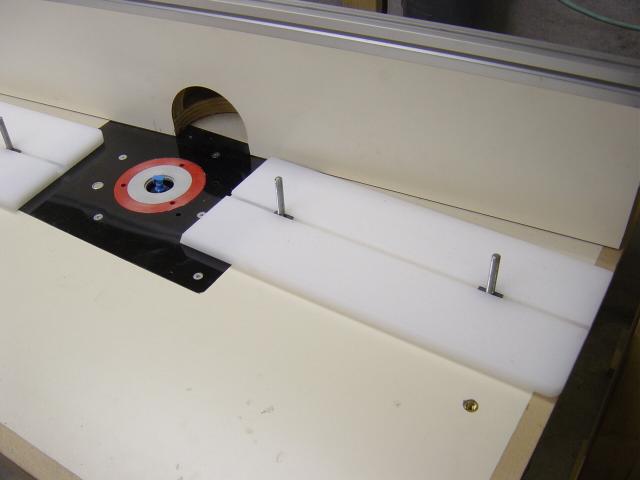
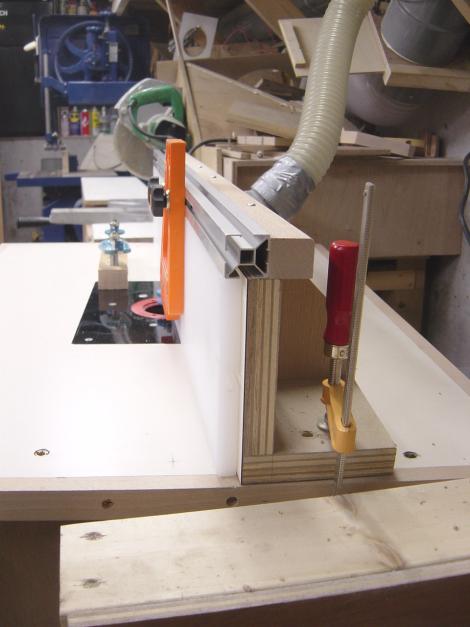
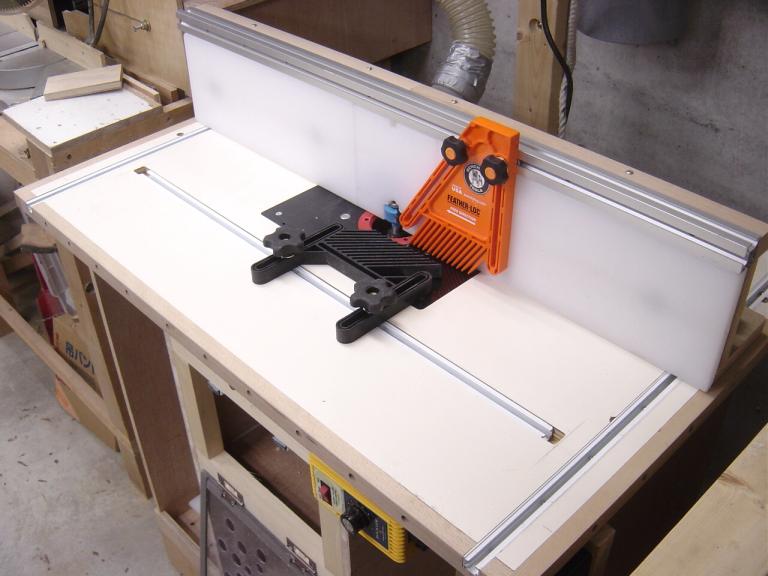
The next morning, I got downstairs early and got it done...

With this set up I can move the fence anywhere I want it on the table
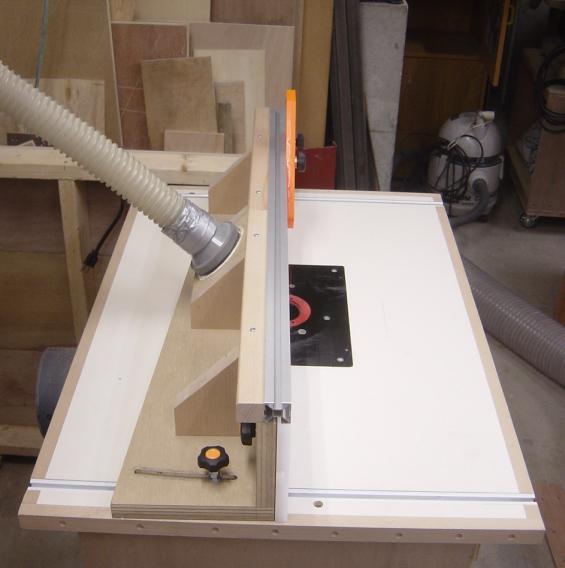
The far end is a single pivot point, but this end still has the arc slot,
so this gives me more flexibility when moving it around.
While I was at it I put in a feather board track
I have seen miter tracks on other router tables, but I do not see the great need
for them, I guess they have their place, but I hear a lot of guys saying they
NEVER use the miter slot, except for hold-downs or feather boards.
I'm please with the way this has all turned out!
I got to put the remote plunge lock in and then build some drawers.
On To The Drawers.
Just simple ones will do. I'm using this solid core plywood kind of stuff, light and strong, but when I tried to use the dovetail jig and do the corners, the stuff just blew up, so plan B is just some basic drawers stapled together.
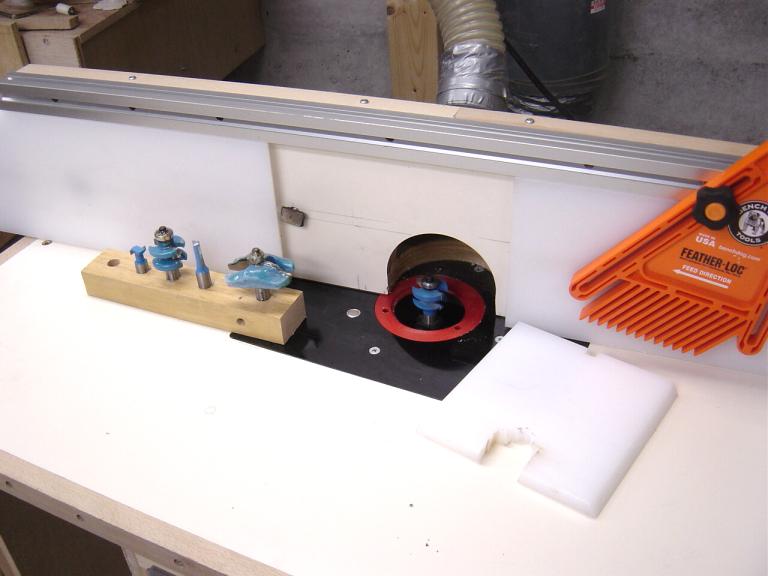
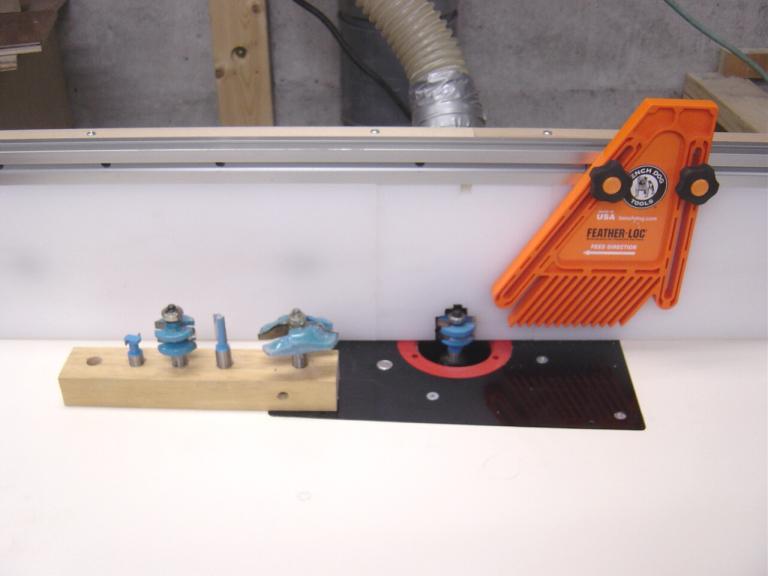
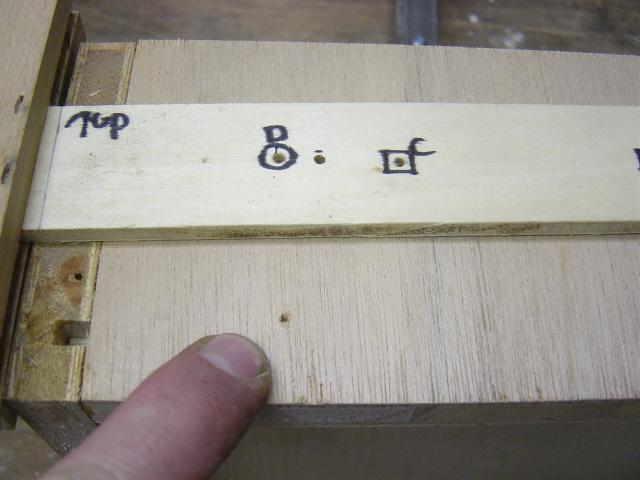
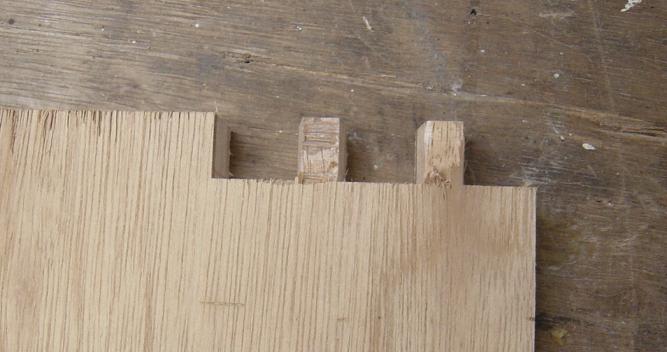
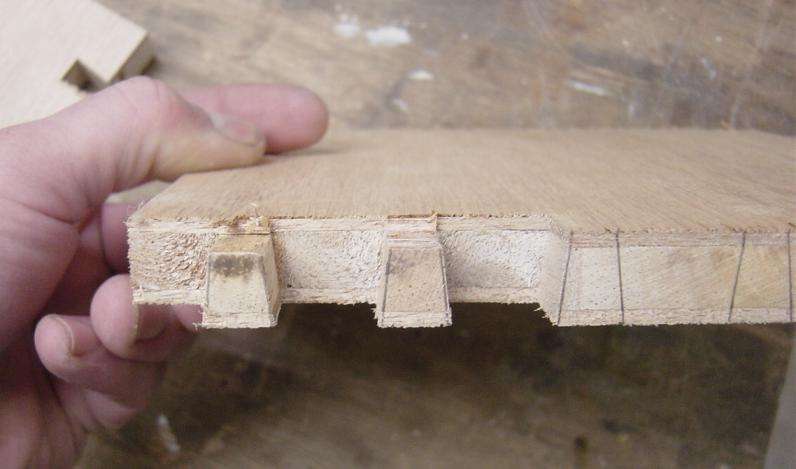
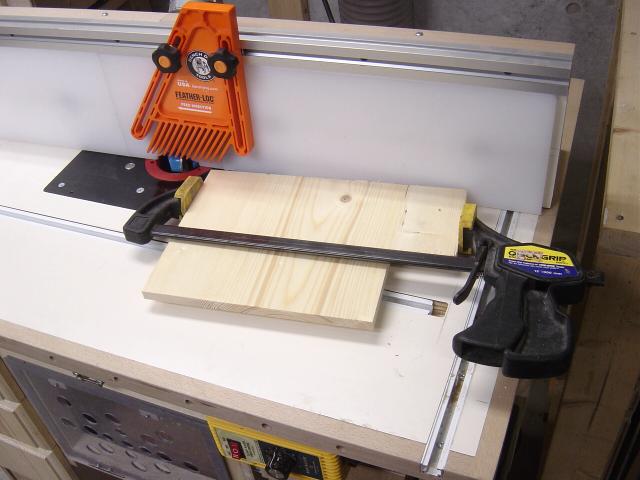
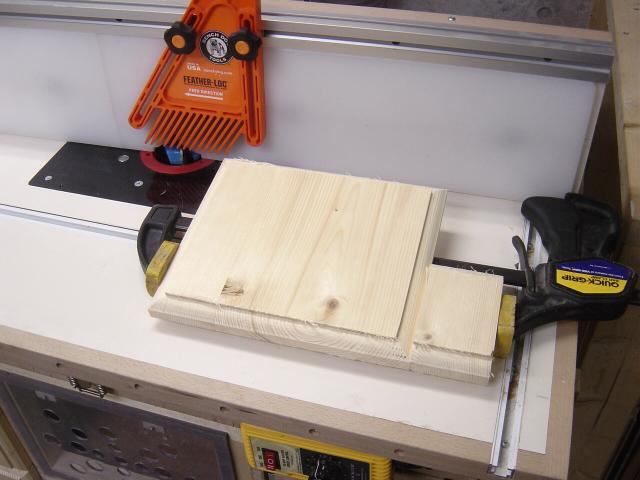
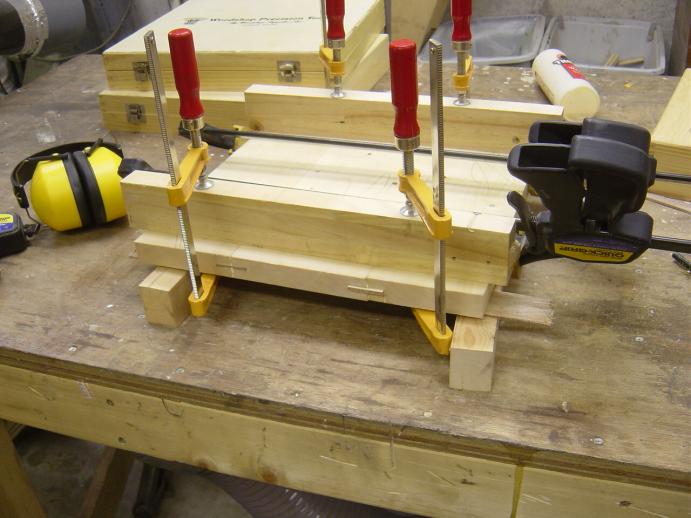
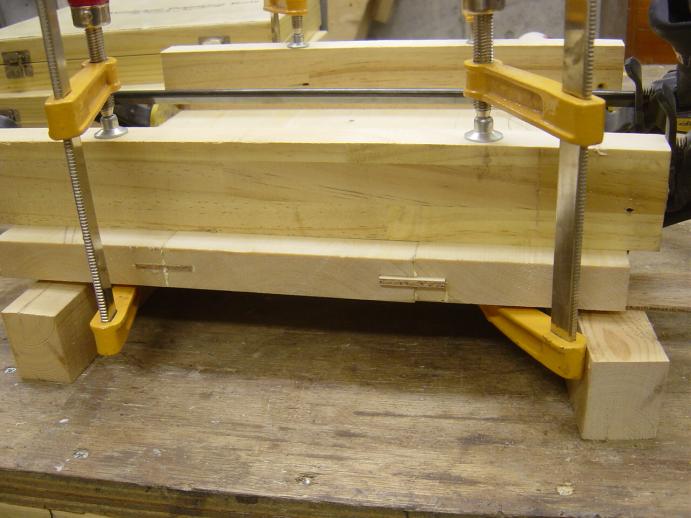
Here is a blank I ran through the table to test the bit for making drawer fronts....
![]()
![]()
I think that will make a nice drawer front.
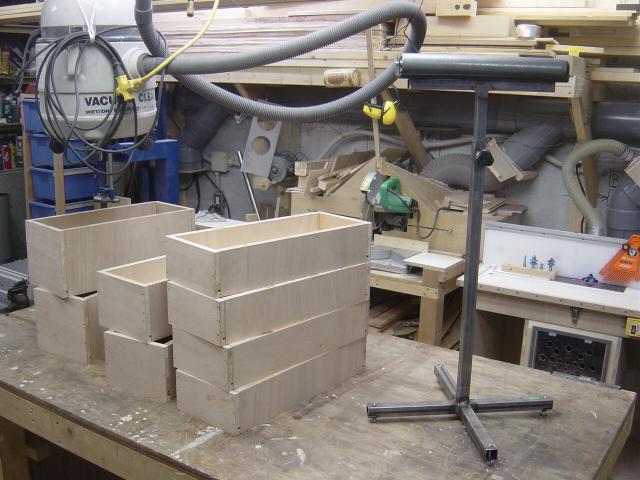
There are the drawers, I've now got to put the full extension sliders on
them,
but I had run out of screws, short ones, so I would have to wait.
Not being one to waste time in the Dungeon, I banged out the infeed, out feed
stand...
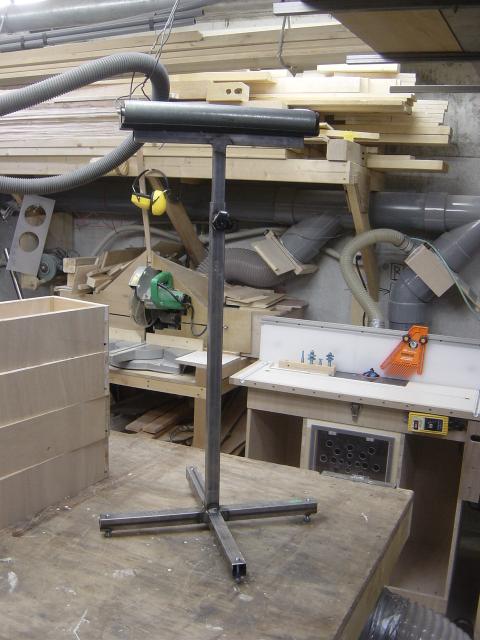
Nothing too complex, just your basic stand, there are bolts in the feet for
now,
I have to buy some leveler feet for it, heck I might even paint it..
When
I made up the drawers I had to cut up a piece of this plywood,
so I broke out the circular saw and my sheet-goods cutting set up,
I've added some dust collection to it...
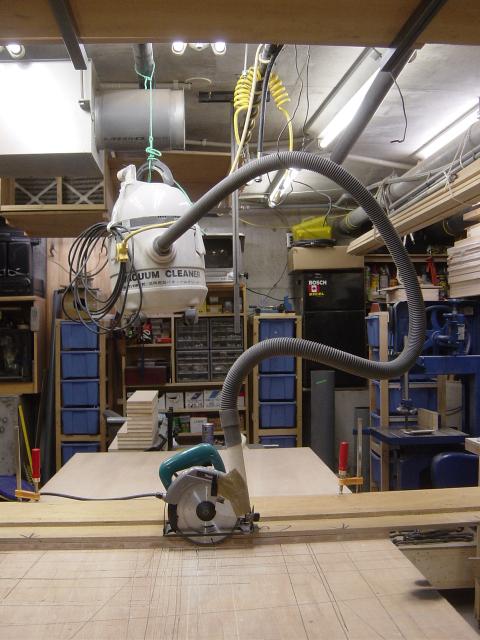
I've left the shop vac up there, and I used it with the M8 router as well,
worked really well.
back to the drawers.
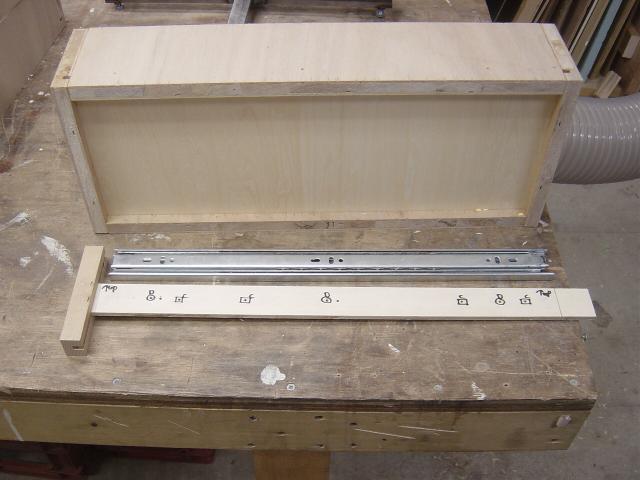
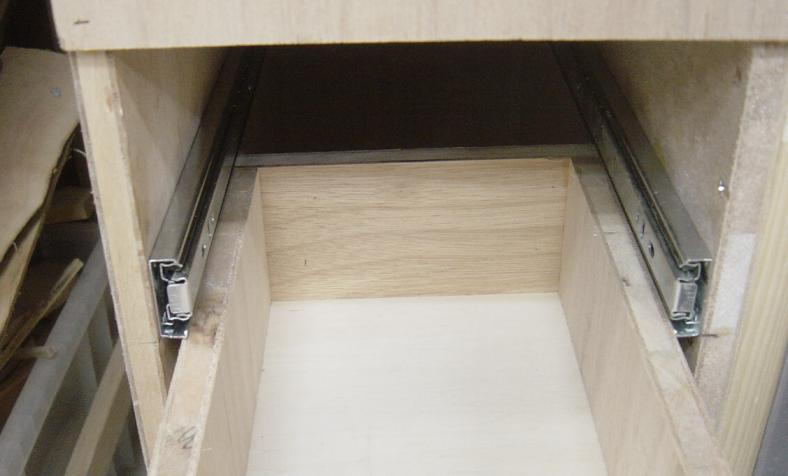
To install the full extension sliders on the drawers and in the cabinets,
I made up this little jig for positioning the screw holes
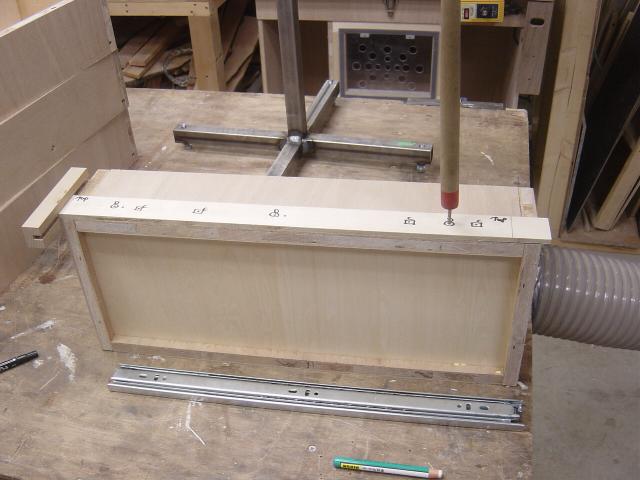
The board with the holes in it is exactly the same width as the sliders, and the
holes are marked for the cabinet side or the drawer side.
The piece of hardwood on the end is at exactly 90 so the slides should be
straight.
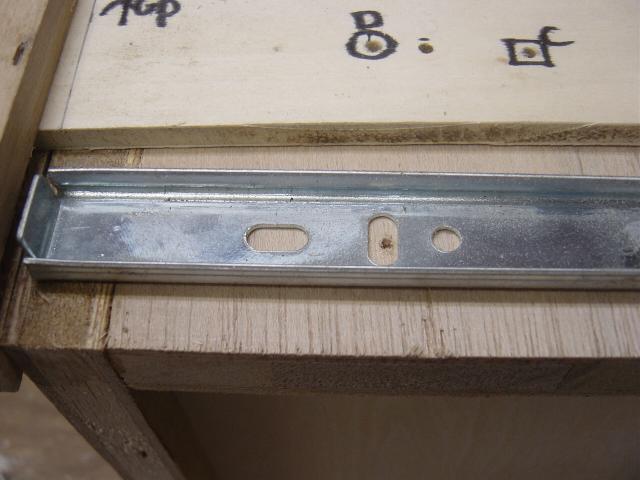
Here is hoping!
Whoops....
Hoping did not seem to help....
I don't know how I did it, but some how I made the drawers too wide......
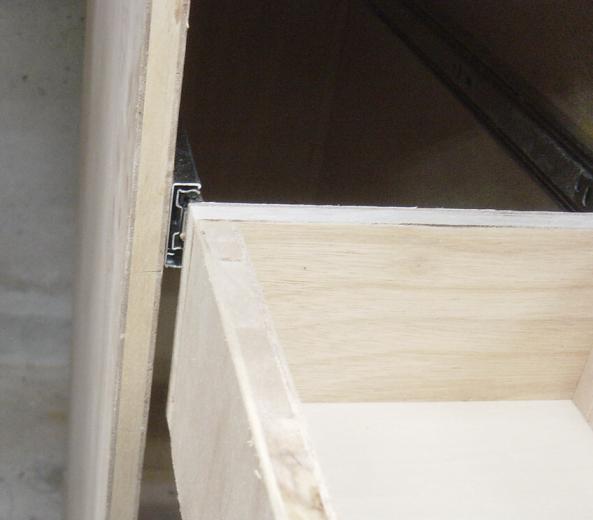
Just not going to fit now is it.... crap......
So
I tore the drawers apart, I could use the sides on the taller drawers cut down
for the shorter drawers,
and I could re-use the bottoms, but there is still more waste in the waste
basket then there should be, my bad...
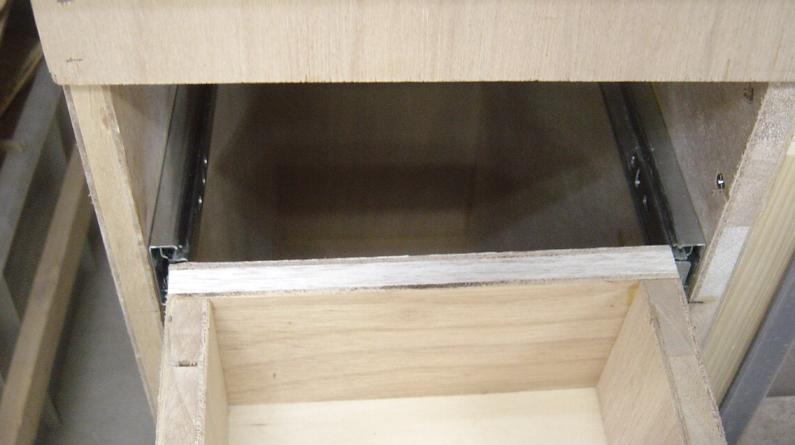
But I persevered and got one done!
The rest of the
drawers are build, now I got to install them,
I'd give a lot for one of them right angle drills about now!!
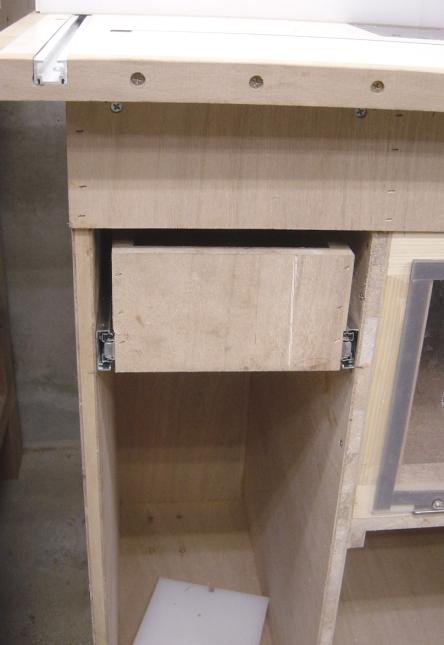
Waiting for a front.
Now I had some trouble with trying to do dovetail corners with the solid-core laminated plywood,
I could cut some fairly good tails.....
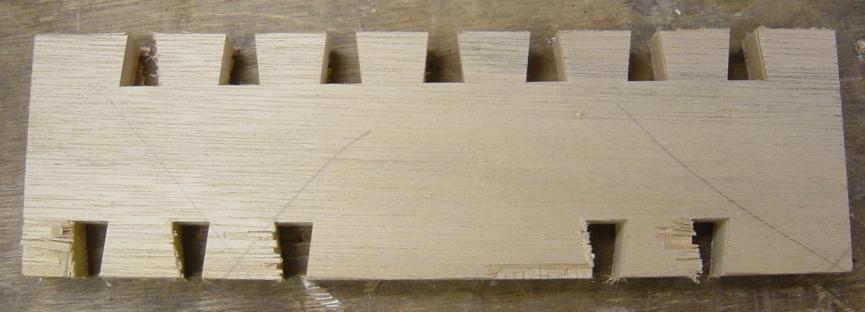
The top tails are all done with a backing board, the bottom ones without (this
was a test piece).
The pins were much worse...
I gave up after only two, there was no point,
The bottom part of the board were against the Keller Jig, the top part just blew
up,
I used a board on it, clamped down tight, but it did not make a
difference,
so I gave up. This core-lam-ply is really light weight and not so strong.
I got to get back to the Dungeon, and install all these new drawers (the ones that FIT!!) and them make up the fronts.
Well I would be done the drawers, if I had enough sliders....
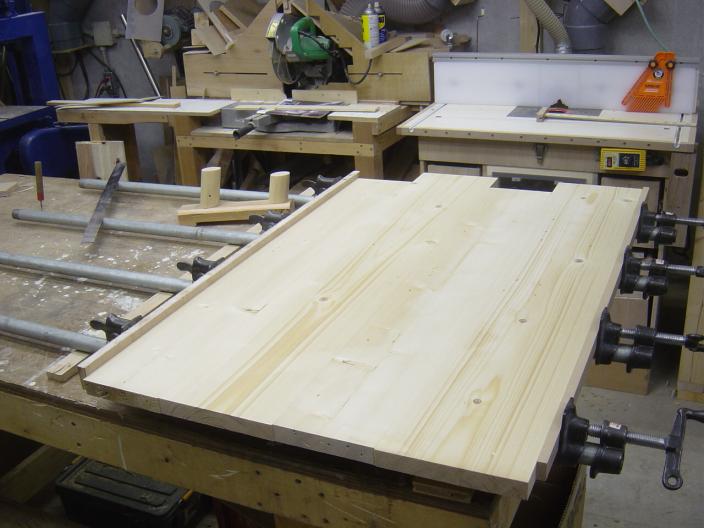
Gluing up some boards for the drawer fronts.
This is four boards that will become two boards,
I'll then cut them down a bit and shape the edges etc.
I let the glue dry about 7 hours and then I cut the fronts to size and routed the edges of them..
I clamped a backing board to the edge of the drawer front, and the run it by the
bit
This is the 4th pass, not bad I think
Here is one side of the drawer, done except for pulls of some sort.
Getting It Done
I'm finally getting around to finishing the router table.
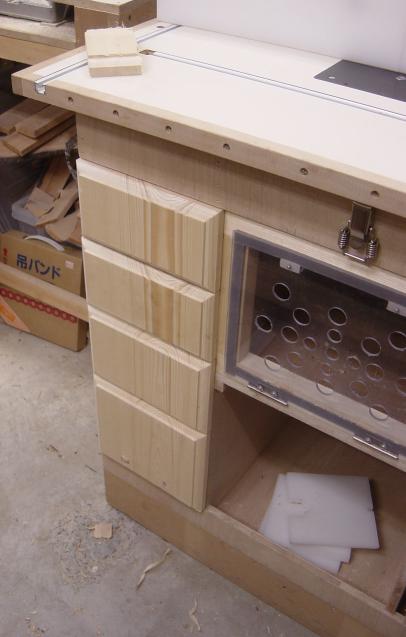
Here the big middle drawer is done, and the pulls are on the smaller
drawers
Now I need to glue up a piece for the front.
I don't have a biscuit jointer, so I did this with splines, I've never tried
this before.
I cut the splines on the router table with one of my new bits, worked well, the
DC worked so well, not a spec of dust!
We shall see how the front turns out.
My planer is just too
narrow to put this piece through the planer when it is glued up,
so by using the splines, I hope to keep the piece flat.
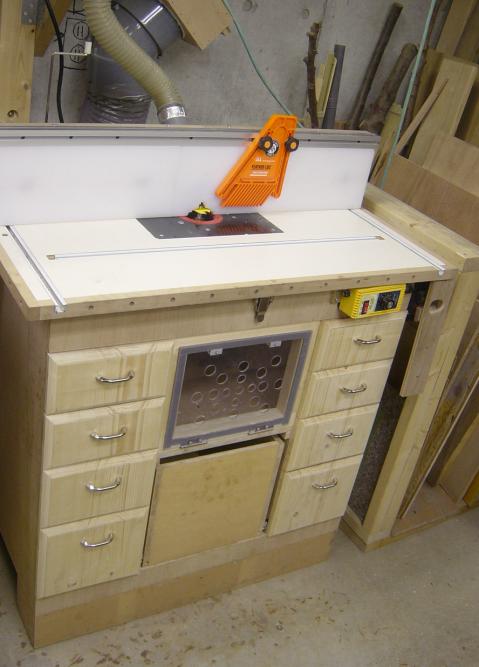
We have Completion!!
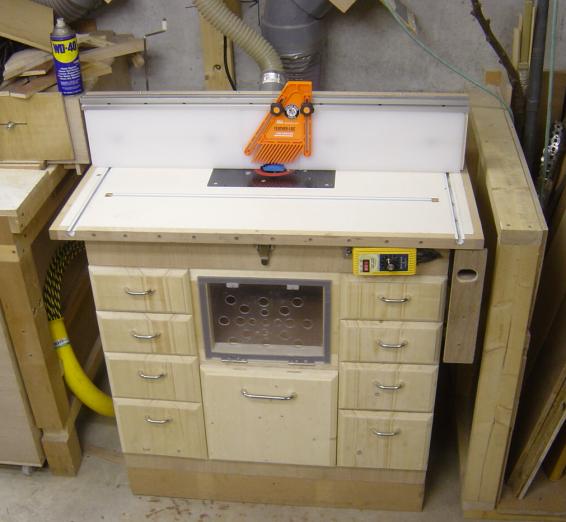
Not only did I finish the big drawer in the middle and get the pull on,
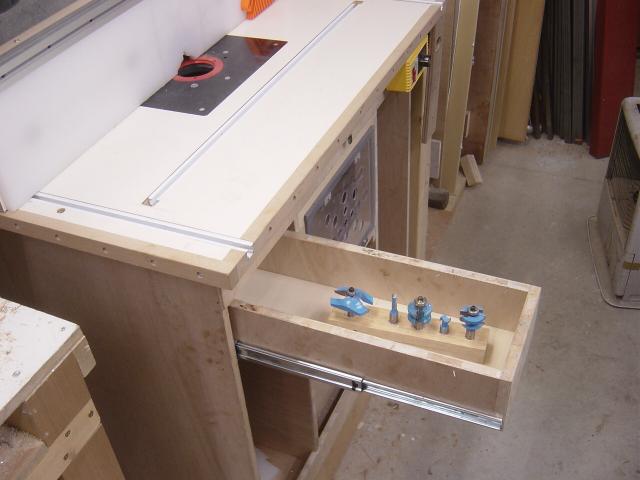
but I also made bit holders for all the bits I have now.
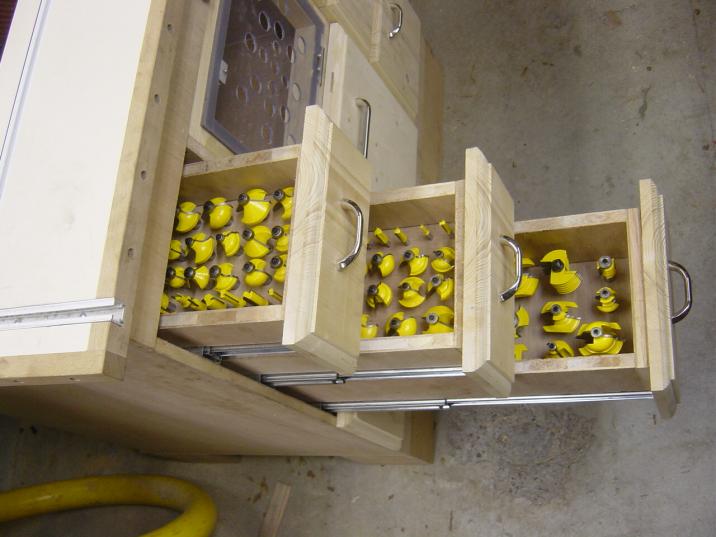
Three drawers full of bits, about 120 bits in all.
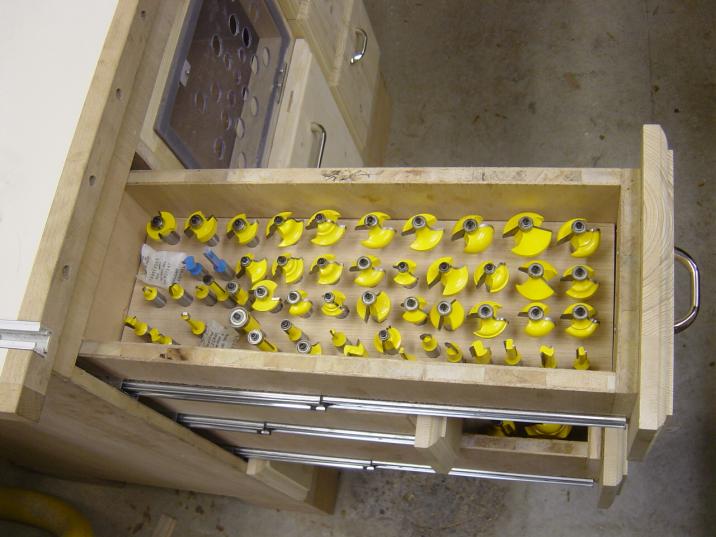
Here is the 1/2" shank bits, these will be used in the router table.
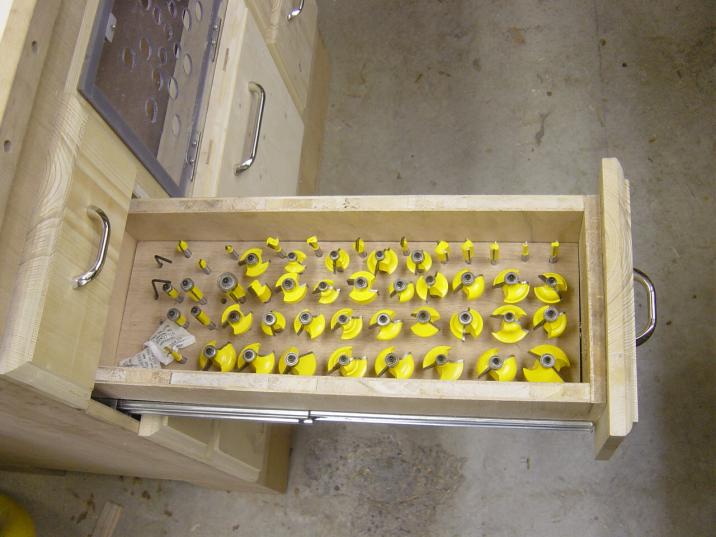
This is the 1/4" bit drawer, these bits will be used in the hand held
router.
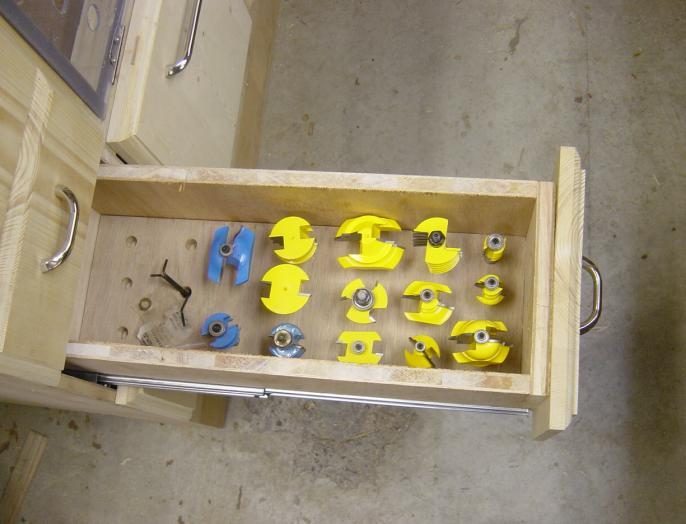
These are the specialty bits, there are some bits here to do just about
anything!
All 1/2" shank bits for use in the router table.
Well I did it, the router table is done!!
Now I'm going to start building cabinets!!
Cheers!!