_____Stu's___Dungeon__
Joyful Honda
Treasure
Lesson Room Cabs
In the beginning
2
3 4 5
6 7 8
9
10 11
12 13 14
15
Jointer1
Jointer2
Router
Table1
Router Table 2
The Doors
Do
Pa
Give Me A Brake
Cyclone
Cyclone 2
Cyclone
3
Cyclone 4
Liquor
Shop Reno Tenjinsama Shrine Tree Tour
Beer Shelves
Wine Shelves
Five Cuts
Drill Press <NEW
DoPa 2007 <NEW
Turning
Jean Francious Escoulen
Eli Avisera Demo Day One
Eli Avisera Day Two
Lathe Stand!!
Turning
Roughing
It
Sharpening Station
Bowl Blank Processing
Captured Hollowing Rig
<NEW
Logging In Tokyo
Woodlot Woodlot
2006 Woodlot
3 Woodlot 4
Chainsaw Mill
Chainsaw
Mill Mk II
2006 Wood Lot Page!!
I made some mods to the Tokyo Log Hog
chainsaw mill, and today, Jan 10th, 2006,
I had the BEST day yet, the wood I got is REALLY nice....

here are two of the flitches I got from the last of the pieces I cut last week,
this is the Akagashi, there is a lot of figure, as I think this tree was sick
from bugs etc,
like most of the trees on this property. The family that had this land, did not
bother taking care of the trees.
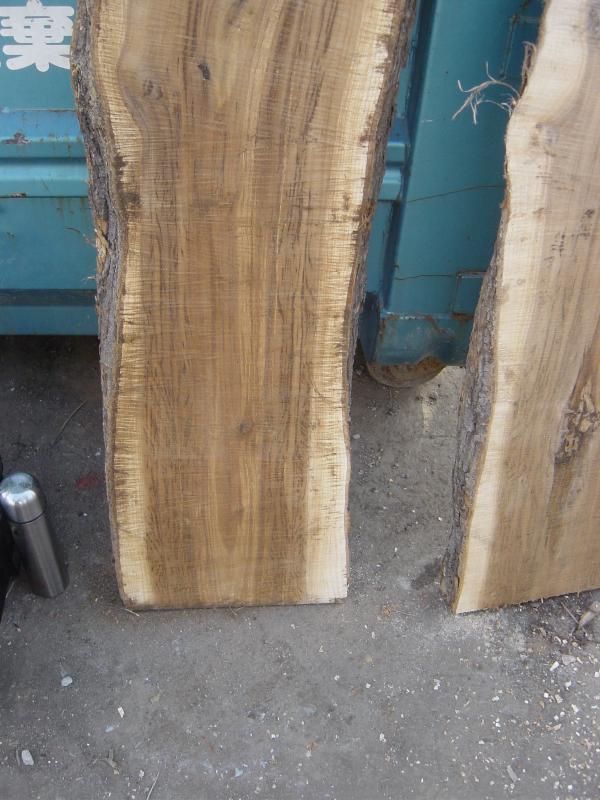
A close up of the Akagashi, some highly figures interesting wood for sure.
Now I'm on to the next donor...

This too is Akagashi, and this one just got uprooted the other day, so the wood
is really fresh.
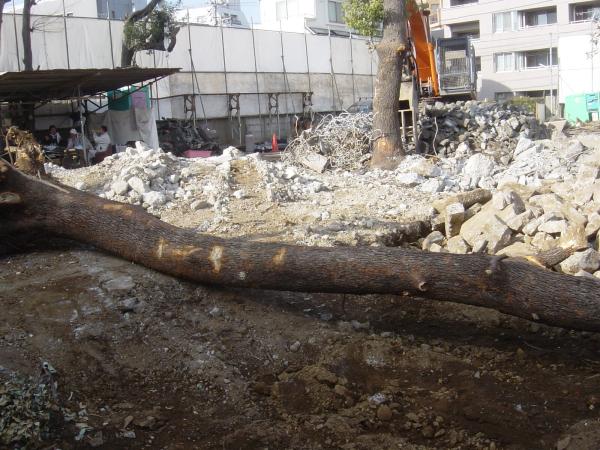
Not the best location, but I'll make it work.
I'm cutting the pieces at 150 cm (5 feet) as that is a good size to move around,
and that length just fits into my little van.
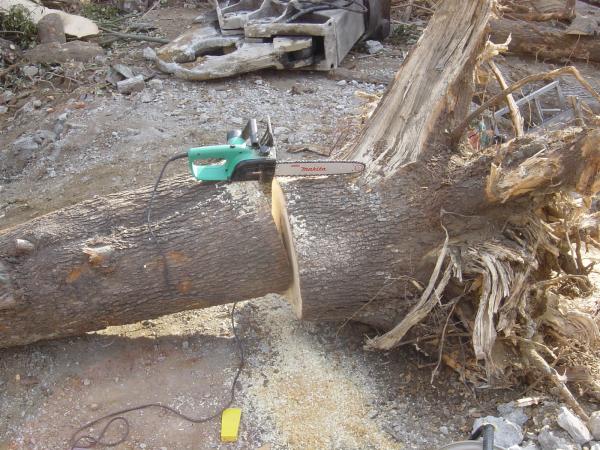
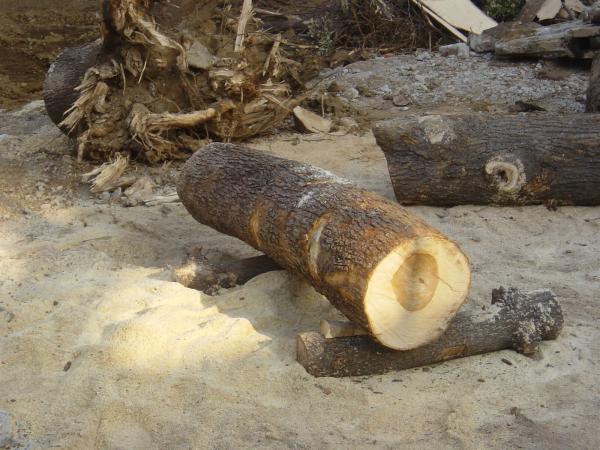
for cross cutting I've got this little Makita 100V electric saw, the bar is only
30 cm long (12")
so it is a bit of a struggle to cut these bigger trees, and it takes some
time.
I'm shopping for a 40 cm electric (16")
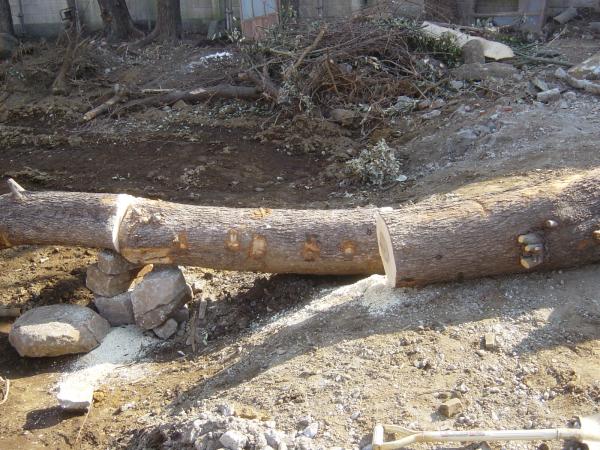
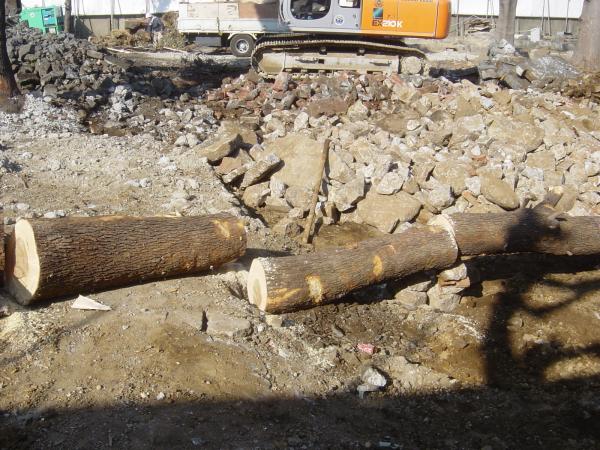
You can see I had to stack some rocks etc so I could make the 3rd cut,
I also dug a hole so the log would not bind the saw as I finished.
I then got the new and improved Tokyo Log Hog out (Mark II) and made some more cuts

I rolled the log over to my cutting area, (soft saw dust to kneel in!!),
and put the guide board on top, takes two 6 cm long screws to secure it.

I've got my space all cleared up, ready to go.
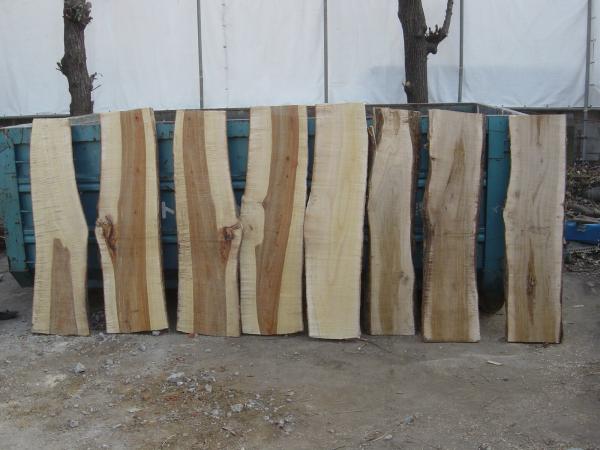
This is the take for the day, not bad if you ask me!!!
they are all around 150 cm long and some are near 40 cm wide, these would make great table tops!
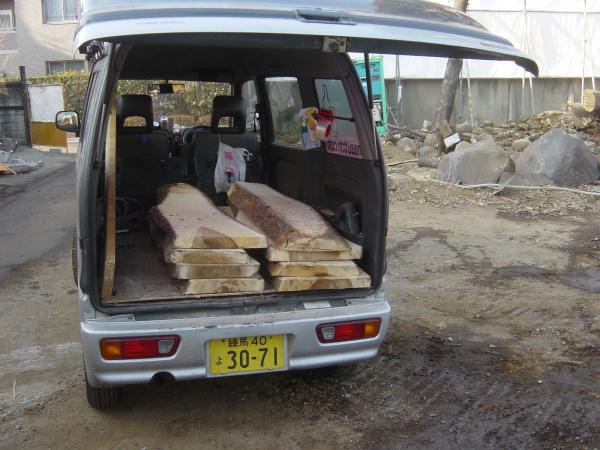
My poor little truck, thank goodness I'm just around the corner form my house!
This one is waiting for me tomorrow!!
here is a link to the new and improved Tokyo Log Hog doing it's thing.
I cut up the last log, and there are no more logs to cut up,
so the Log Hog is getting a rest,
and all logging operations are suspended, until further notice!
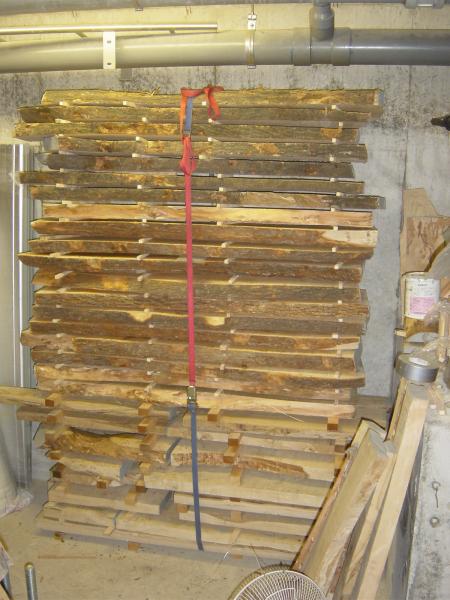
Here you can see my stack of wood.
Stacked nearly to the ceiling, and strapped down.
Now I got to build that solar kiln on the roof, then I'll get to lug all of this stuff up to the roof........
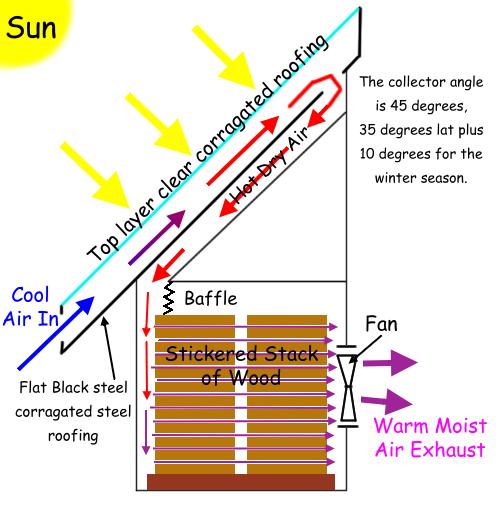
Here is my basic idea for a solar kiln.
Well I was not happy with the way the stack of wood was, so I restacked it....
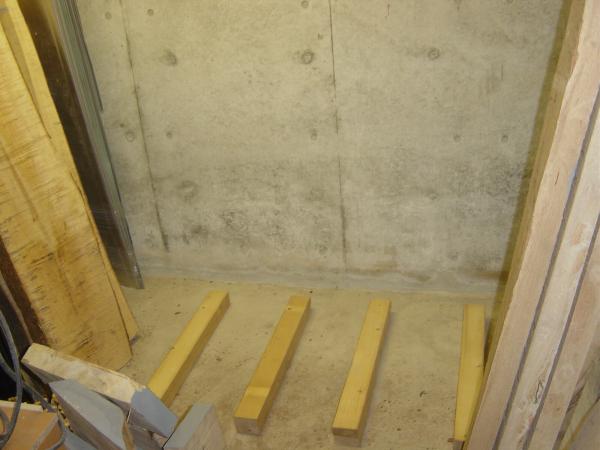
This time I started away from the wall a bit, and used wider two 2x4s,
bringing the wood off the floor a bit more.

I put my largest boards on the bottom
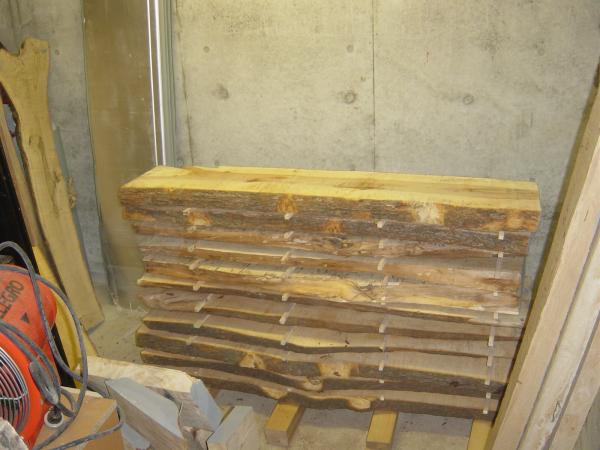
Most of the largest boards are now stacked
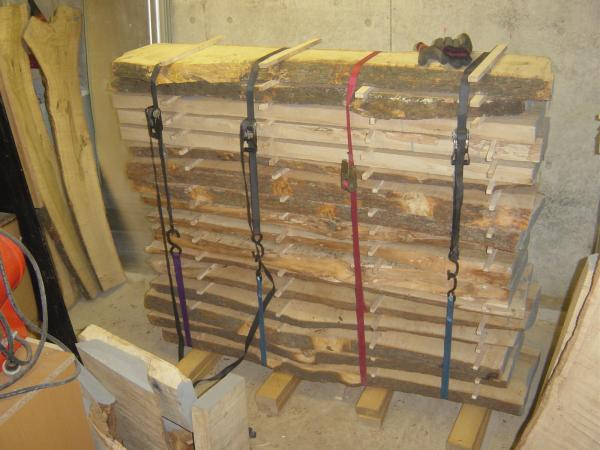
All strapped down, this worked rather well, and I should have stopped here.....
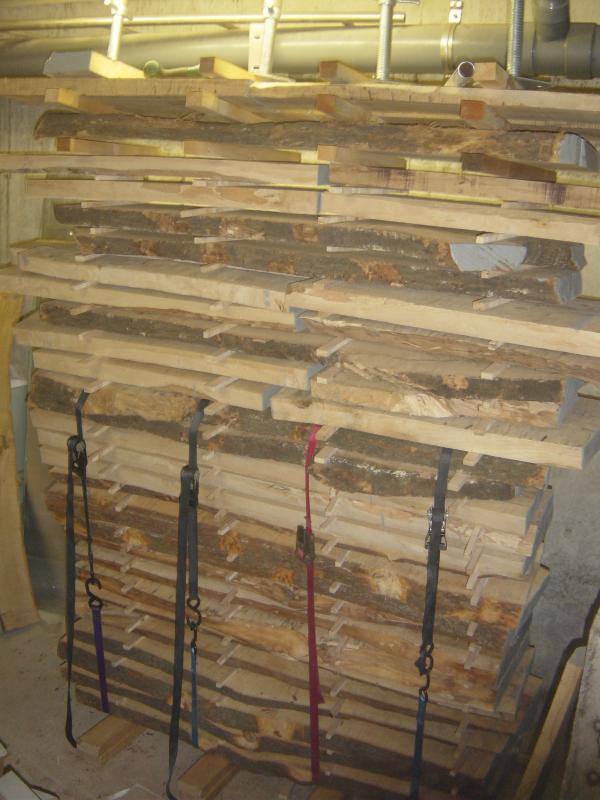
But I did not, I went on stacking it, and now it is too wobbly at the top,
I'll take it down and make a second stack.
Self Stacking Wood Pile
Well, I went back in the
morning to re stack the top half of the pile, but I was too late,
the pile had restacked itself......
Whoops......

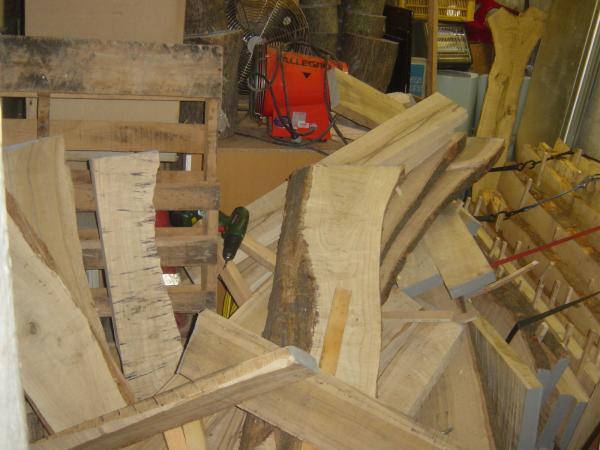
Thankfully the only damage, besides my ego, was a slightly bent bucket, and a
lot of busted stickers...
Oh well....
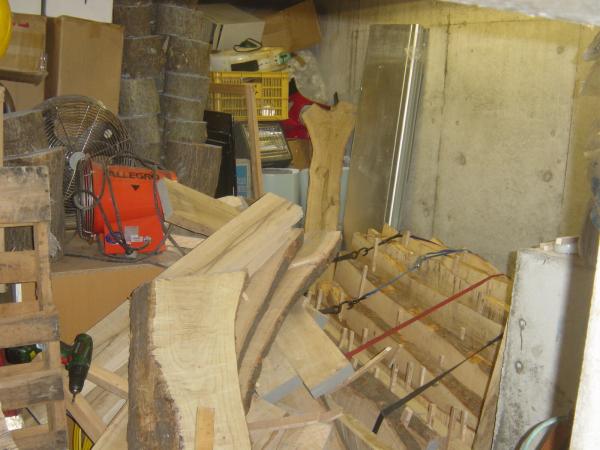
Update!!
I
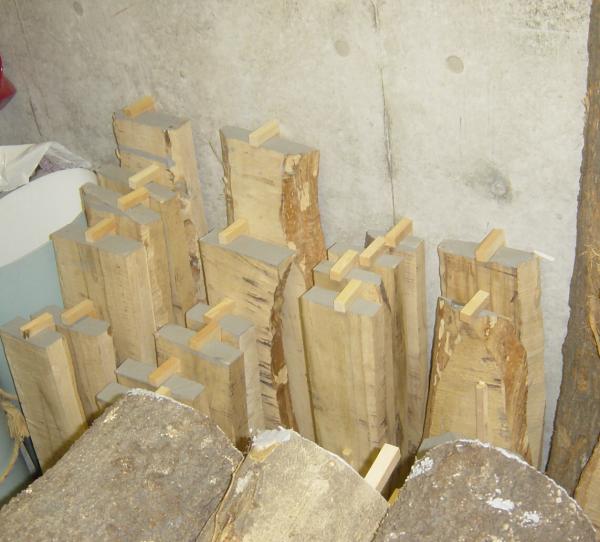
got the stack redone, and I also made all new stickers, including some
"L" stickers for some of the
lumber that I'm just going to lean against the walls.
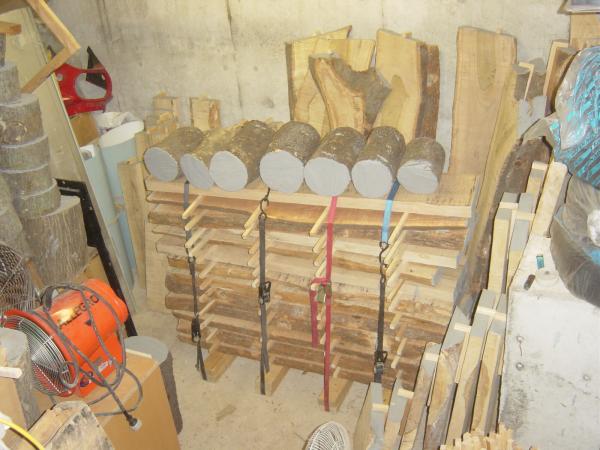
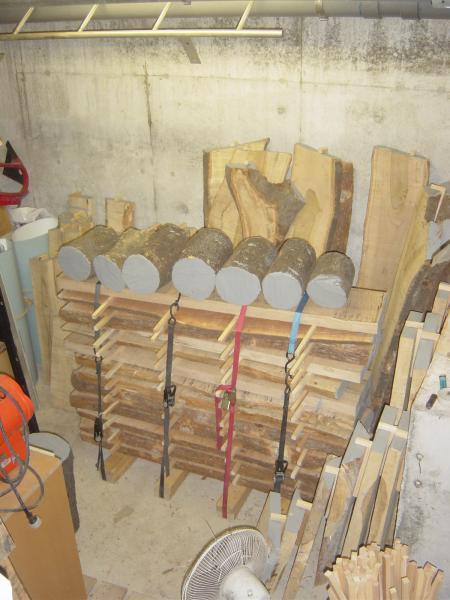
All strapped down, nice and secure.
The rest of the lumber is not the best for uniform thickness, as I was just
starting out on the chainsaw mill,
so I'm leaning it against the walls with "L" stickers to keep spaces
between it all.
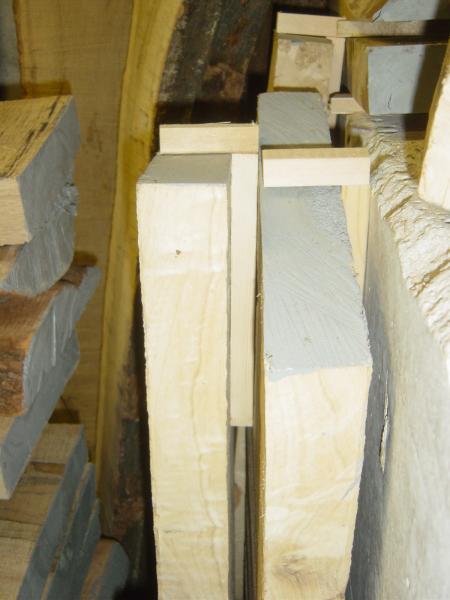
You can see them here..

...and here...
They should work OK, I hope, I got the idea from Bill's Wood Creations Lots of good info there
The next day, I returned to the Dungeon Annex and I found this....
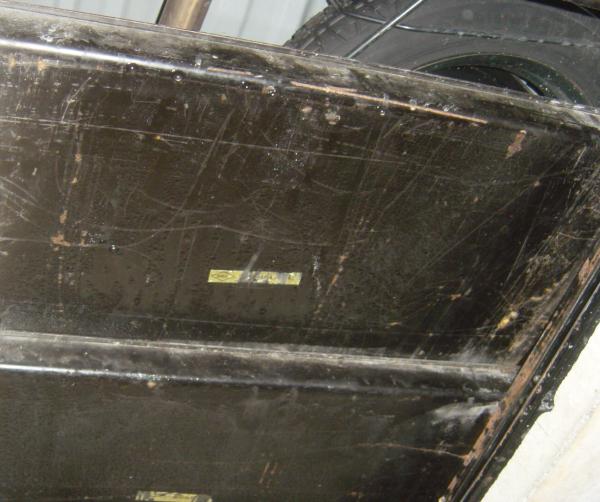
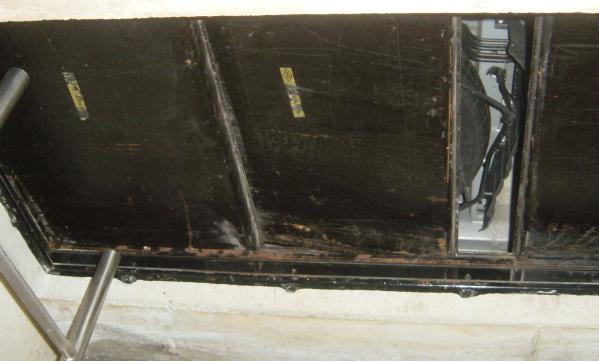
Hard to see, but these are the concrete and steel hatches on the Annex,
I've got the middle one cracked open about 6" for air exchange.
The bottoms of these hatches are covered with little drops of water.
Plan B
I need to move some air in and out of the
Dungeon Annex,
I had this old fan from a heater sitting around, and some foil flex hose....
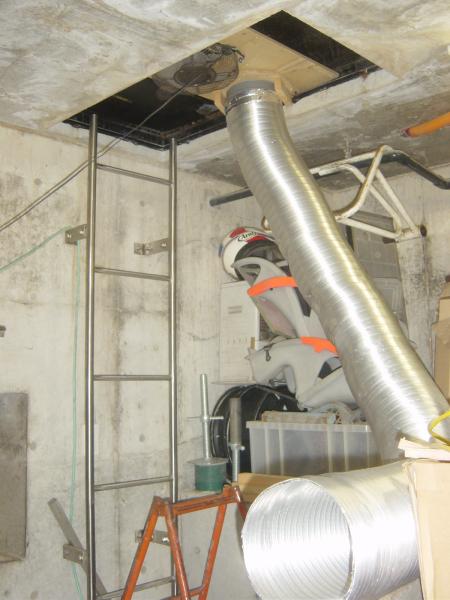
The fan blows out, and the pipe lets fresh air in towards the wood stack.
I guess I'll put the fan on a timer, something like 15 minutes every hour should do it.
I guess I'll see how it works.
Cheers!