_____Stu's___Dungeon__
Joyful Honda
Treasure
Lesson Room Cabs
In the beginning
2
3 4 5
6 7 8
9
10 11
12 13 14
15
Jointer1
Jointer2
Router
Table1
Router Table 2
The Doors
Do
Pa
Give Me A Brake
Cyclone
Cyclone 2
Cyclone
3
Cyclone 4
Liquor
Shop Reno Tenjinsama Shrine Tree Tour
Beer Shelves
Wine Shelves
Five Cuts
Drill Press <NEW
DoPa 2007 <NEW
Turning
Jean Francious Escoulen
Eli Avisera Demo Day One
Eli Avisera Day Two
Lathe Stand!!
Turning
Roughing
It
Sharpening Station
Bowl Blank Processing
Captured Hollowing Rig
<NEW
Logging In Tokyo
Woodlot Woodlot
2006 Woodlot
3 Woodlot 4
Chainsaw Mill
Chainsaw
Mill Mk II
Going Round & Round
This all started with a simple request from my lovely
wife,
we were given a set of wooden chairs by some friends who were moving.
One of the stretchers on the legs broke...and I got asked to fix it.
I had this little hand drill driven lathe that I bought on an impulse buy....
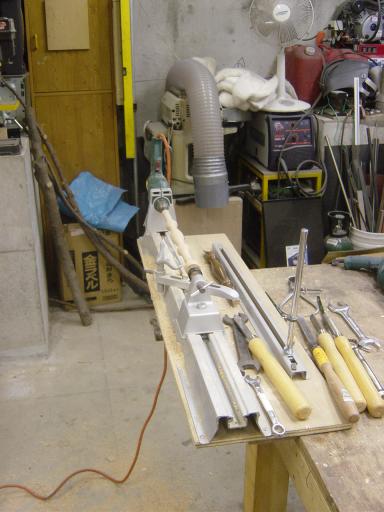
It works, but man, just..........
I used a piece of Beech to make the stretcher up, and all in all I think it worked out well.
A long time ago, in school, I did some turning on a lathe, but not much on wood, mainly on metal.
I'm sure it will do just fine, now I have to match the color.
Here are my turning tools
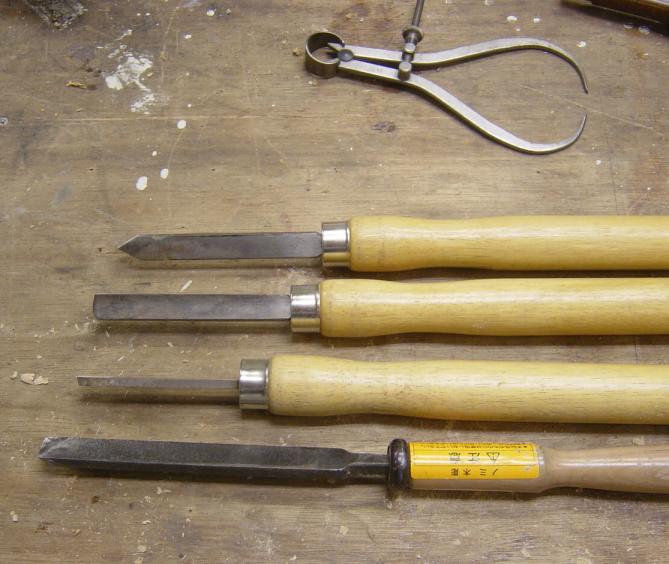
Not expensive stuff, but they seem to work OK
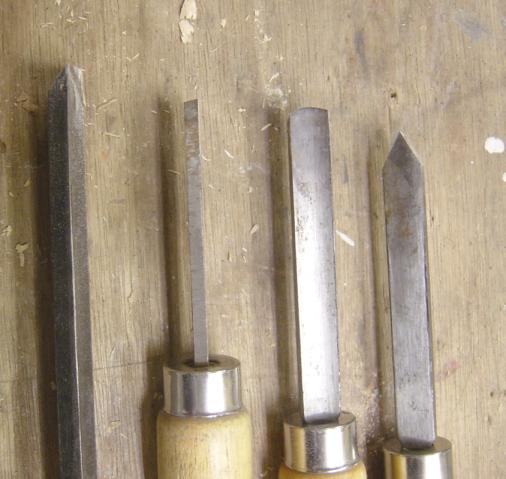
They all need some sharpening, for which I have to make a jig etc.
Fast Forward six months or so.......
I wanted to get a lathe, something of a real lathe, not one driven by a hand drill....
I looked at various ones here in Japan, I found some nice ones, but the prices HURT!!!!
The Delta, or Grizzly lathes that I found here were 3 to 4 times the price of the same lathe in the US.
The a buddy on one of the Wood Working forums I go to, offered me one that he had sitting around unused.

Like this one.
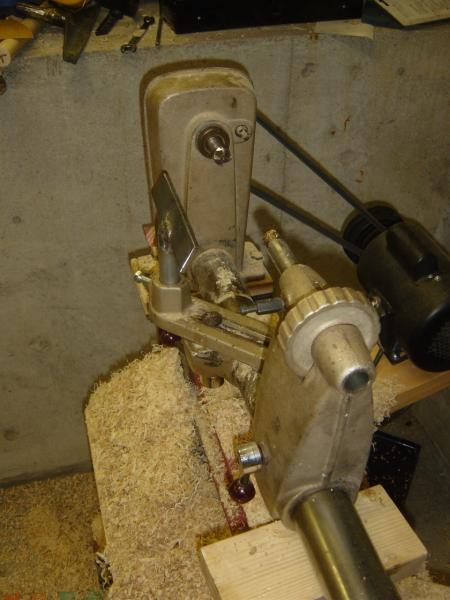
The lathe is a Craftsman 12" tube bed lathe, not the best
lathe going,
but good enough for me to get going on for sure, and the price (cost of shipping) could not be beat.
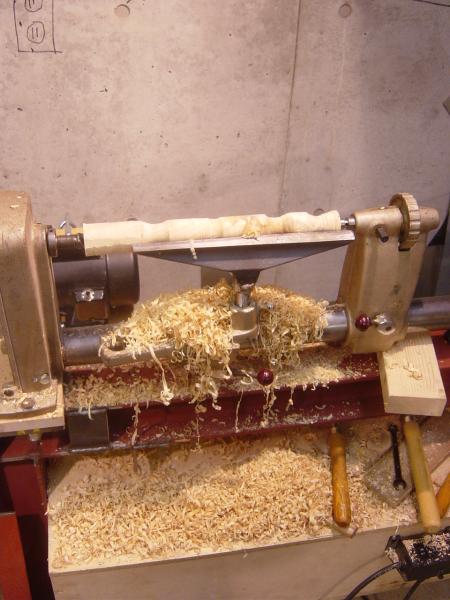
I got the lathe, and bolted it together, on my work table, and had some fun....
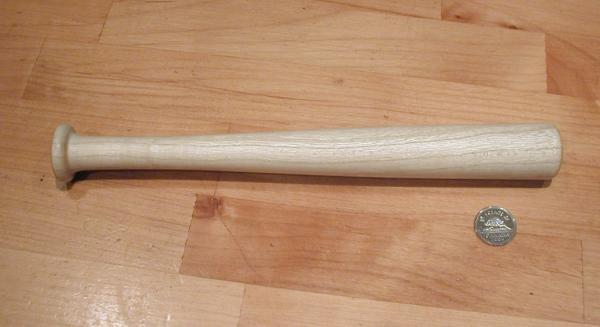
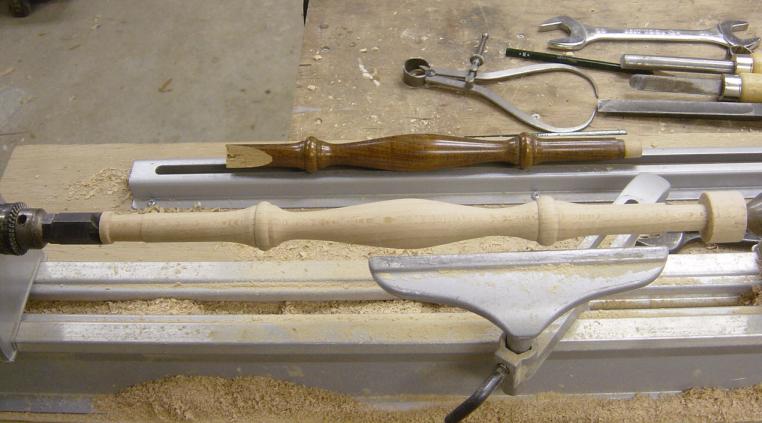
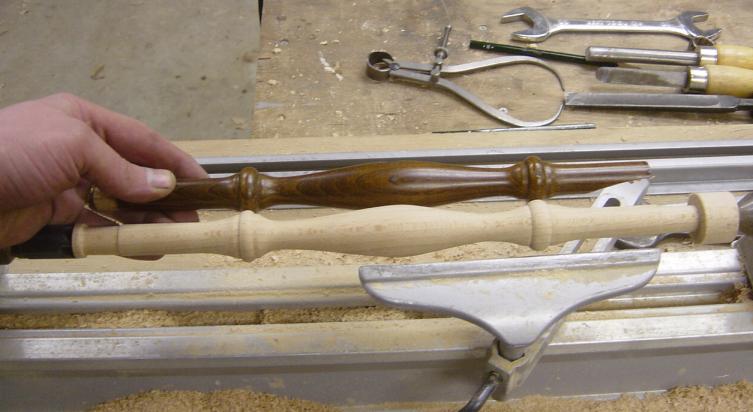
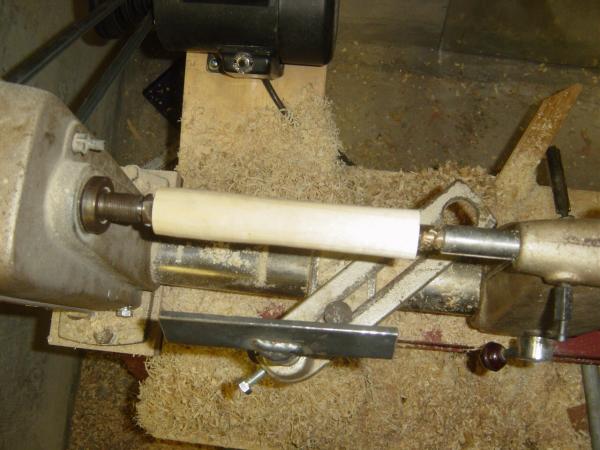
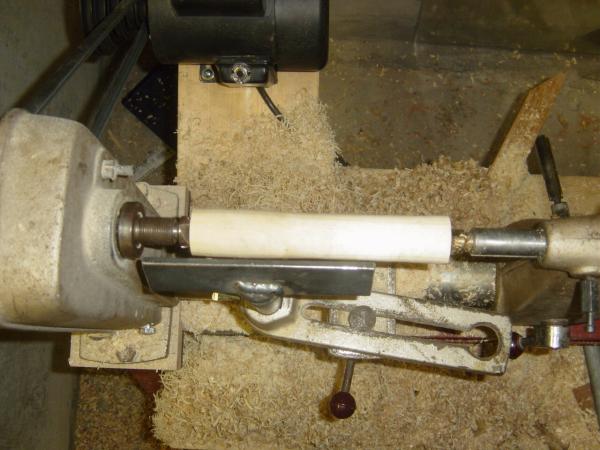
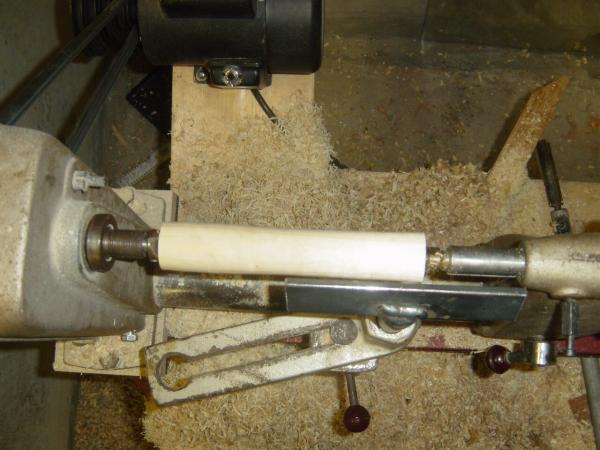
The first turning off my lathe, the wood is Blue Keyaki, just a little fun thing
to do
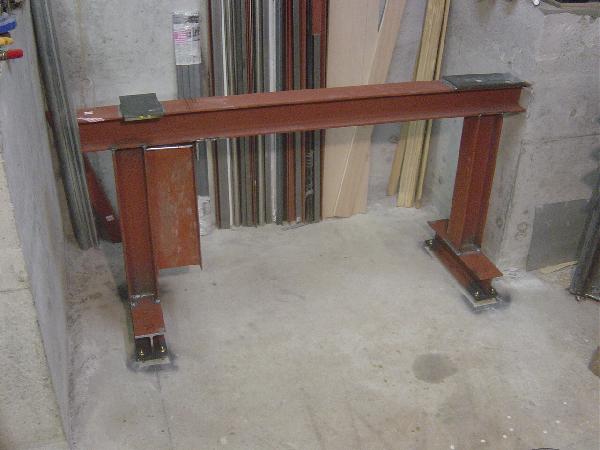
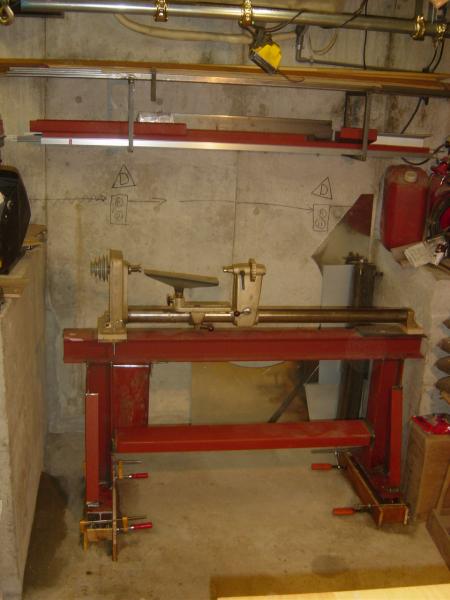
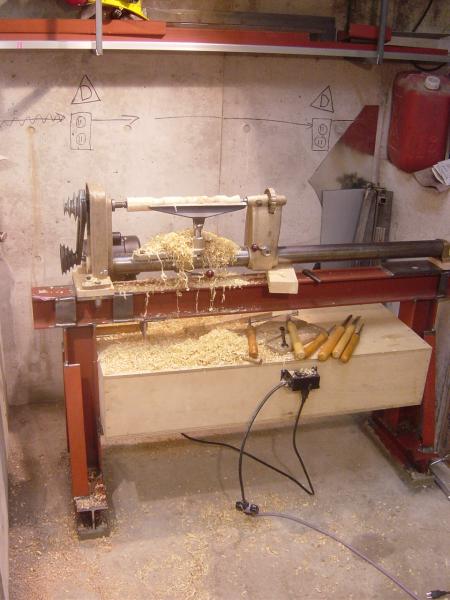
I then decided to make a good solid stand for the lathe.
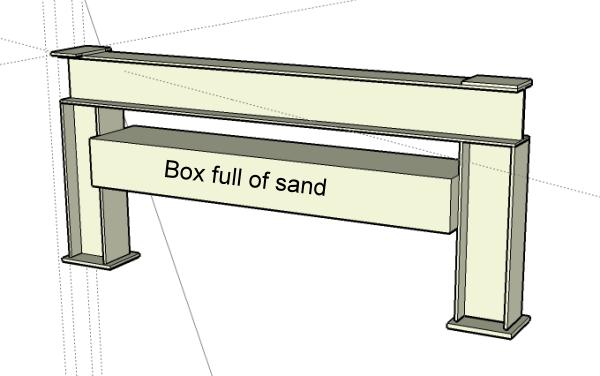
This is the idea I had of making a stand, I'd use some "I" beam to
make it good and solid, bolt it to the floor,
and then put a big box filled with sand between the legs, to dampen vibrations.
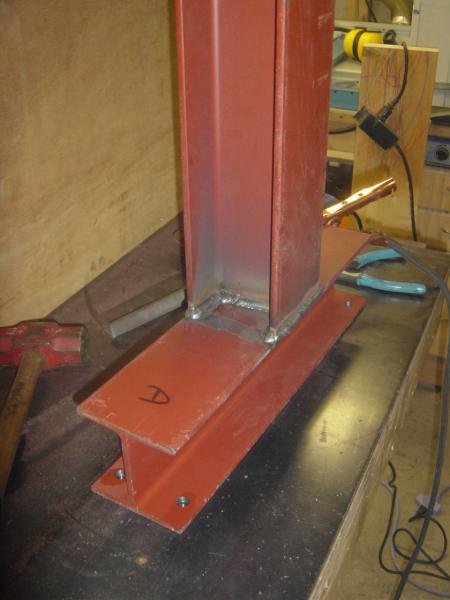
I bought some I-beam stuff at Joyful Honda, it is 10 cm x 10 cm, good and
strong, and heavy.
They cut it up there, as I don't have a cut off saw that big, cost $8 a cut,
(ouch) but, the cuts are exactly square, which made welding the stand a lot easier.
In the pic above, you can see the mock-up I did, it is all just standing there.
Here I welded up the first leg of the stand. This metal is
fairly thick to weld with my MIG welder, so I had to bevel edges where I
could,
and then I cranked the MIG up to the highest setting, and I changed from my
regular CO2/Argon gas mix to straight CO2,
as you get better penetration with it, and I needed it. I did weld a few spots
several times to build up a good bead.
The Hobart Handler 175 ( a 200V unit) worked great!
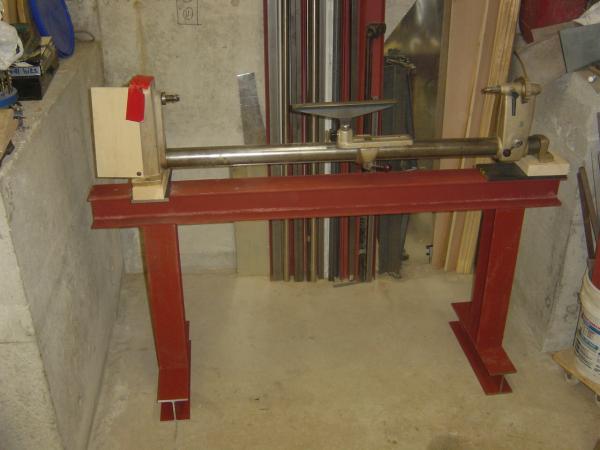
Here the stand is all welded up, and I bolted to the floor.
I found that there was a fair bit of deflection to the side, so I added some extra braces...
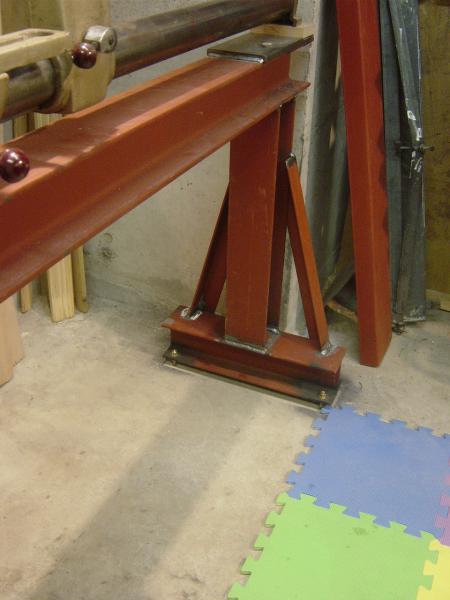
This really stiffened things up.
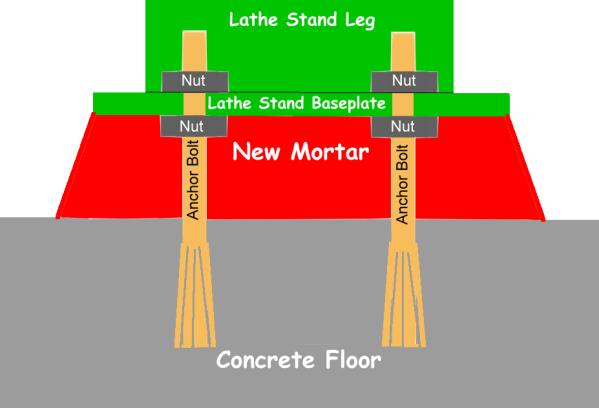
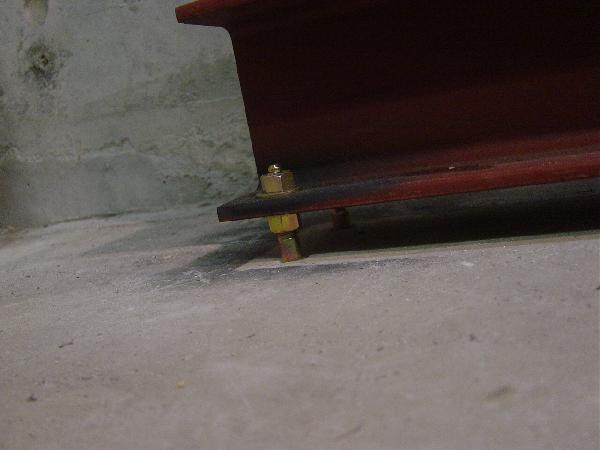
I used the anchors to level the stand, as my floor is not level. With the nuts
all tightened up,
I then filled the space between the floor and then stand with concrete.
Here you can see how it really looked.
Here you can see the forms holding the wet concrete in place.
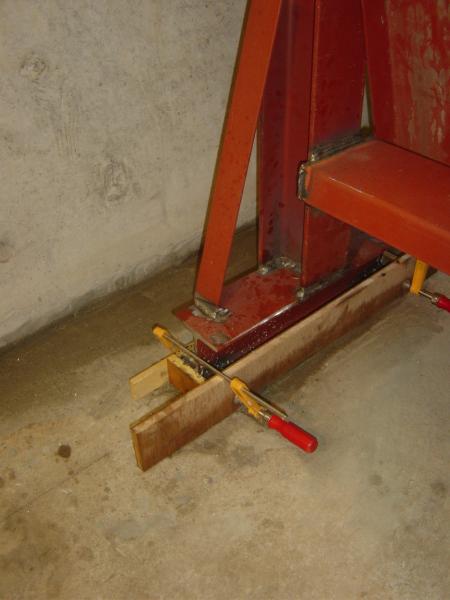
Nothing special, just some plywood.
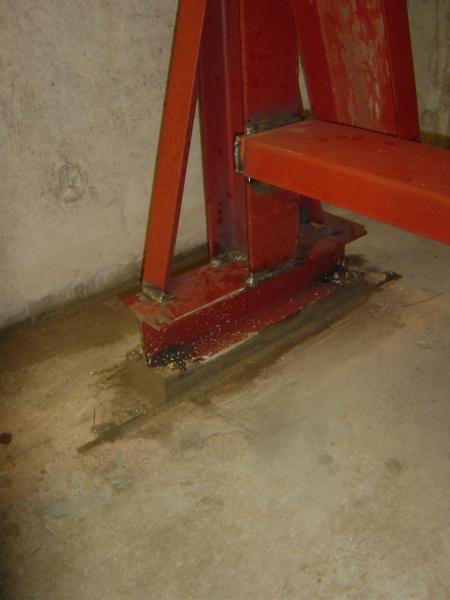
Should be good and solid.
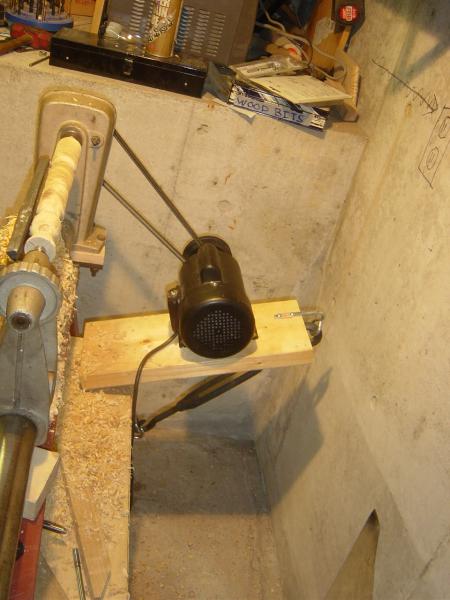
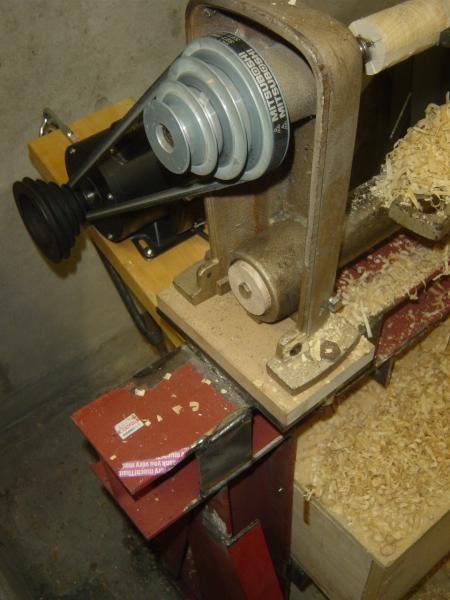
I ended up using a hinged board and a turn-buckle to put the motor in place.
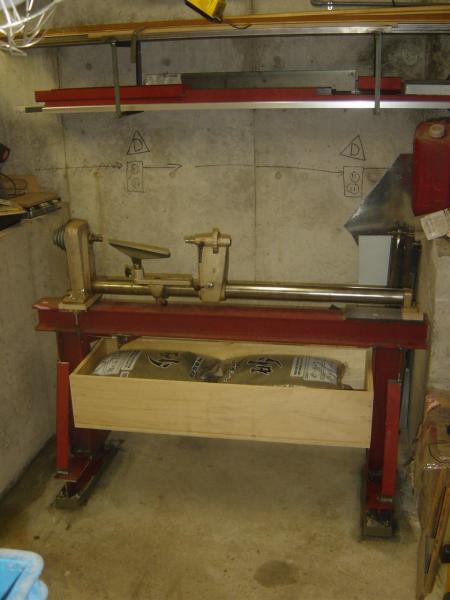
Next I added the Sandbox. It is made from 21mm thick plywood,
and it is mounted on a cross piece between the legs, there is 80 Kg of sand in
there.
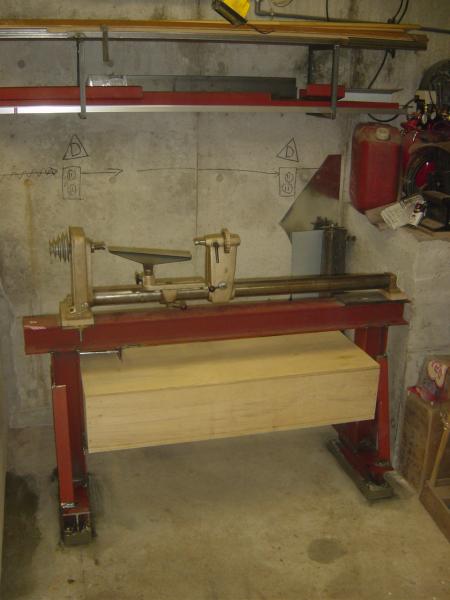
I put a lid on the box to, which will make a good spot for putting my tools.....
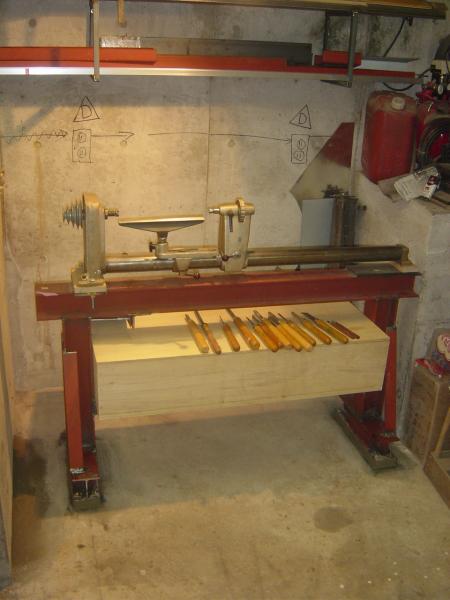
A tool bench of sorts.
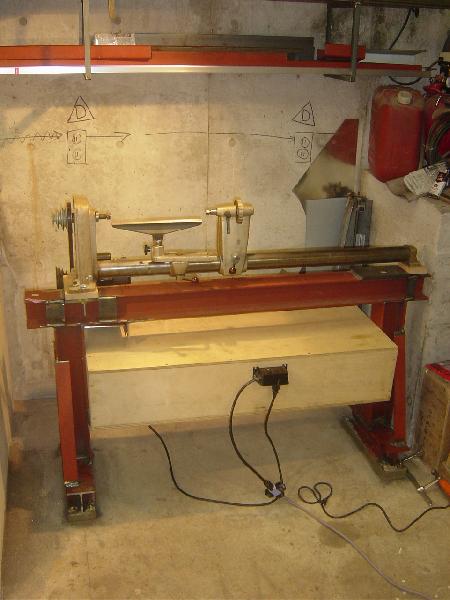
I put a switch on that I had laying around,
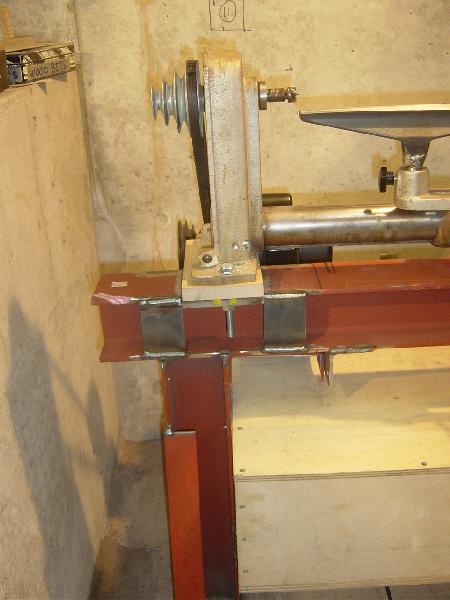
I also put some gussets between the top and the bottom of the
I-beam near the head and tail stock,
this helped, as the I-beam flexed a fair bit to the side.
I tried it out, but I was getting a lot of vibrations, something felt
"loose"....
Upon further investigation, I found a few things wrong,
one was the riv-nuts that hold the keyway on the bottom of the tube bed were
loose, in fact one was missing.
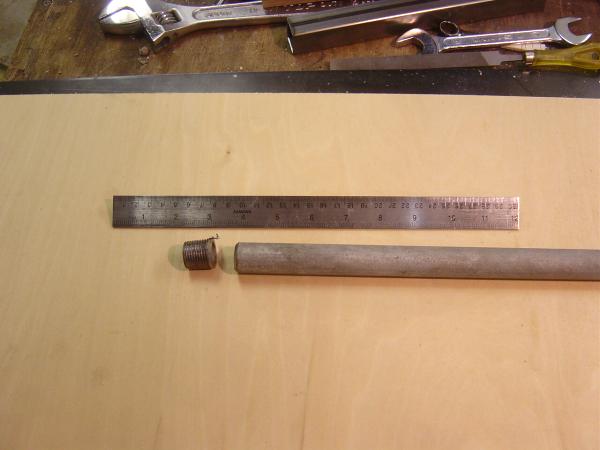
What is a Riv-nut?
It is like a pop rivet, but it has no mandrel, and once installed, it has
threads that you can screw a nut into.
Here you can see a squished riv-nut.
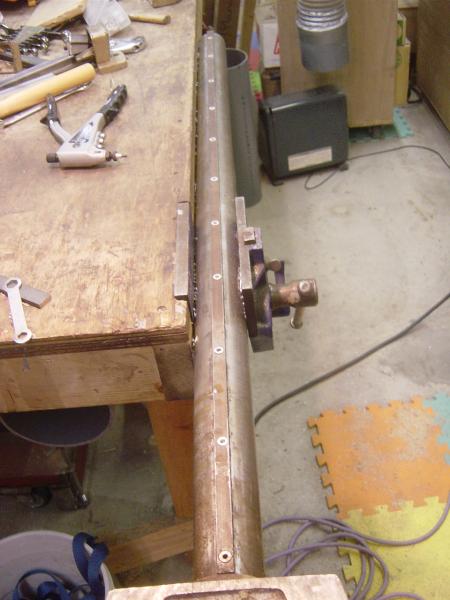
As the space between each riv-nut was close to 12", I decided to put in
extra riv-nuts.
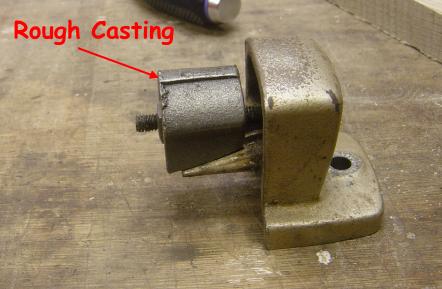
I also found that the piece on the end of the tube bed, the tail end, had a very
rough casting,
this was not letting the holder fully engage the tube, which means it was moving
around.
I cleaned it up with some grinding.
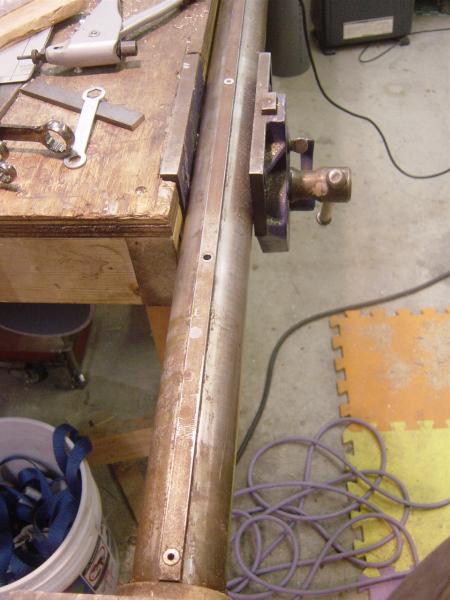
The last thing I did was fill the tube bed with sand, here you can see the
wooden plug on the end,
I figured this could not hurt with the vibrations.
Yep, making a mess for sure!!
The vibrations are all but gone!!

The next thing I did was put a pipe above the lathe, this gives me a spot to put
a light,
and I can put the DC here to get the sanding dust.
The next thing I needed to do was make a sharpening station, as the tool I have were dull dull dull.....
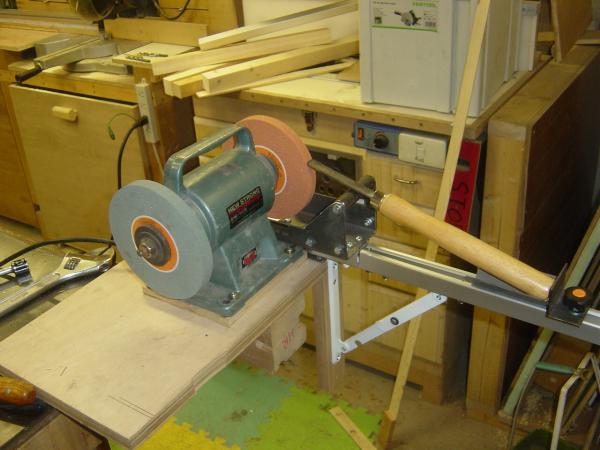
I made this up, and it worked well, but the hinge in the folding shelf bracket wobbled badly....
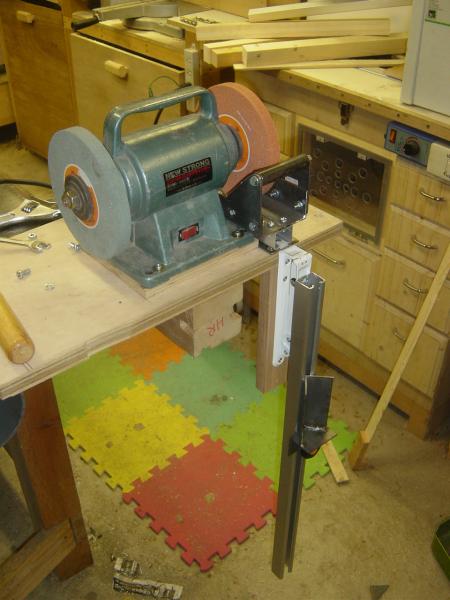
in the folded position....
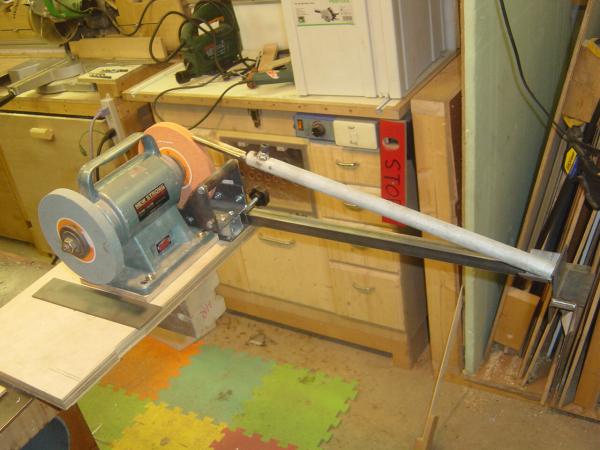
So I came up with this version instead, it is ROCK solid.
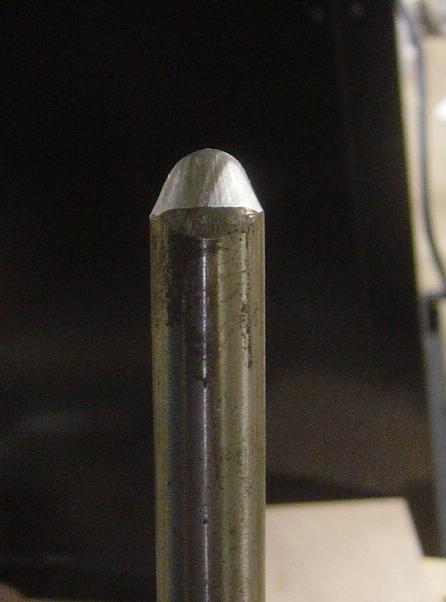
I was not enjoying the short handles on my tools, so I made this longer handle from some 3\4" gas pipe.
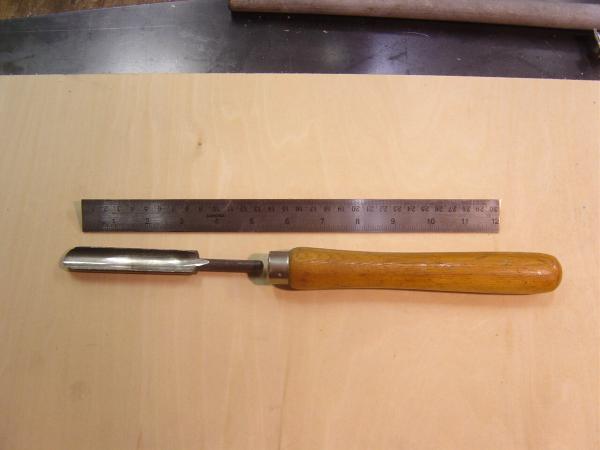
Here I've liberated the gouge from it's shorty handle.
I took the threaded ends off, as they are sharp!!
I ground a flat spot to weld the nut in place.

Like this....
Here you can see the Skew held in place.
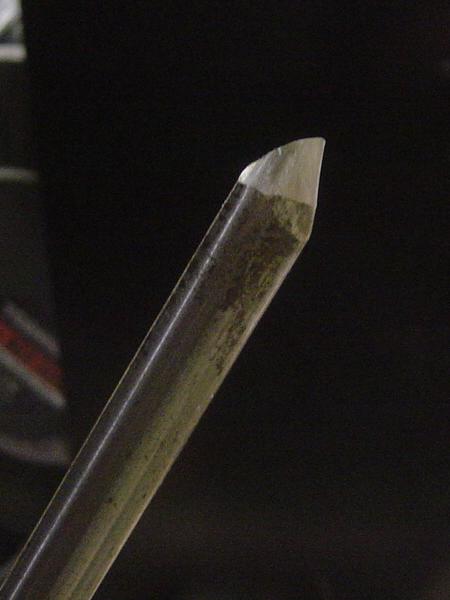
I can get a nice consistent grind on the tools.
Yep, seems to work fine!
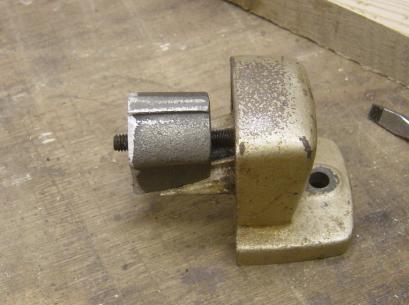
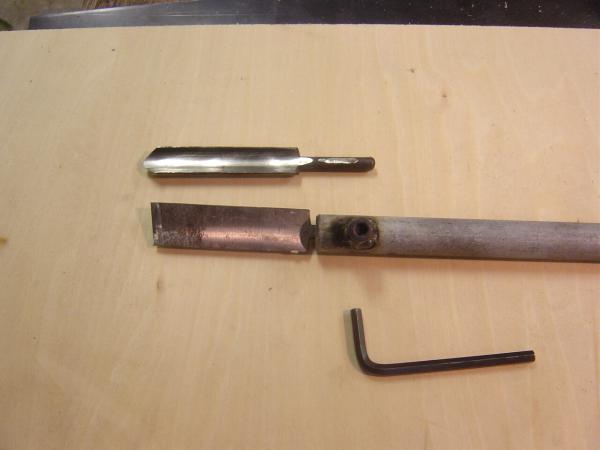
A Tool Rest
I only have the 12" tool rest that I got with the lathe,
this is rather long for a lot of stuff,
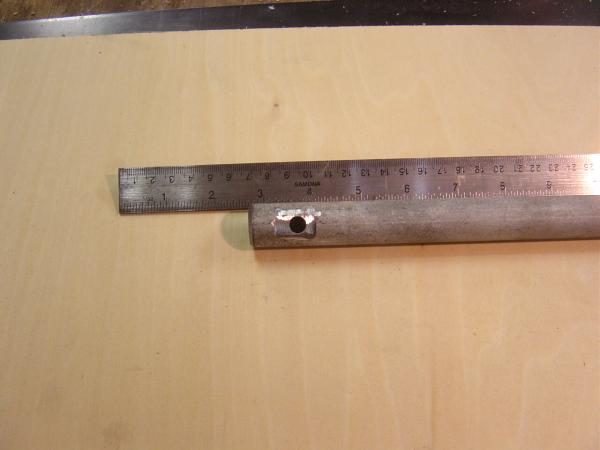
I wanted to make a shorter one. I can not find any 22mm stock that fits in the
hole on the banjo, but I did find some gas pipe that is 22 mm.
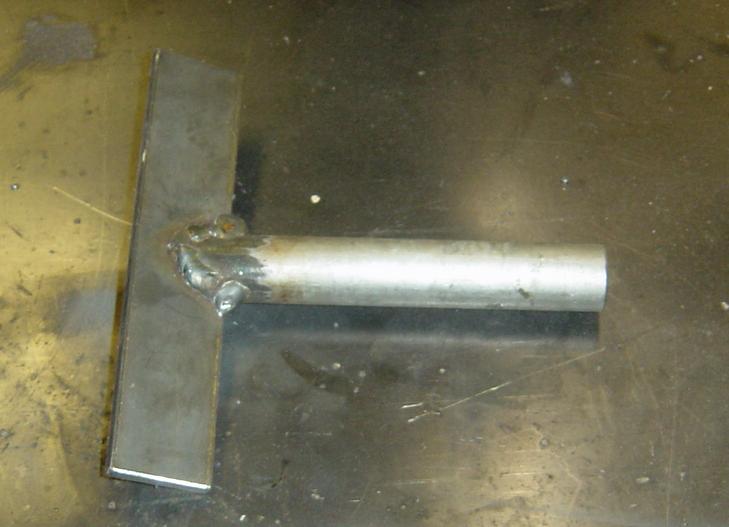
Here is the backside, the welds are double thick, as I welded over the first
welds, to add to the strength.
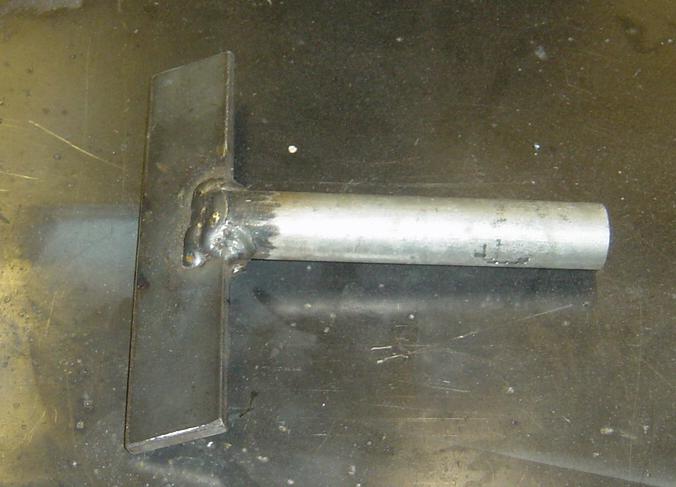
The other side.
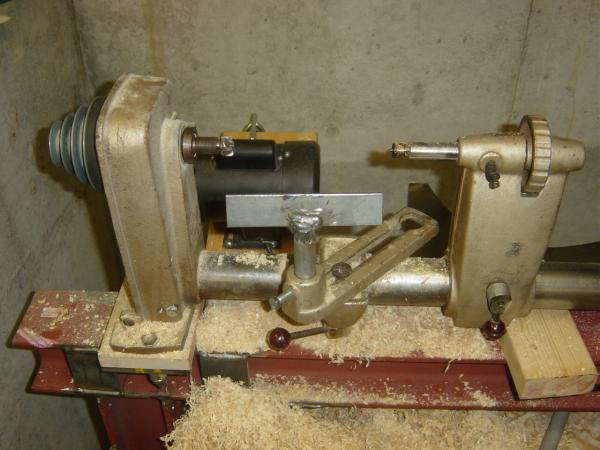
Here the tool rest is on the lathe.
A view from the side.
I have a problem, with the rest centered, on this short 6 inch piece, I cannot
get the banjo close enough to the wood,
the end of the banjo hits the tail or head stock.
I have to move it to the left, or.....
...to the right, this is a pain....
I think I'll make another one, but I'll have the rest offset on the post.
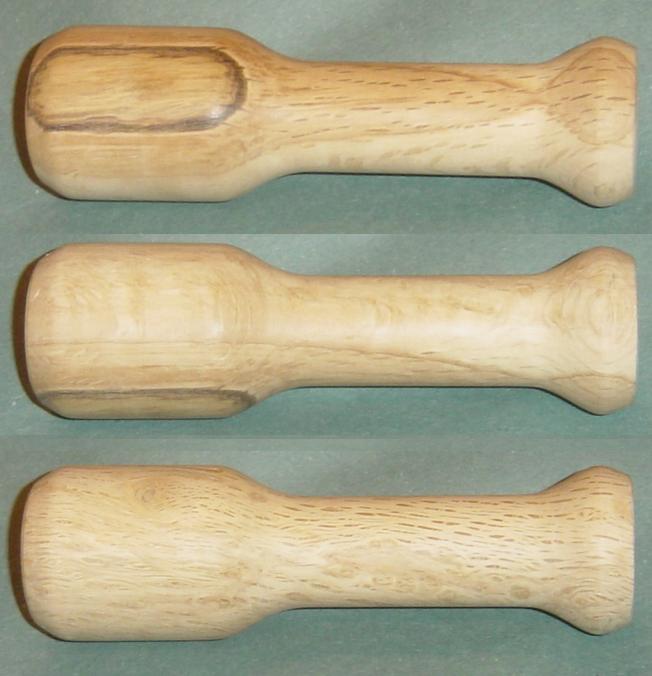
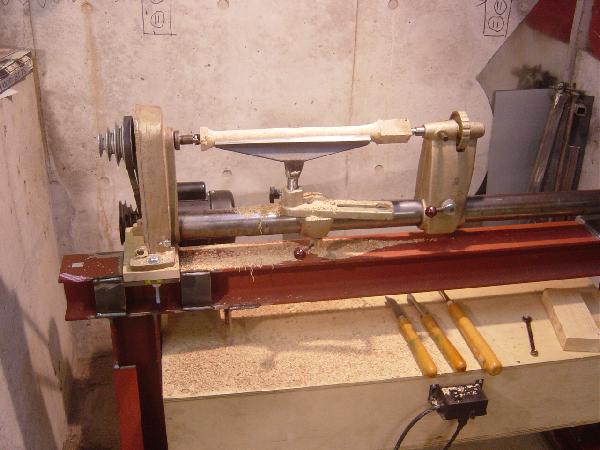
The second real turning to come off my lathe, a carving mallet, or a "Bonker".
The wood is Japanese Ornamental Cherry, or "Sakura".
Girlies and Curlies
The girls wanted to get in on the fun of the lathe, so they headed down to the Dungeon on Sunday afternoon and we went through the basics, and then I let them get a feel for the process.
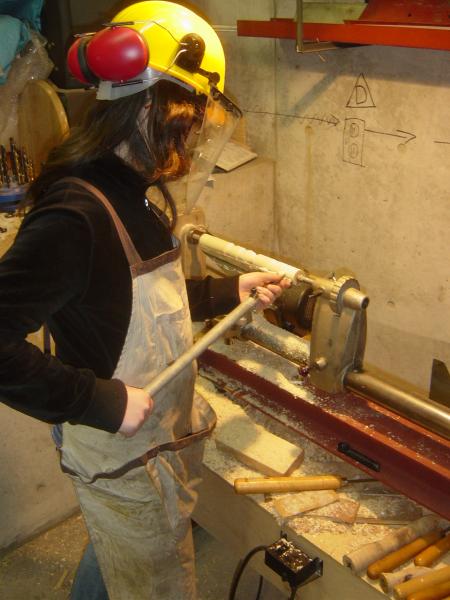
Erika started off, she was fairly aggressive and wanted to hog off all the wood
in one pass,
roughing out did not seem to bother her at all.
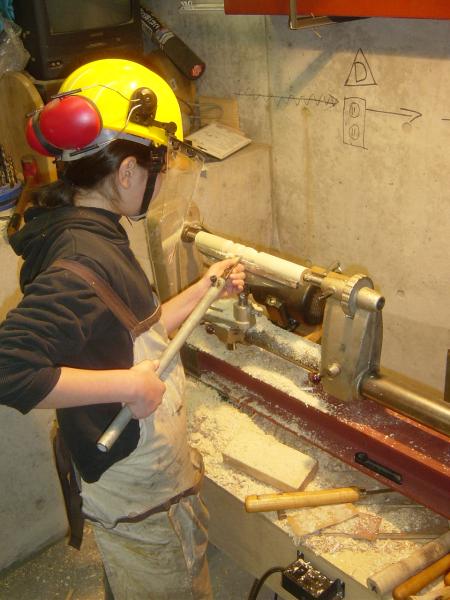
Mizuki did not like the tool bouncing around on rough out, so I helped her a bit
with that,
but when she got going she showed a healthy respect for the whole thing, and was
able to take VERY light smooth cuts.
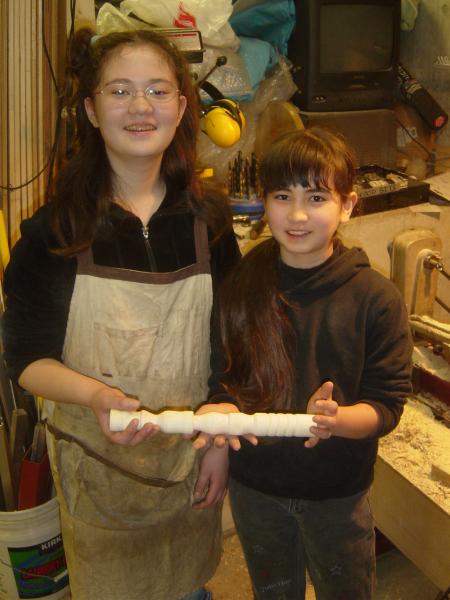
In the end we have the Tokyo Dungeon Bonker MkI.
Dungeon Bowling
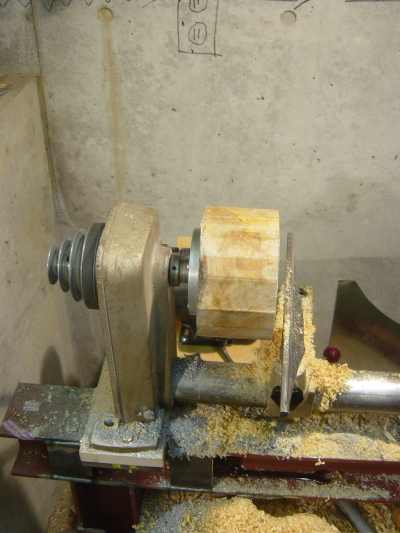
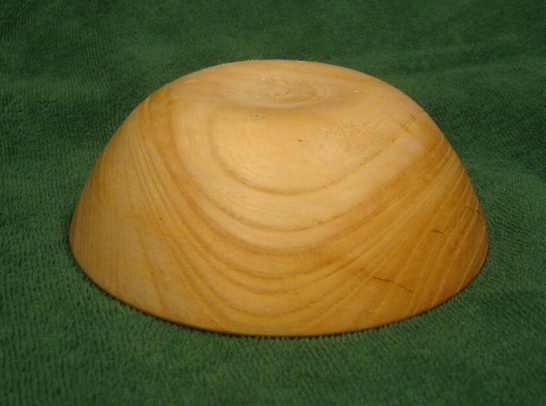
First blank on the faceplate.
Roughed out
I then boiled the rough out.
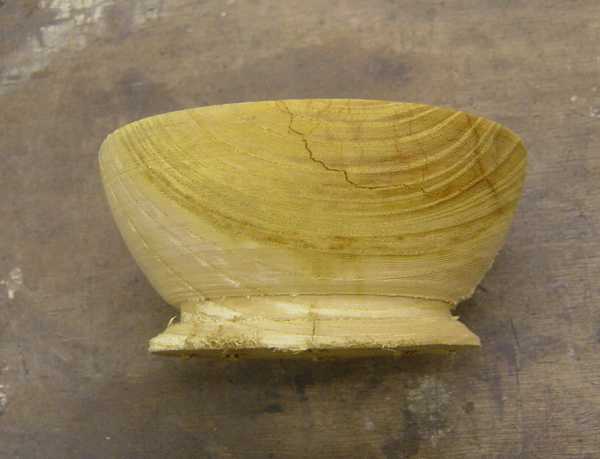
After boiling, I see I have some cracks
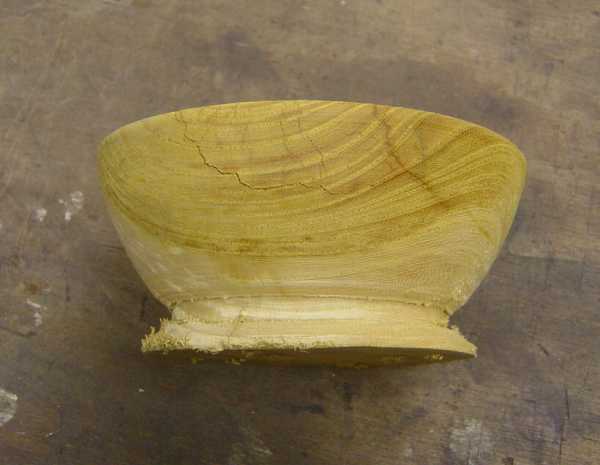
OK there are lots of cracks!!!
I used that wood CA glue, and then I chucked it up and turned it......
I did my best, but it was not wanting to turn nice, the area where the CA was, I
got a ton of catches, even with the scraper!!
Nice grain I guess.
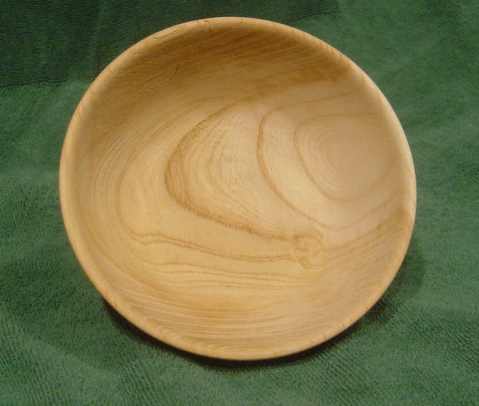
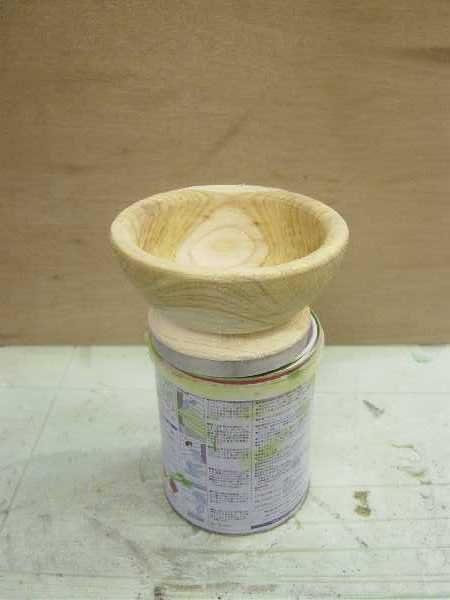
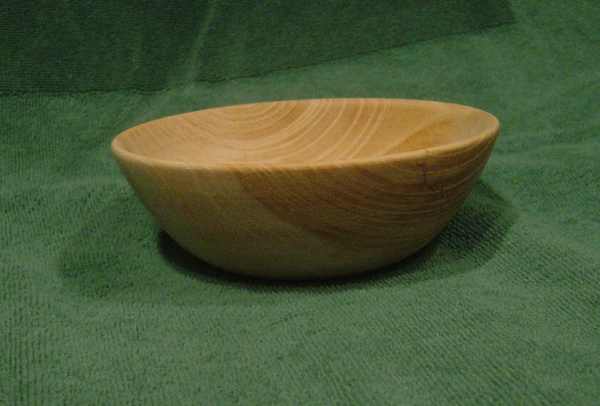
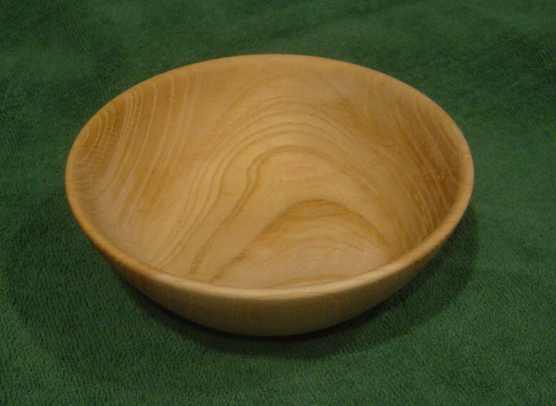
I even got a nice recess bottom.
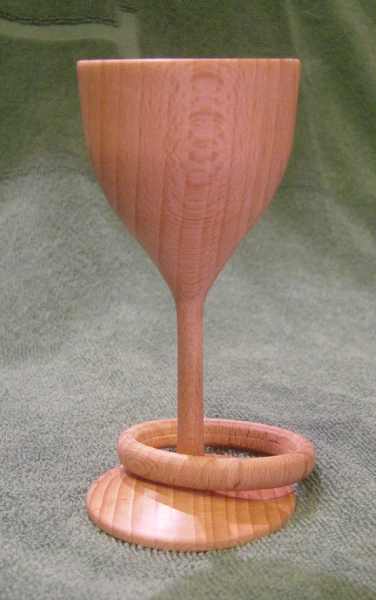
I also made a goblet with a captive ring
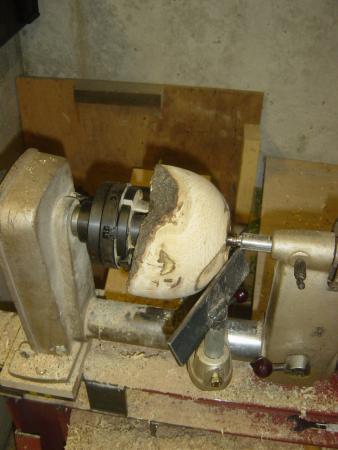
I decided to do a Natural Edge bowl, (NE) as they are hard to do, and I'm not so smart!!
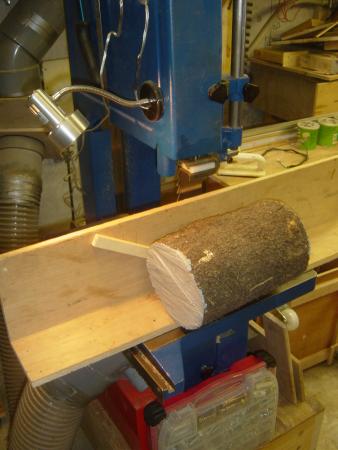
A couple of screws on my fast and dirty resaw sled.....
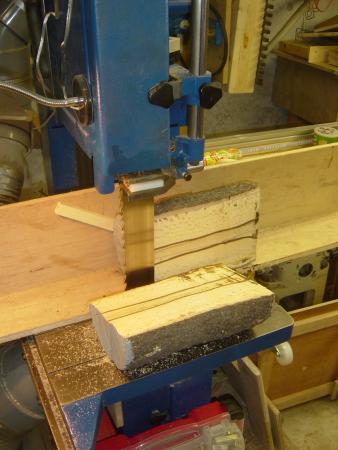
...and Big Blue earns his keep!
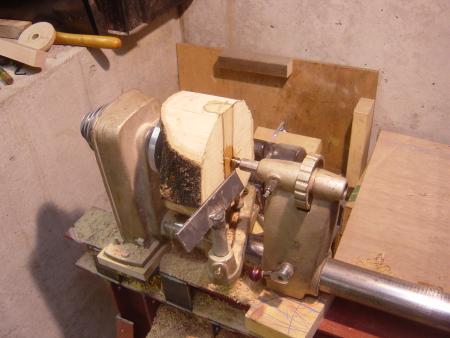
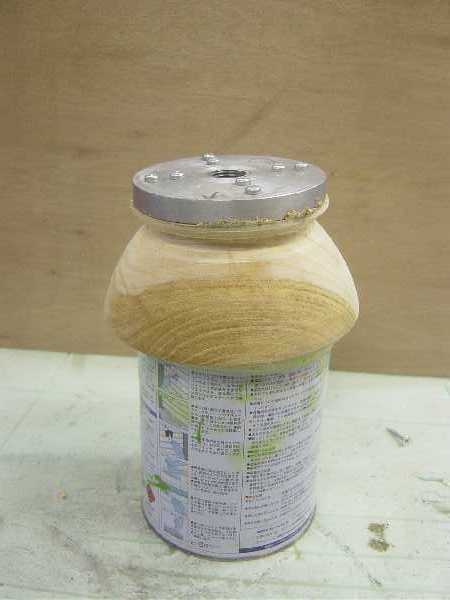
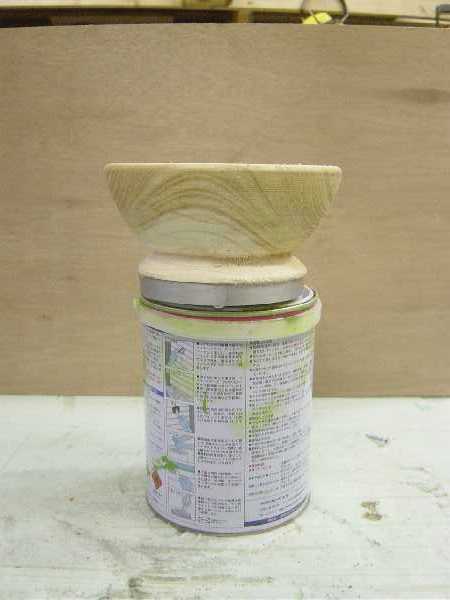
I put a face plate on the back of this blank, as I'm going to try to do a NE
there, bottom done, the tenon turned, time to get the chuck out...

I got this chuck from Grizzly for $42.50, not bad at all.
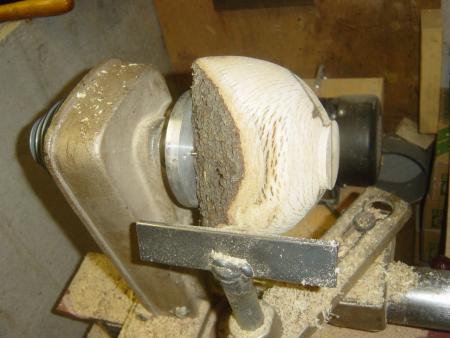
All chucked up ready to do the inside of the bowl so I barely get going on the
inside and BAM.......
Not even a big catch, really just a minor one, but it came off.
Upon closer inspection the dark area of the wood was really soft and punky.....
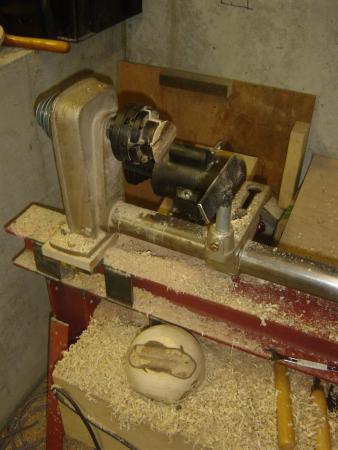
go to the jamb chuck mode to return the tenon...
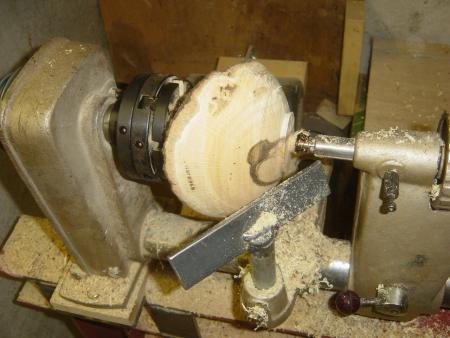
Tenon returned, but I'll admit, I still had a few more get offs, mainly as the
spindle gouge I'm using don't like the inside of the bowl, the outside I can get
nice cuts, but the inside is a lot harder...
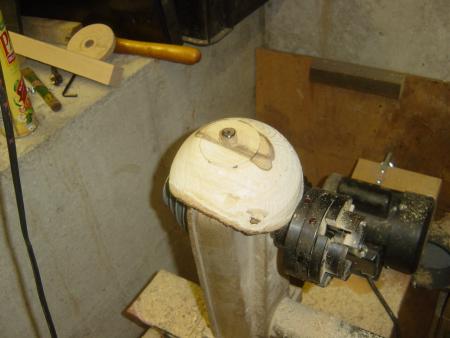
Here is the bottom of the rough out, I had to work hard to get the bottom thinner than the sides, as I learned on Mr. Grumbine's DVD.
and the top, I've got a ton of inclusions and other defects, so I got out the CA
glue and got sticky fingers.
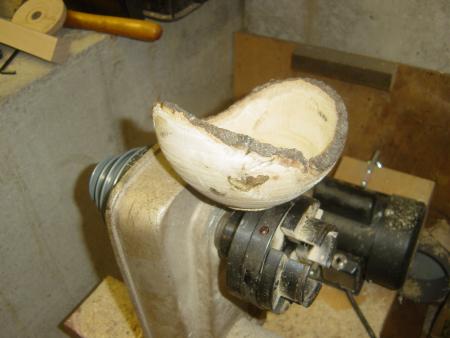
I'll let this one dry in the paper bag, don't think the boiling method will work
so well with the NE..... (Will it?).
Certainly was fun, but I NEED a real bowl gouge, this other thing I have sucks for the inside. A good scraper would help too.