_____Stu's___Dungeon__
Joyful Honda
Treasure
Lesson Room Cabs
In the beginning
2
3 4 5
6 7 8
9
10 11
12 13 14
15
Jointer1
Jointer2
Router
Table1
Router Table 2
The Doors
Do
Pa
Give Me A Brake
Cyclone
Cyclone 2
Cyclone
3
Cyclone 4
Liquor
Shop Reno Tenjinsama Shrine Tree Tour
Beer Shelves
Wine Shelves
Five Cuts
Drill Press <NEW
DoPa 2007 <NEW
Turning
Jean Francious Escoulen
Eli Avisera Demo Day One
Eli Avisera Day Two
Lathe Stand!!
Turning
Roughing
It
Sharpening Station
Bowl Blank Processing
Captured Hollowing Rig
<NEW
Logging In Tokyo
Woodlot Woodlot
2006 Woodlot
3 Woodlot 4
Chainsaw Mill
Chainsaw
Mill Mk II
Page 15
As the summer winds down here in Japan, and we get back to
work and to school,
I realize that I've not gotten nearly as much done as I had hoped.
Part of this is because we have been busier than usual,
and partly because this year we don't have a part time worker at the
liquor shop.
We also have the kids home this summer, not in Canada.
It all adds up to one busy summer with little free time,
at least I'm not bored!
I went down to the Dungeon with the intention of getting the
sheet stock
cut up for a set of drawers to slide under our bed, that will be used for storage.
I got all the head scratching done, figuring it all out,
but when I went to begin ripping up stock,
I was thinking about all the side and front pieces that would be needed in
the same size,
I began to look at my SCMS's fence and table with less than admiration.
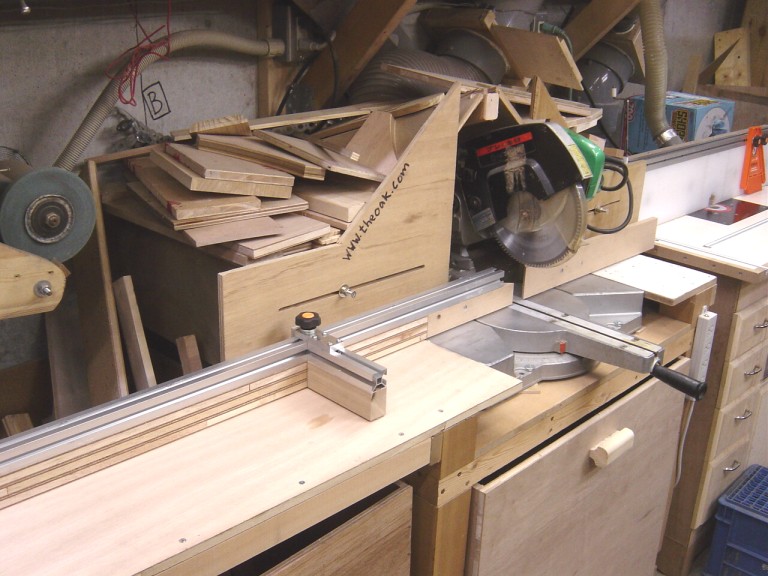
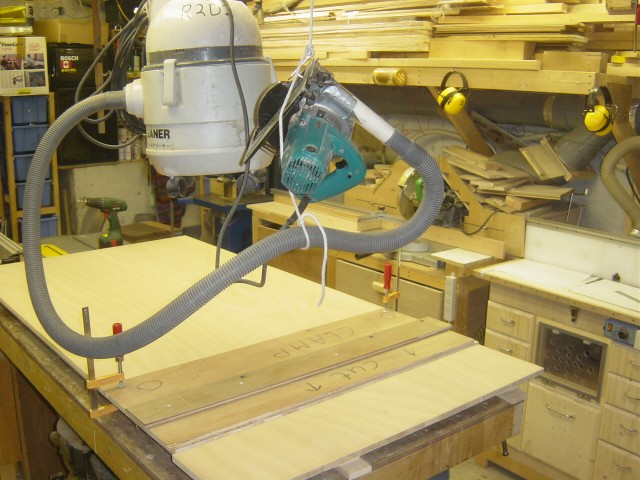
The SCMS table and fence were whipped up to "Get-R-Done"
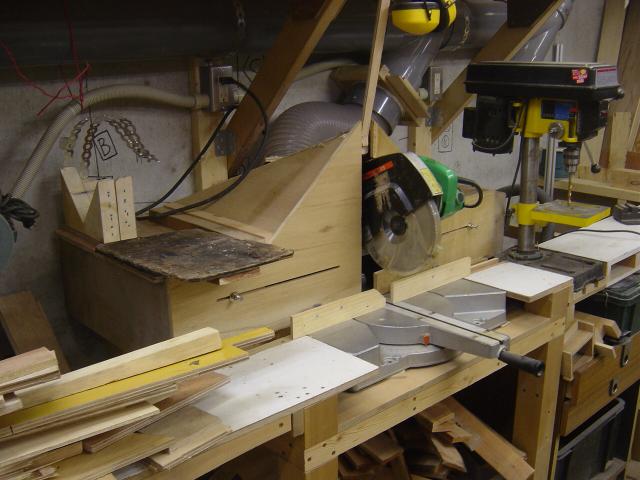
The old set up.
I still had most of a piece of the aluminum extruded stuff I
used for the router table's fence,
so I thought I'd put that to good use.....
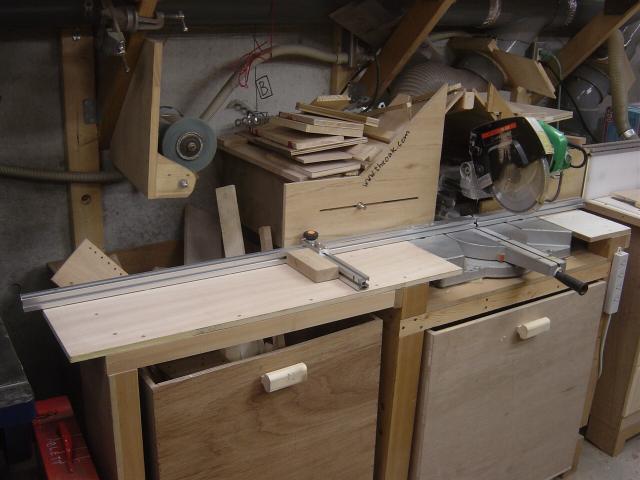
This is what I came up with.
I know that when I go to cut some miters I'll have to cut the fence a bit,
but I'll do that when I have to, now it just just nice having a long fence with
a moveable stop.
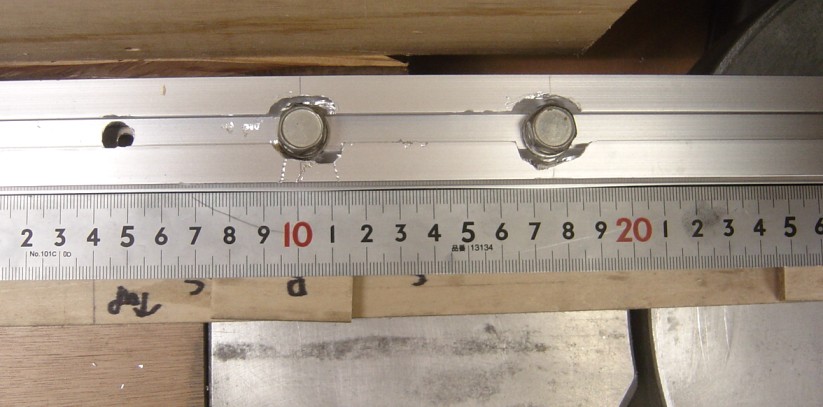
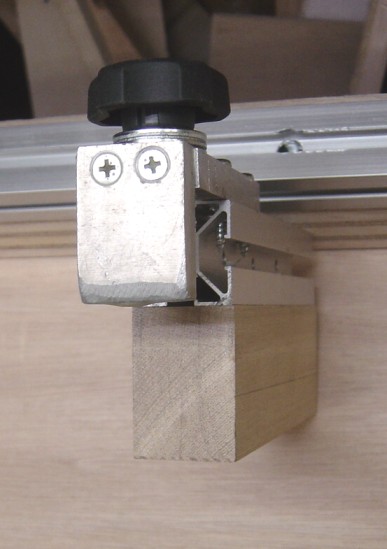
Nothing fancy, just a couple of chunks of aluminum,
the one under the knob is backed up on the back side of the fence with
another pieces,
so the fence has a piece on all three sides. The wooden block is part of the
stop,
it gives it a squared surface to seat against.
I've only used it a few time, but it is a big improvement over the old set up.
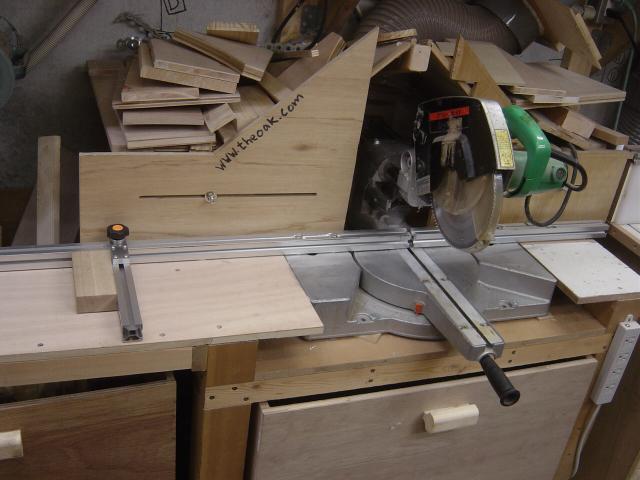
Whoops, Mark II
OK, I had a bit of a problem, well two problems.
1)The aluminum fence was deformed by tightening the bolts down....
This was not going to work.
The second problem was that I could not slide the stop close to the stop, the bolts were in the way of the stop sliding close.
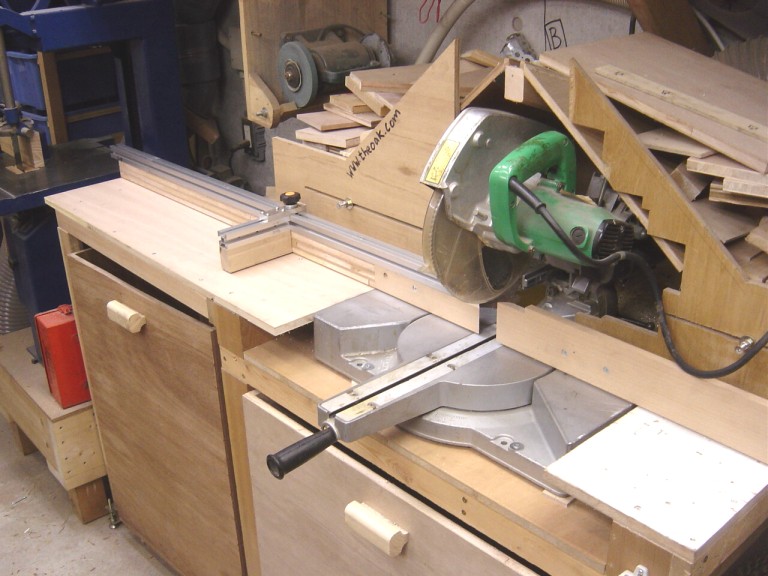
To solve these problems, I put the stock pieces back, and then put wooden fences with the aluminum track on top.
I ended up with a better solution, IMHO, this lets me slide the stop to very
near the saw,
and because the track is now held on by screws, and is not the main fence, it is
not squished.
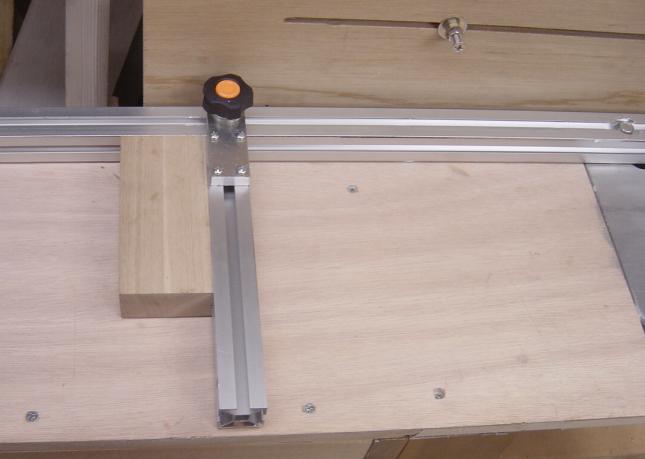
A view from the right side
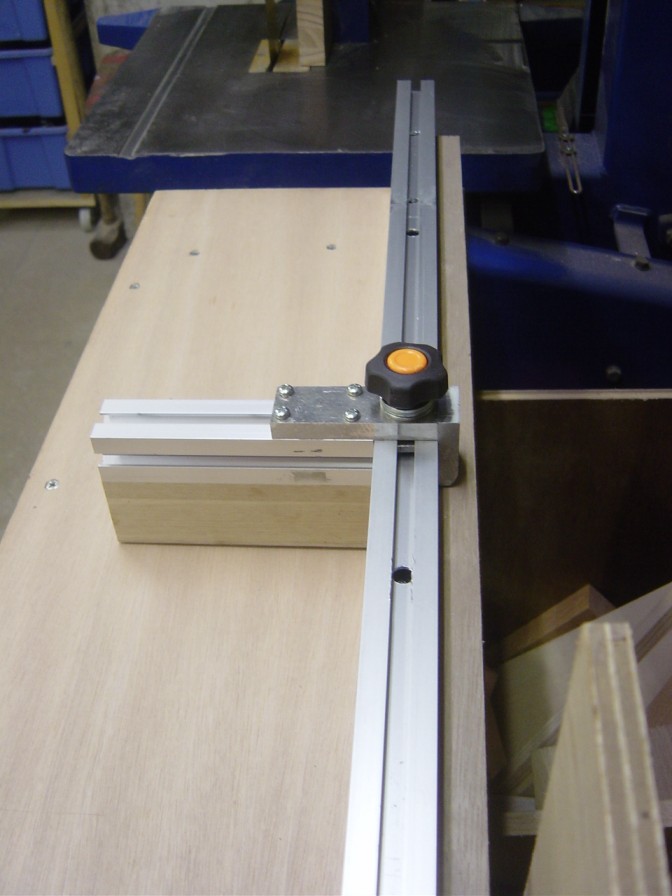
Here you can see the back side of the stop, and how the track is captured on
three sides
A close up of the back side of the stop
I think this is much better than the first version, but who knows, you may yet see a "Mark III"
Cheers!
On To Making Some Sawdust!!
My
lovely wife wants some more storage, the one place I can think of that is not
used at the moment is under our bed.
I plan on making a bunch of "drawers" that are on wheels and can just
be pulled out from under the bed.
There would be no tracks to keep them in place, they would just be organized
under the bed.
To do this I need to cut up a bunch of sheet goods, I need to cut a bunch of 21
cm tall sides and fronts for the drawers.
The best way to get the stock out of my 3'x6' sheets of plywood is to cut these
pieces on the short side, not lengthwise.
I need a total of 28 pieces to make the drawers.
I came up with a very simple but quick method to do this.
Using my cut off guide, I made two "T" spacers, these will put the cutting guide at exactly 21cm from the edge....
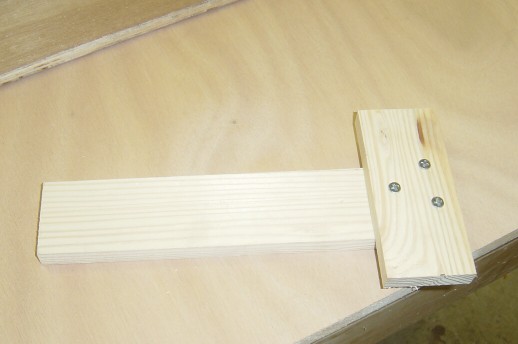
T-stop for setting the cutting guide
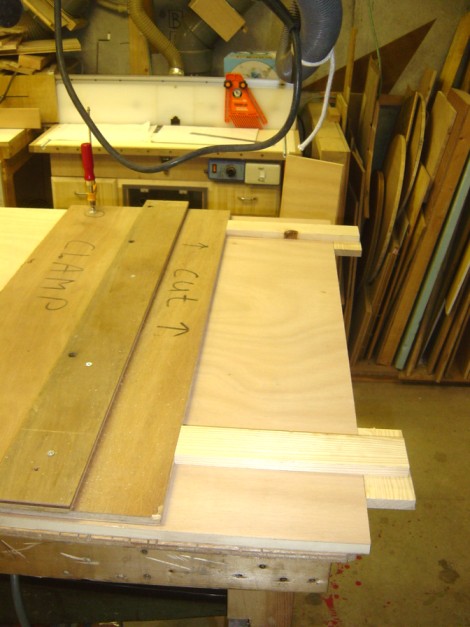
Using the T-stops, the cutting guide is set in place
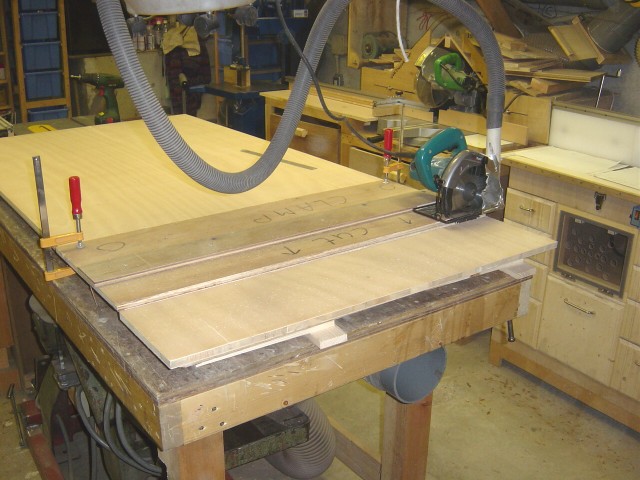
Here is it at the end of the cut, the rope holds up the vacuum hose out of the
way,
and there is a hook on the rope to hang the circular saw on.
OK the saw is hung out of the way, and the piece is ready to remove.
Then remove the clamps, and move the whole shebang forward for the next cut.
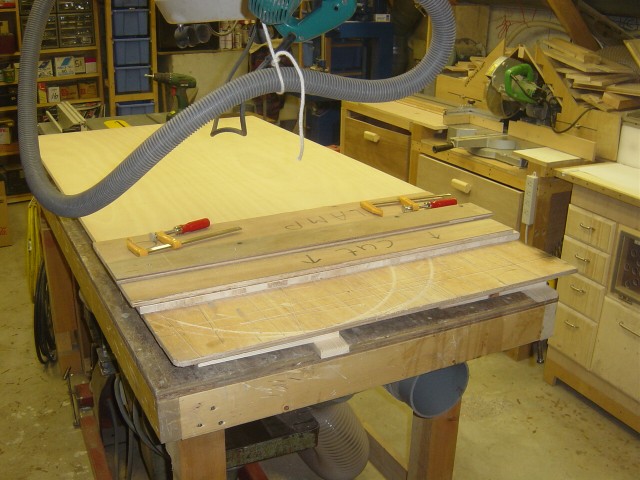
Cut and unclamped, ready to move to the next piece and start the whole process
again.

In 30 minutes I cut up 3 1/2 sheets of plywood for the drawers.
I hope someone gets some ideas from this.
Cheers!
More stuff going on in the Dungeon......
Amp me up!
I wanted an amp meter for my cyclone, one
that would be permanent.
I found this one on Yahoo auction
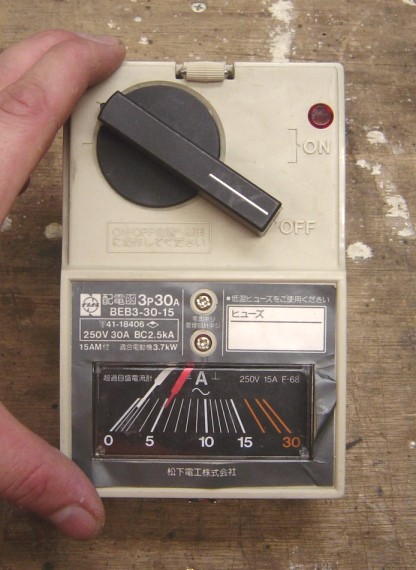
It is actually a kind of on/off switch/breaker with an amp meter built in.
I paid about $20 for it with shipping.
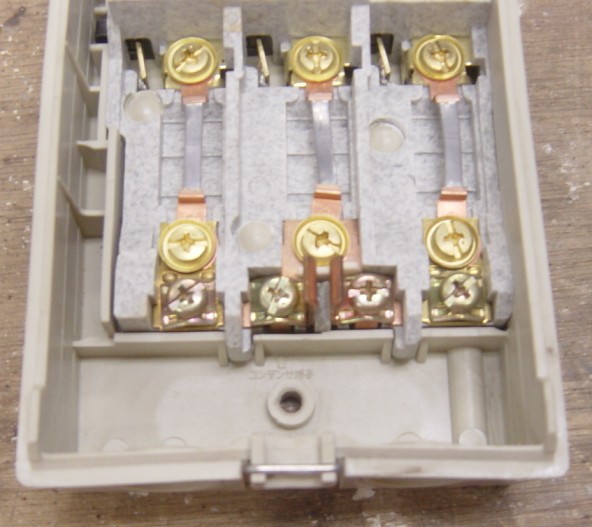
It hinges open and you can see the three poles, they have the old fashioned
fuses, but I guess it will work
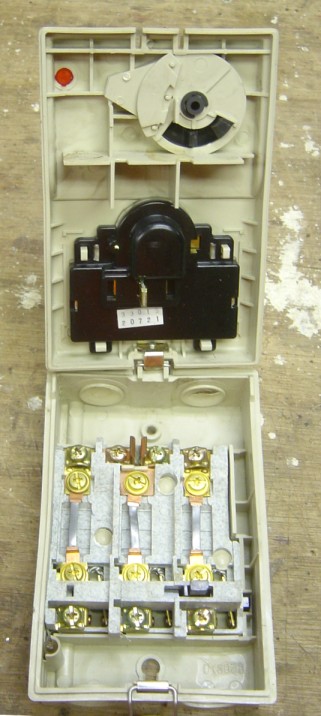
and another shot of the inside.
The black thing in the pic, in the middle is the back of the amp meter,
it has a stub on it that mates with the backside of the unit.
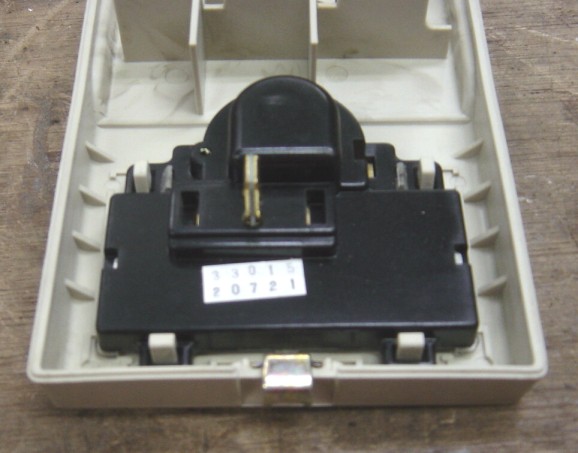
A close up of the back of the amp meter, the stub seems to be in two pieces,
with an insulator between them.
I guess this is how it reads the amps.
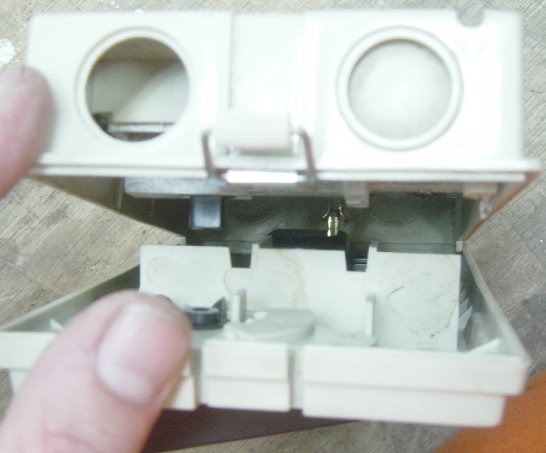
From the top down, you can see the stub going into its contact
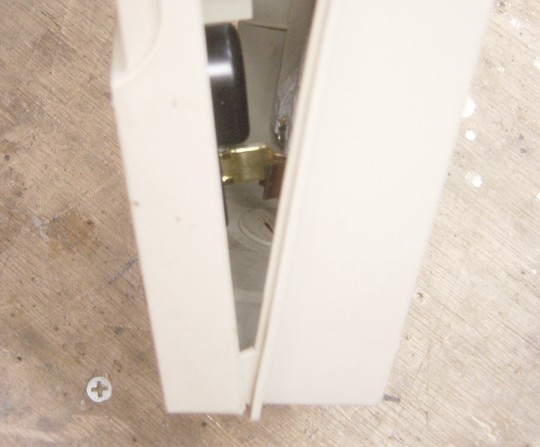
A side shot of the two pieces making contact.
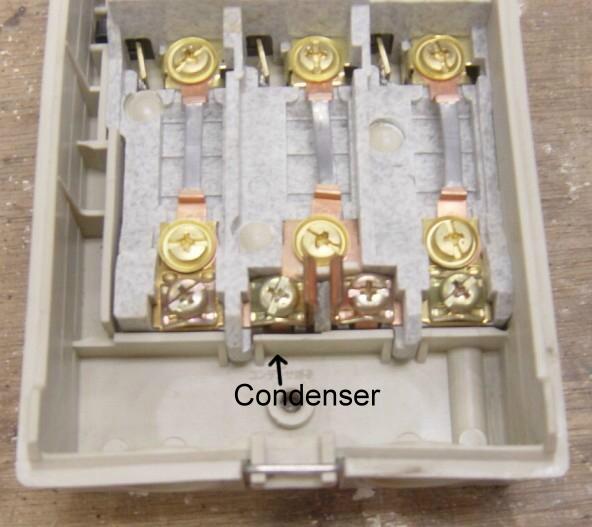
The middle leg where the amp meter attaches has two screws on it,
below the screw on the left it says Condenser. I wonder how I'm supposed to hook
this up.
I guess I got to bug some sparkies I know!!
Cheers!