|
_____Stu's___Dungeon__
Joyful Honda
Treasure
Lesson Room Cabs
In the beginning
2
3 4 5
6 7 8
9
10 11
12 13 14
15
Jointer1
Jointer2
Router
Table1
Router Table 2
The Doors
Do
Pa
Give Me A Brake
Cyclone
Cyclone 2
Cyclone
3
Cyclone 4
Liquor
Shop Reno Tenjinsama Shrine Tree Tour
Beer Shelves
Wine Shelves
Five Cuts
Tod Evan's Doors
Building The Phoenix
The Phoenix Part II
Drill Press
<NEW
DoPa 2007
<NEW
Turning
Jean Francious Escoulen
Eli Avisera Demo Day One
Eli Avisera Day Two
Lathe Stand!!
Turning
Roughing
It
Sharpening Station
Bowl Blank Processing
Captured Hollowing Rig
<NEW
Logging In Tokyo
Woodlot Woodlot
2006 Woodlot
3 Woodlot 4
Chainsaw Mill
Chainsaw
Mill Mk II
Links
Other Stuff
| |
The New (to me) Jointer/Planner Combo is
here!!!
I finally found a Jointer Planner Combo at a reasonable
price, I paid about $800 US for it.
It is a 5 or 6 year old Makita Model# 2030S. The jointer is 155 mm or just over
6" and the planner is 312 mm or about 12 1/4". Here is a review of the
Jointer I found online....
| Tool Preview |
| Makita's 2030S Planer-Jointer |
| By John English - August 29, 2000 |
| |
|
One of the most daunting tasks in any woodshop (especially for
beginning craftsmen) is sharpening and setting planer or jointer
knives. I've been making my living in the shop for twenty-some
years, and I'm still not really comfortable doing this job. So the
first thing I looked for when reviewing Makita's new 2030S
planer-jointer was how their engineers tackled knife installation. I
was absolutely delighted with their innovative solutions.
I say solutions, because there are two sets of knives in the
2030S: one for planning and the other for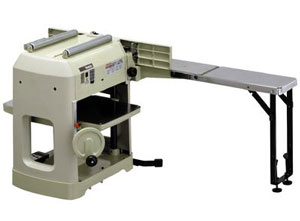 jointing. The jointer is the simpler of the two: just loosen a few
set screws and the two-sided, disposable knives slide right out.
Installing replacements is just as easy in fact, it's pretty much
impossible to get it wrong. The knives just slide into place,
correctly aligned and ready to go as soon as the set screws are
tightened. Makita has even built in a drum lock that radically
reduces the chances of injury. Just rotate the drum by turning a
knob on the exposed end of it: as you do so, a pin slips into place
and locks the drum securely while you work.
jointing. The jointer is the simpler of the two: just loosen a few
set screws and the two-sided, disposable knives slide right out.
Installing replacements is just as easy in fact, it's pretty much
impossible to get it wrong. The knives just slide into place,
correctly aligned and ready to go as soon as the set screws are
tightened. Makita has even built in a drum lock that radically
reduces the chances of injury. Just rotate the drum by turning a
knob on the exposed end of it: as you do so, a pin slips into place
and locks the drum securely while you work.
The only problem I had with this process was figuring it out: the
instruction booklet that came with the machine described a much more
complicated method that involved using magnetic holders. A pair of
holders were included, but they were designed for setting the planer
blades. This operation was a little more traditional, but still
relatively simple. It was made easier by having such open access to
the set plates and knives: the top of the machine opens up and
totally exposes the bolts and drum.
Is this a Benchtop Unit?
The top surfaces of all three benches in my shop are 36" off
the floor, the same height as the top of my table saw. If I were to
mount the 2030S on any of these benches, the jointer bed would be
53" high, way too high for comfort. The bottom of the planer
knives would be two inches lower, which is still a very
uncomfortable height. I mounted the unit on a 24" high stand,
which made it just about perfect for my 6' 2" body. At that
height, the jointer bed was 41" off the floor, and boards being
fed into the planer were just above my waist at 39".
Getting Set Up
It took about fifteen minutes to remove the factory pallet and
plastic that surrounded the unit, and another ten to bolt it to a
stand. Installing the crank handle for the planer was a matter of
tightening one screw: with that done, I was ready to insert one of
two included plastic safety keys and go to work.
The one thing that struck me immediately is how fast the planer
table moves vertically. One turn of the crank raised the bed
3/32", an unusual fraction and one that took some getting used
to. Most of the machines I've operated in the past have adjusted
1/16" on a full turn, a much easier measurement to keep track
of. I discovered on the very first board that the factory
calibration was right on the money. That may not sound like a big
deal, but I can't remember a single other machine, gauge or fence in
the shop ever being true and accurate right out of the box.
Infeed and Outfeed Tables
Planing long boards safely with a benchtop planer is a two-man
operation. Realizing this, the engineers at Makita have added a pair
of rollers on the top of the planer housing. The outfeed man can
just roll the board back to the infeed man, a big improvement on the
usual cumbersome exchange.
Long boards were also a consideration in the jointer design.
Here, a removable extension table can quickly be locked in place to
extend the outfeed table to 30-3/4" long. That extends the
overall bed length to more than four feet, a pleasant surprise on a
benchtop unit. Unfortunately, the extension requires support, so it
can only be used when the machine is mounted on a bench: the stock
machine stand I used offered no support options.
The Jointer
I had a couple of minor reservations about the jointer tables. Being
used to a heavy ground cast iron bed, I was a little dubious about
the 2030S's honeycomb base metal frame and its thin, polished steel
tops. However, neither seemed to affect the quality of the cut in
any way, but a slight wiggle in the infeed table was annoying. The
jointer fence was the only real disappointment I experienced in this
rather thorough shop test. At 90 degrees, the fence adjustment
across the knives was only 1-3/8".
So, at its most extended, it still left 4-5/8" of the knives
exposed. That means an operator can't use the fence to extend the
cutter life: as most jointing is done on 3/4" stock, many
woodworkers like to adjust the fence across the knives in 1"
increments to preserve sharp edges as long as possible. It also
limits your options when dealing with nicks in the knives, you can't
use the fence to work around them.
The fence also fell short of the mark when being set at an angle.
This was a very elaborate process. Adjusting the angle requires
loosening two hand screws and four bolt heads, then tightening all
six when the desired angle is set.
The bottom of the fence isn't beveled, so at 45¡ there is a
7/16" gap between the fence and table. And the fence doesn't
have a bevel scale, so you have to set the angle manually with your
own protractor, jig or gauge.
Ease of Use Built In
The net weight of the 2030S planer-jointer is 97 lbs. That means
it's a two-man job to move it around. So, for those jobs when you
need to bring the planer to a job site, Makita made removing the
jointer very easy: just loosen two knobs and lift it away.
That same attention to detail is evident in all aspects of
maintenance with this tool. Access to the replaceable carbon brushes
couldn't be easier, they're right under the lift-up hood. Access to
the chain that drives the feed rollers is also a snap, and the only
maintenance required is periodic lubrication with machine oil.
Dust collection is also easy with the 2030S: a built-in exhaust
port can easily be tapped and connected to an individual shop vac or
a central dust collection system.
Overall Impression
The active part of this shop test consisted of running a number of
rock maple and walnut rough sawn boards through the 2030S. Results
on the 12-9/16" planer were quite impressive. Thanks to the
9,000 RPM no-load speed, mill marks (using a fresh set of knives)
were virtually invisible. Well-designed feed rollers and generous
tables meant that snipe was almost nonexistent.
Feed rate on this model is energetic (34.5 ft/min), but not
overly so. Our boards came out with a thickness so uniform that even
a 1 mil (1/1000") gauge couldn't find any deviation. After
about 100 lineal feet of stock, there was no perceptible wear on the
knives. Even the noise levels were quite comfortable, a surprise
considering the nature and history of similar machines.
My overall impression of the 2030S is that it is a well-designed
machine with several innovative features that more than make up for
its one design flaw (the jointer fence). I liked all the new twists,
from rollers on top of the unit to great access for maintenance,
locking knife drums and simple knife replacement. This is a safe
machine for beginning woodworkers and a welcome addition to any
advanced practitioner's shop.
On-line article is here...
http://www.woodworking.com/articles/index.cfm?fa=show&id=170
|
|
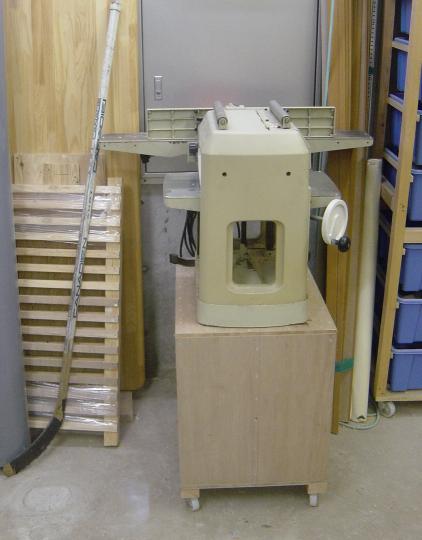
OK on to my used unit...
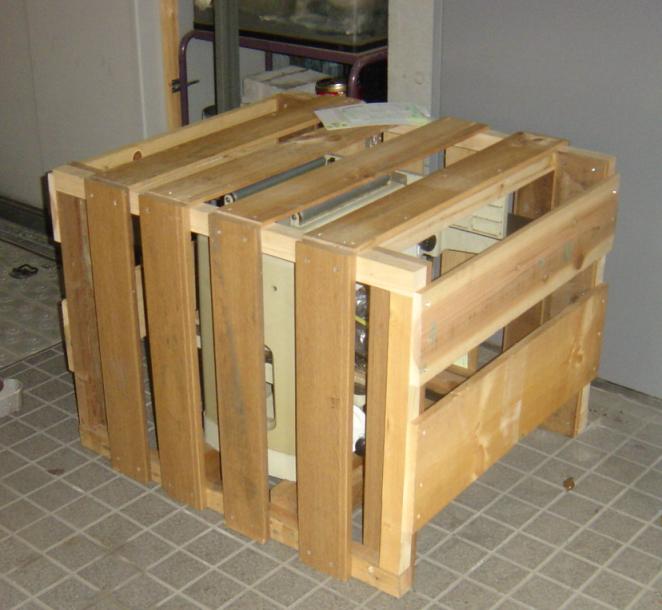
This is how it showed up at my door, all caged up, but wanting to get out.
I tied some ropes to it, and lowered it into it's new home, the Dungeon.
The wood in the crate is of some use, but alas the nice darker colored boards on
the sides are MDF covered with some kind of plastic fake wood grain stuff,
bummer!
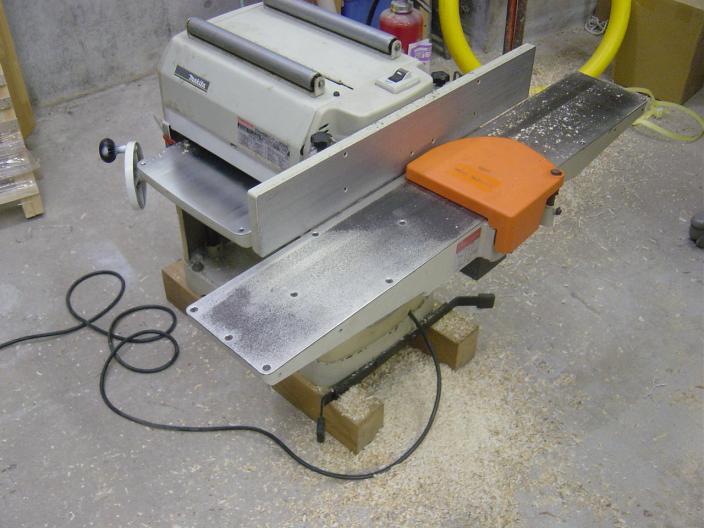
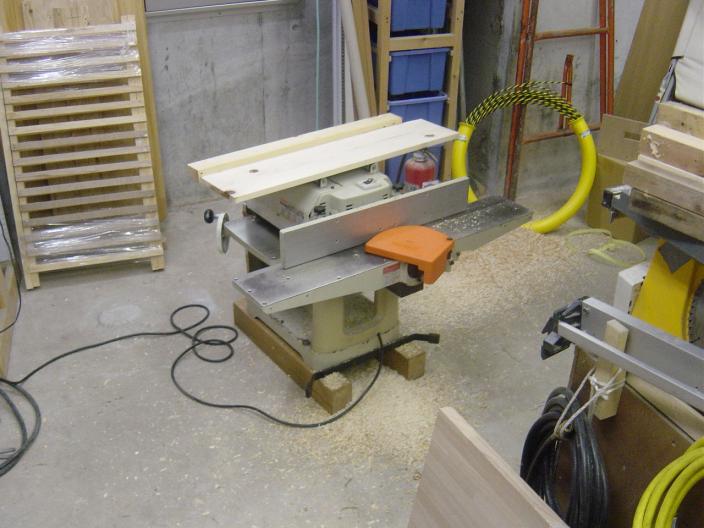
I got it uncrated, and set-up on one end of my shop, I checked to see that
everything looked fine and I fired it up, ran a board through the jointer and
the planner, it works great!!

Here is an old cutting board from the kitchen, very used and not to pretty
anymore....
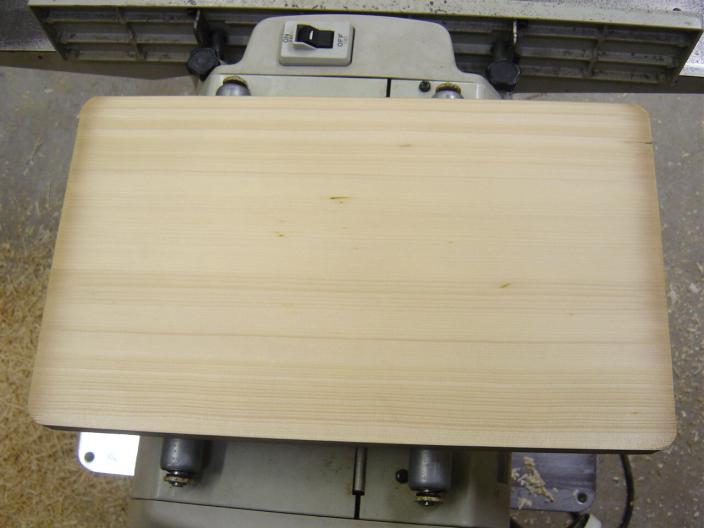
Run it through the planner a few times and SHAZZAM it looks like new!! My
wife sure liked this aspect of the new tool! I think she is going to tell all of
her friends, so I may have a few more cutting boards to do!
!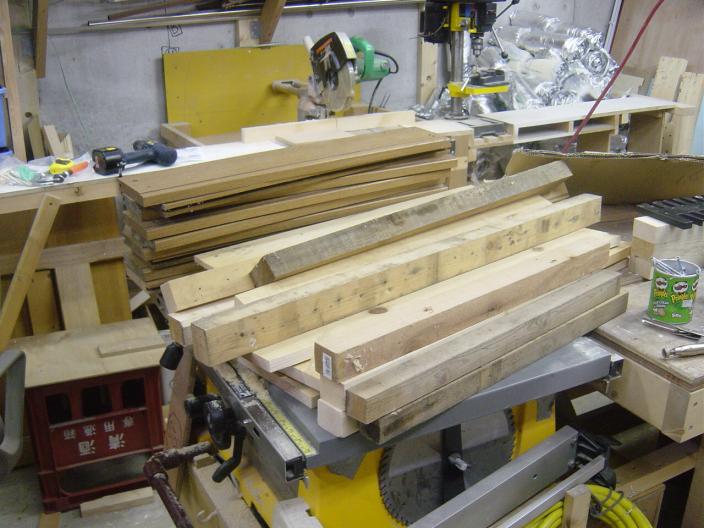
This is the pile of sticks I got out of the crate the Jointer/Planner came in,
nothing really good in there, but still, wood is wood.
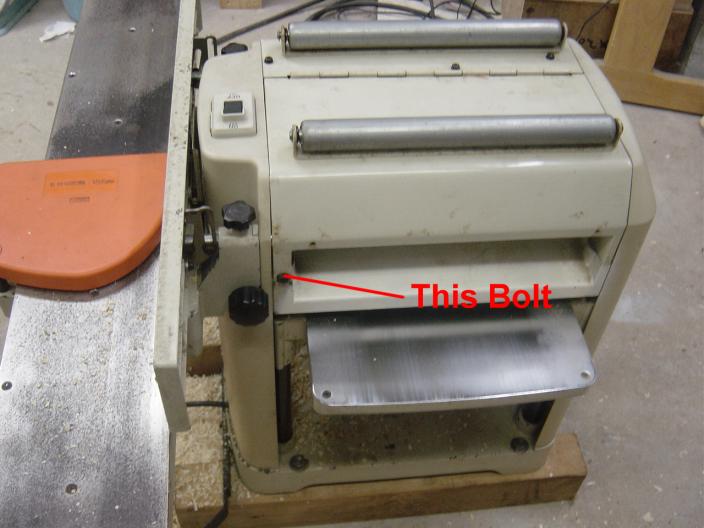
This is the outfeed side of the planer, to open the cover to get at the knives
you just have to remove the one bolt.
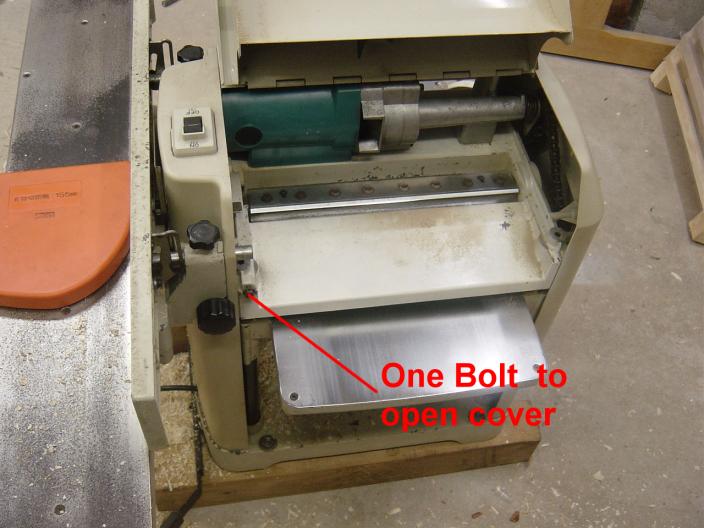
Planner cover open
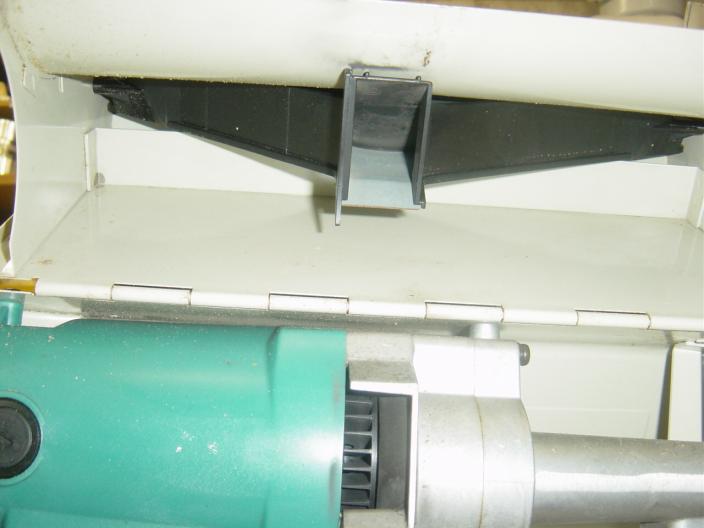
I noticed that the Planner has a built in fan, this cools the universal motor,
and it helps with the chip extraction on the planner. When the cover is closed
the fan exits into the black plastic duct at the top of the picture. This duct
is then directed to the edges of the planner chip exhaust...
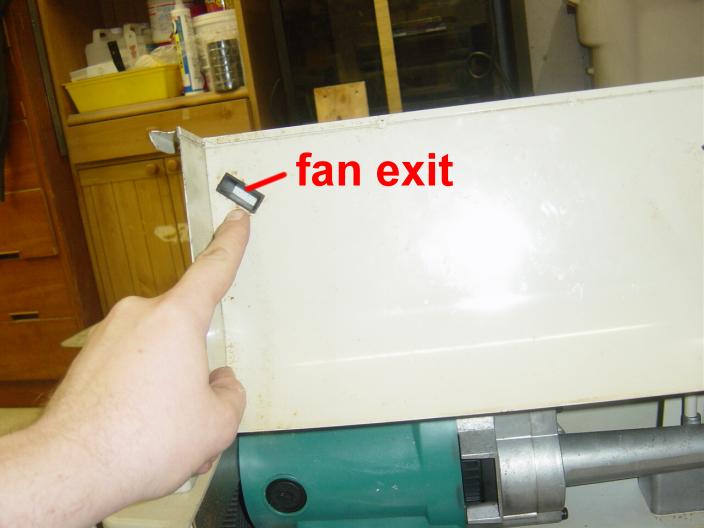
This really shoots the chips away from the machine...
You can see the chips are in a pile about 2 feet away from the planner.
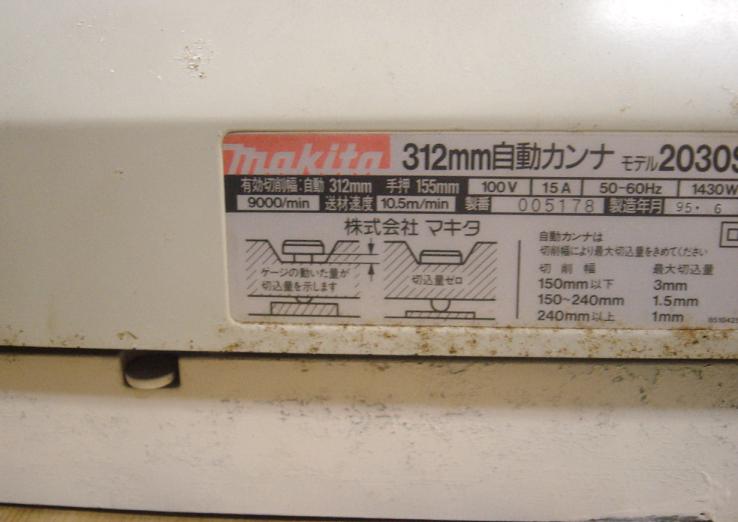
In the center of the pic is a description in Japanese about the depth of cut gauge
built into the infeed side of the planner. When that little "T" shaped
thing lifts up, the space under the edge of the "T" is the depth of
cut, simple but is seems effective.
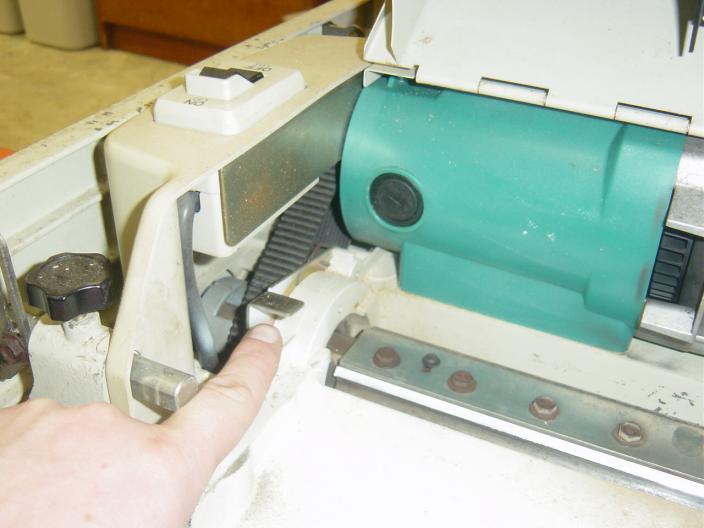
Again back inside the planner, this is the auto lock, when the cover is lifted
this locks the cutter head in place, you can push it to rotate the knives when
replacing them. Sure lookd easy to replace the knives!
The jointer side of things.
True this is not the jointer to end all jointers, but it does work well for it's
size. the bed of the jointer is steel, and they are a bit more rusted than I
thought. The look like they could be just replaced, as the are only screwed on,
maybe I'll see how much they want for them. In the mean time, I'm going to sand
them down a bit, and wax them to keep them from soiling the wood they come in
contact with.
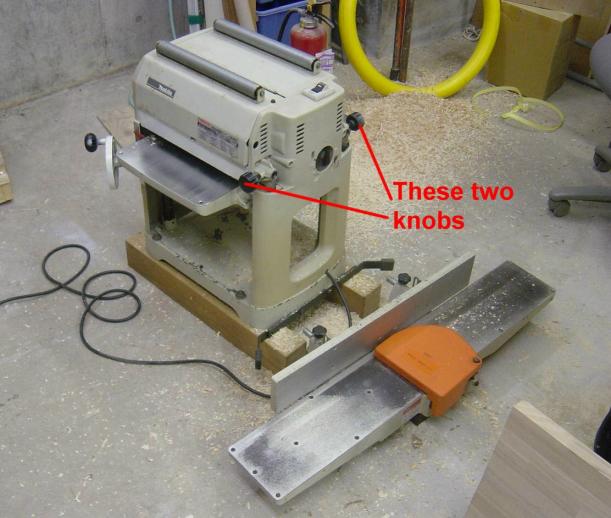
for ease of transport, the jointer comes off the side of the machine by
loosening just these two knobs, easy as can be (I do not know why you
would want to do this..)
The Fence on the Jointer is the one thing that is not so good.
The online review says this, and I have to agree with it.
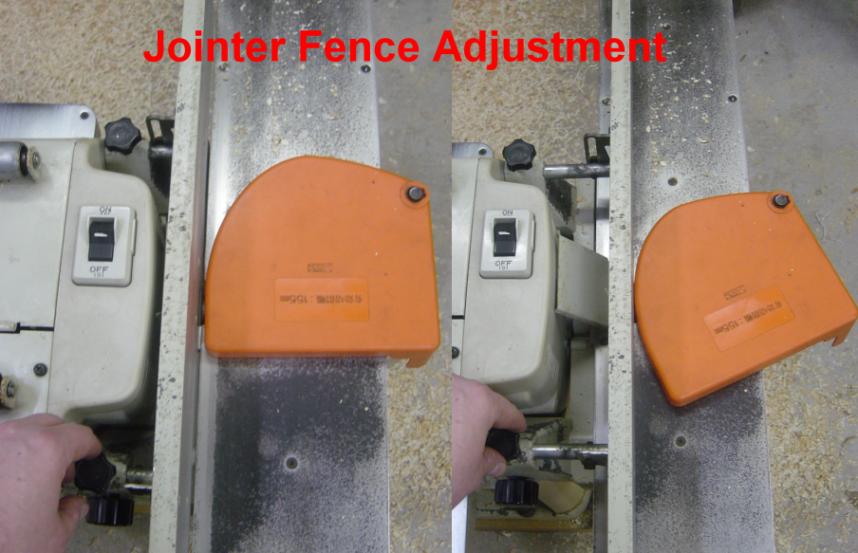
Here you can see the fence set from max to min adjustment, and the tilting
function is not great.
Still it does a good job at jointing the edge of the boards or the faces, up to
6" wide, very well, and that really is what we do the most of with our
jointers.
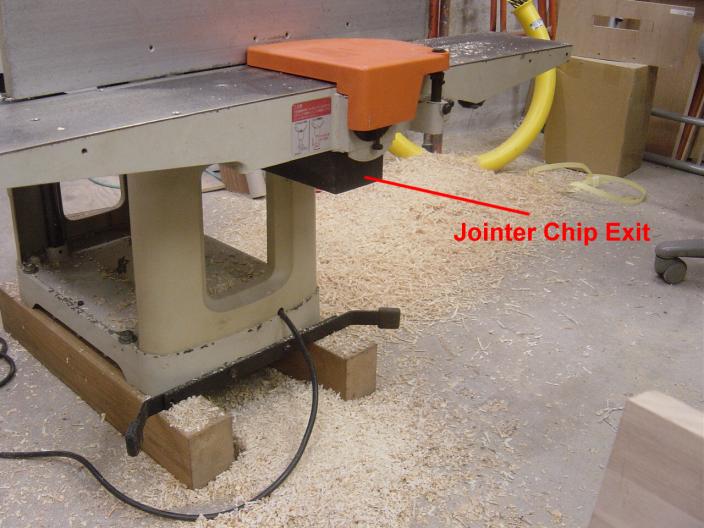
This rectangular box is where the chips fall from the jointer,
I should be able to fabricate a dust hood here fairly easy.
Well that is about it for now, I should build a cabinet/stand
for this unit, like suggested in the online article, and put some wheels on it
as well as find it a place to nestle.
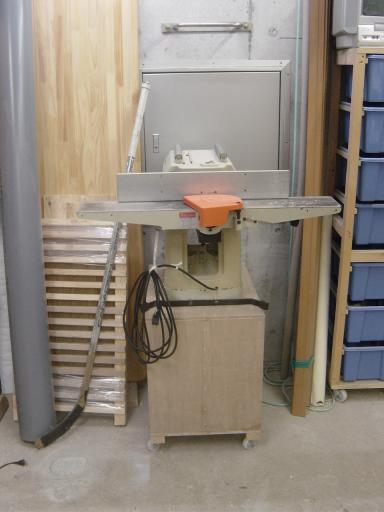
OK I had enough of the Jointer/Planner sitting on the
floor, so I built a stand for it.
Nothing compelx, but it should do. When I get some time I'll
put some drawers in the sides of it.
The Front side
At first is seemed a bit high, but, like in the article above, I built the stand
about 2' tall, but if the stand is too tall, I can adjust it.
The backside
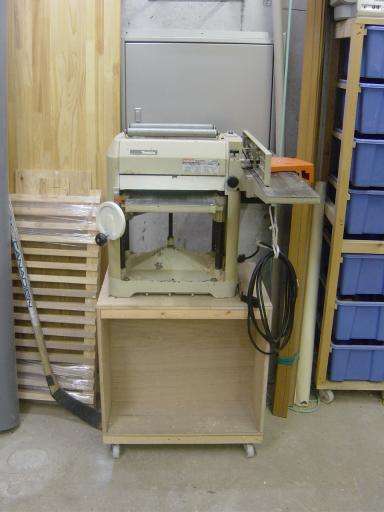
The infeed side of the Planner
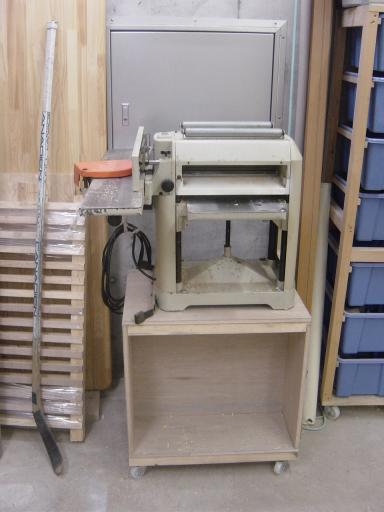
The infeed side of the jointer
Oh I see a dirty spot!
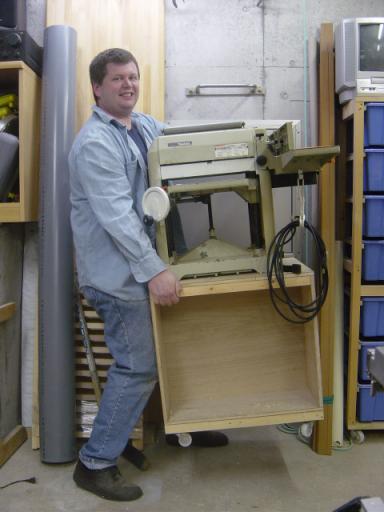
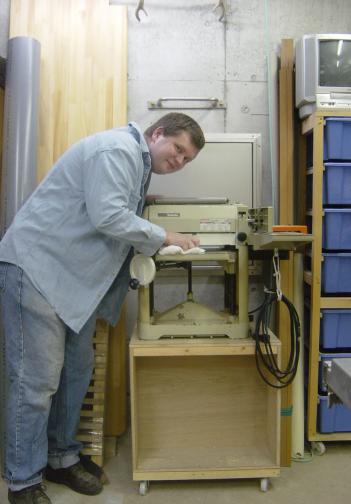
What do they mean this is not a "portable" Planner!!!
Cheers! |