_____Stu's___Dungeon__
Joyful Honda
Treasure
Lesson Room Cabs
In the beginning
2
3 4 5
6 7 8
9
10 11
12 13 14
15
Jointer1
Jointer2
Router
Table1
Router Table 2
The Doors
Do
Pa
Give Me A Brake
Cyclone
Cyclone 2
Cyclone
3
Cyclone 4
Liquor
Shop Reno Tenjinsama Shrine Tree Tour
Beer Shelves
Wine Shelves
Five Cuts
Drill Press <NEW
DoPa 2007 <NEW
Turning
Jean Francious Escoulen
Eli Avisera Demo Day One
Eli Avisera Day Two
Lathe Stand!!
Turning
Roughing
It
Sharpening Station
Bowl Blank Processing
Captured Hollowing Rig
<NEW
Logging In Tokyo
Woodlot Woodlot
2006 Woodlot
3 Woodlot 4
Chainsaw Mill
Chainsaw
Mill Mk II
Liquor Shop Wine Shelves
I've got to make some new wine shelves for the liquor shop.
I got a really good start on them today.
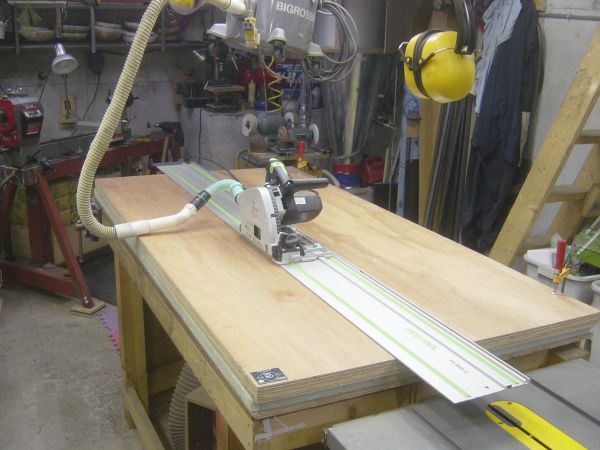
I sure like my Festool TS55 saw and rail system, makes this work easy!
I ripped the sheets 4 deep (9mm thick plywood).
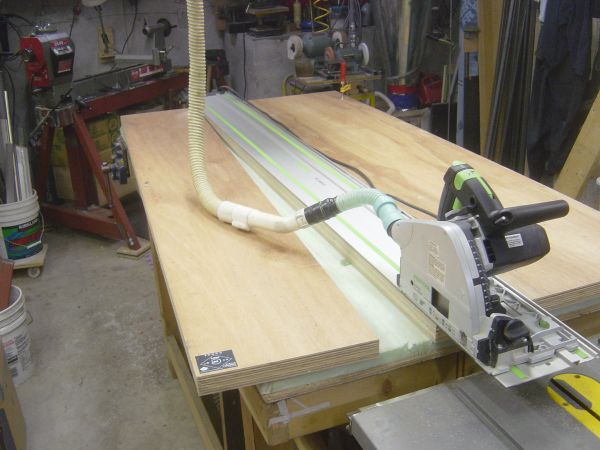
Yep, sure is slick!
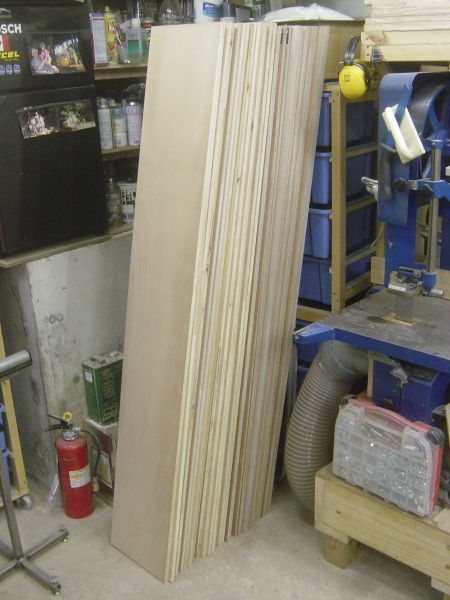
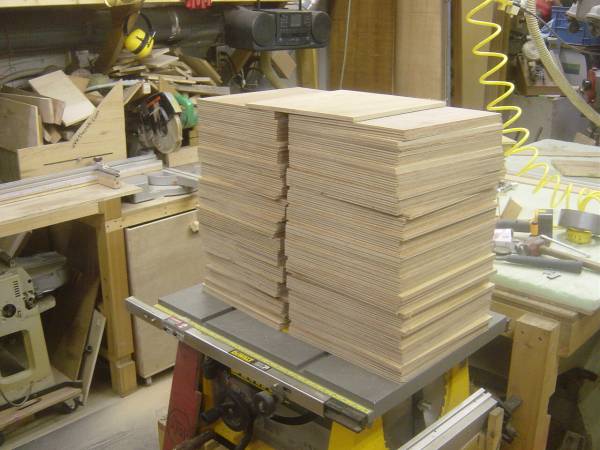
Here is all the sheet goods ripped to width.
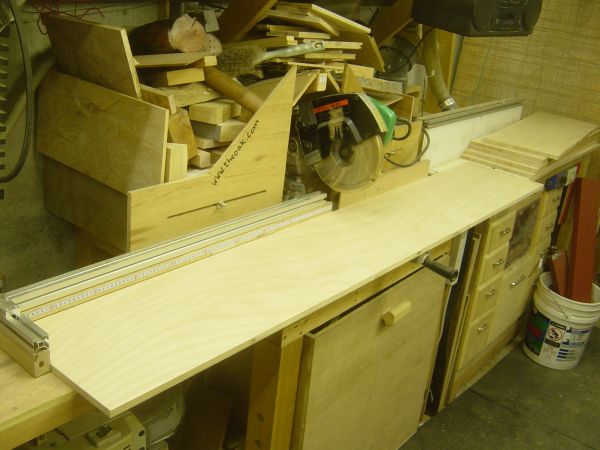
Next I had to cut stuff to length.
For the shorter pieces I was able to use the stop on my SCMS fence.

Unfortunately, I could not quite cut all the way through (sure would like the
10" saw!!)
... but a couple of pulls with the saw, and everything is OK!
When cutting the longer pieces, I could not use my stop block
set up left of the blade,
I had to use a temp stop block on the right side of the blade.
I always use two pieces of plywood, one thin and the other thicker.
Doing this give me an undercut of sorts, this allows any sawdust somewhere to
go, so I do not have to worry about the sawdust throwing my cuts off, simple and
easy, I like!
I decided to use the corner making bit on my router table for the casework....
This big sucker! I got the instruction on how to set it up from the Lee Valley
website, worked great!
Making some set-up cuts
That looks good, took less than 10 minutes to set it up.
The sides of the casework are going to be about 150 cm tall, so I had to make a
good push jig for the router table.
Long arm and used the worktable for support, worked great!
Here is the jig I made to push the standing up pieces.
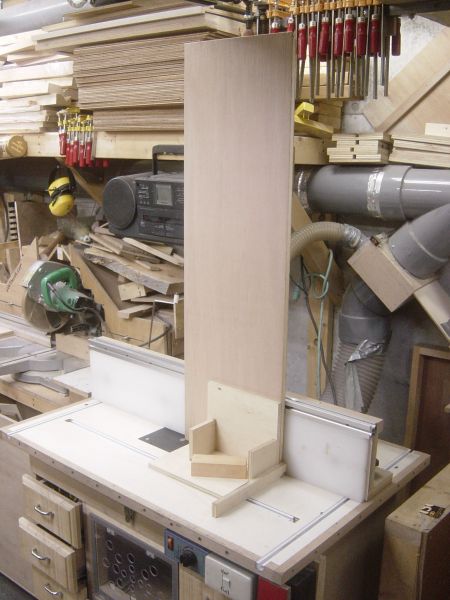
Those pieces are 99 cm tall, again, worked great!
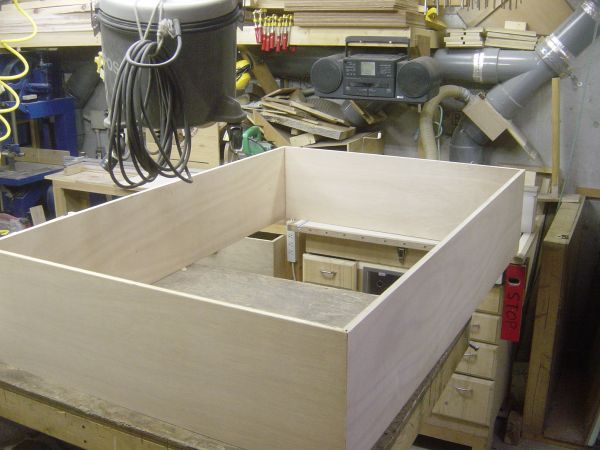
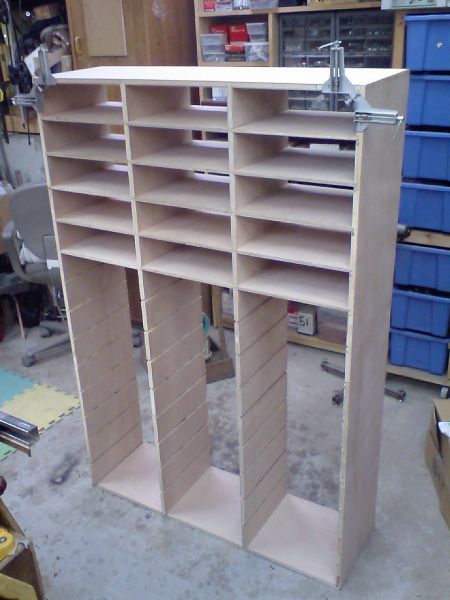
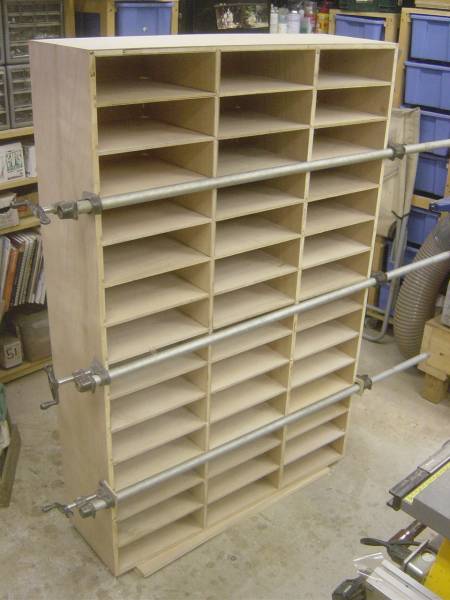
I just dry fit one of the cases together to make sure my math was right (it was)
Next, I have to make a bunch of dados in the sides and the
middle support pieces.
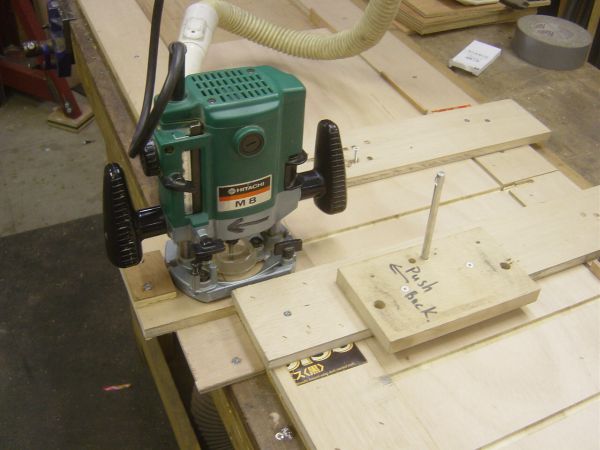
I made up a jig for my handheld router to do this.
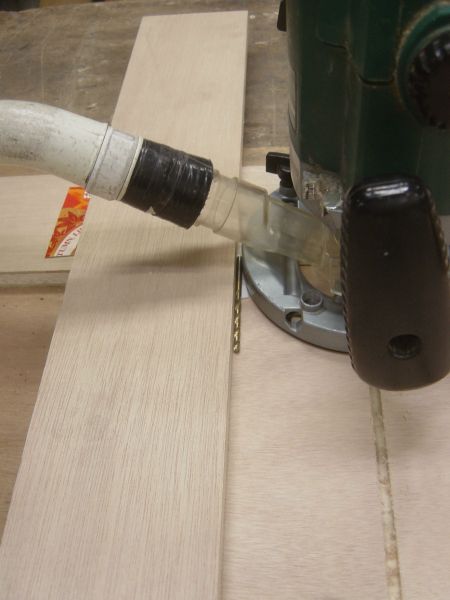
it is a simple sled of sorts, I'm using a 6mm straight bit, and the shelves will
be 9 mm,
so I did the first cut and then used a 3 mm drill bit to set up the second fence
to do the return cut.
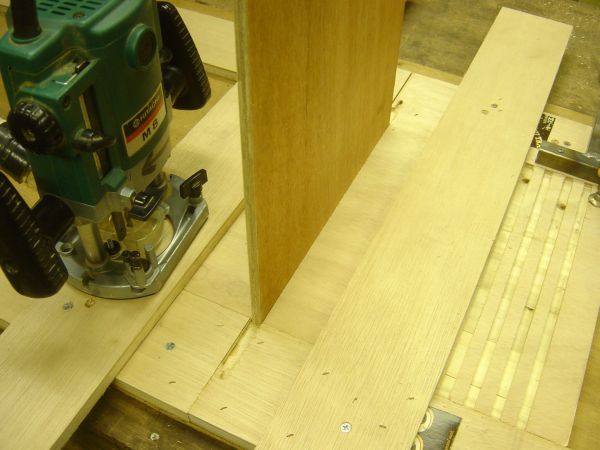
After few tries, I got a nice tight fit
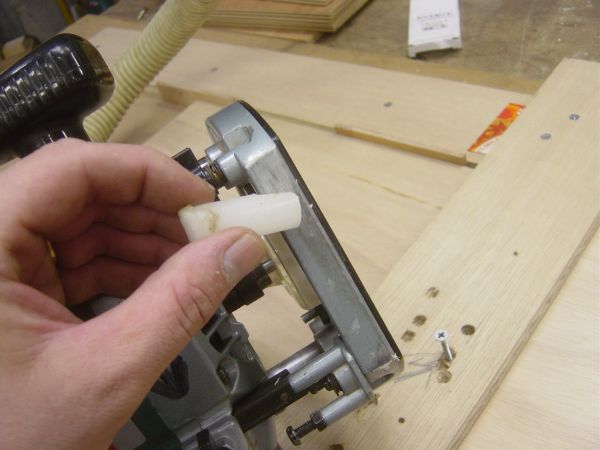
Now I need to do repeatable dados, all spaced 95 mm apart, what I did was use a pin drilled into the sled, when I cut a dado, I release the clamp, and then slide the piece to the right, the pin engages the dado I just cut, and sets the spacing.
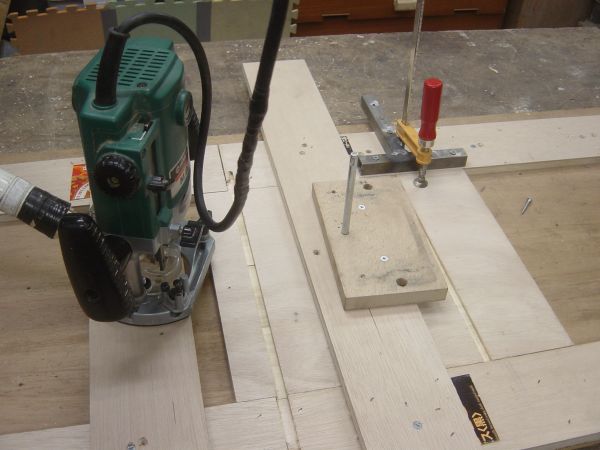
Nothing fancy, but it works
Here is the results on a test piece, they were exactly 95mm apart.

One last thing, I got this from a box of stuff a buddy left me when he moved
away from Japan.
It is basically a switch that you plug in between an appliance and the power,
this worked great, as I do not have to reach up onto the the vacuum cleaner each
time to turn it off.
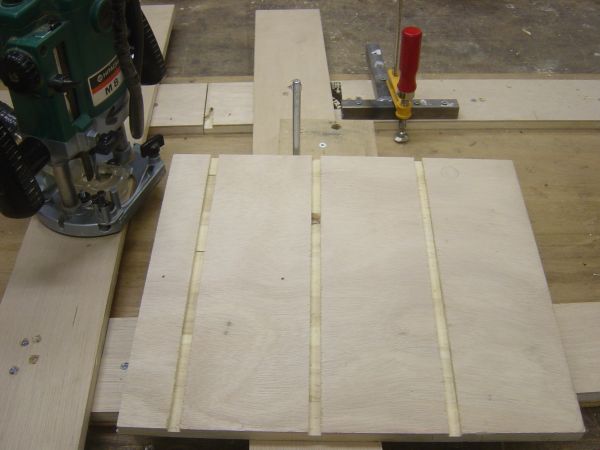
A couple more pics


The router sled, just some more shots.
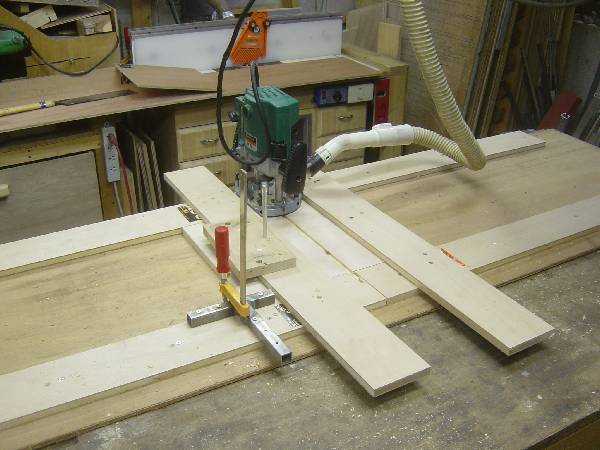
I used my vacuum cleaner for dust collecting on the Festool TS55 and the router, it works OK, but, when I opened the vacuum to see if it needed cleaning............
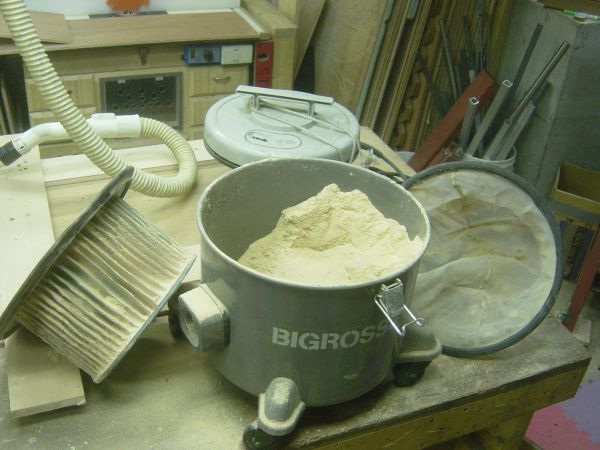
I realized that this vacuum works more than OK.
If I did not use the vacuum, all that dust would be clouding up the Dungeon.
(I really need to build a mini cyclone to go with this vacuum).
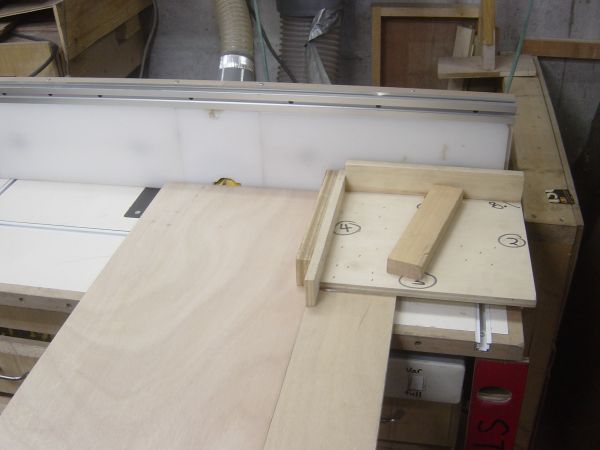
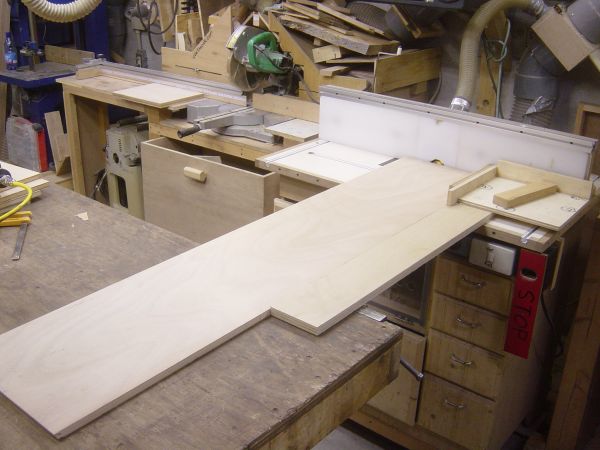
Now on to the real cuts.
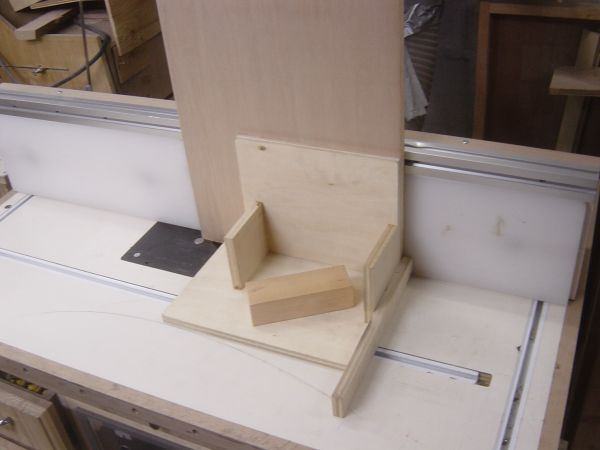
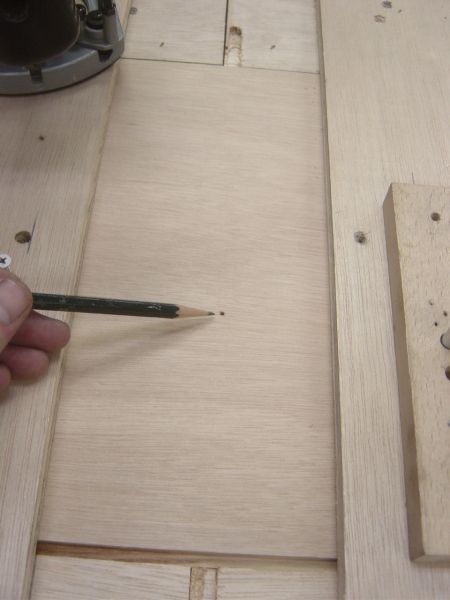
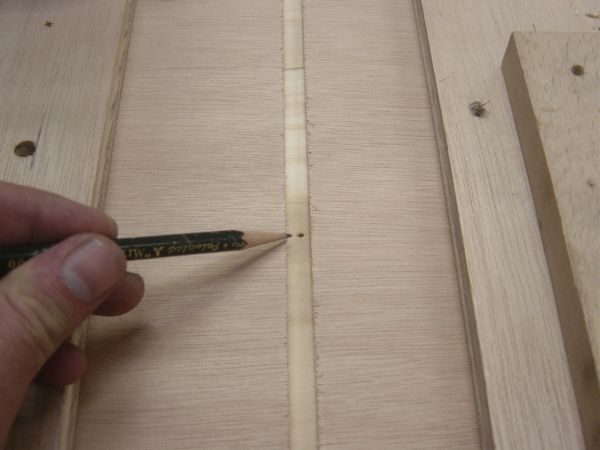
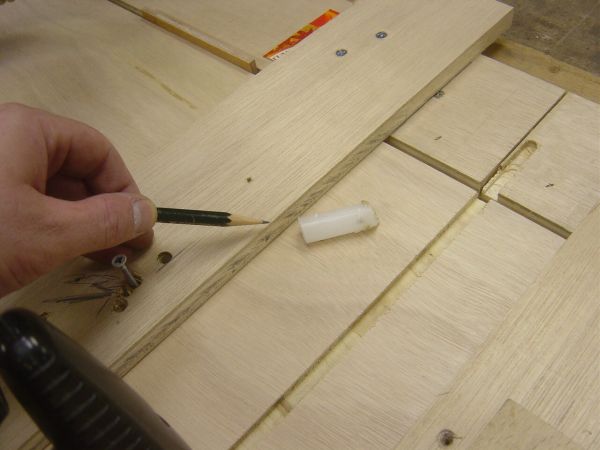
I needed to make a way to start the boards, so make them all start at the same point.
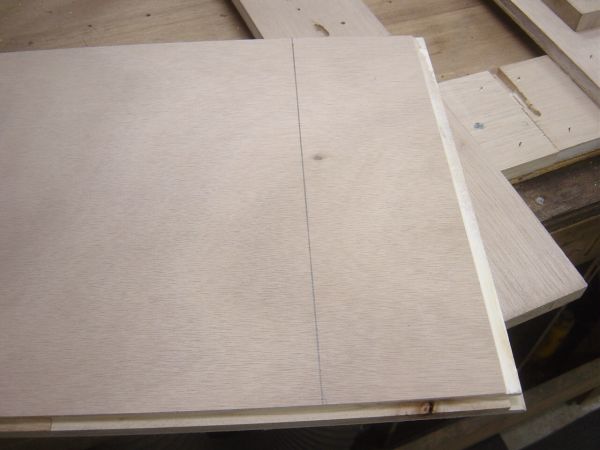
I marked on the board where I wanted the dado to be......
and lined it up with the jig.
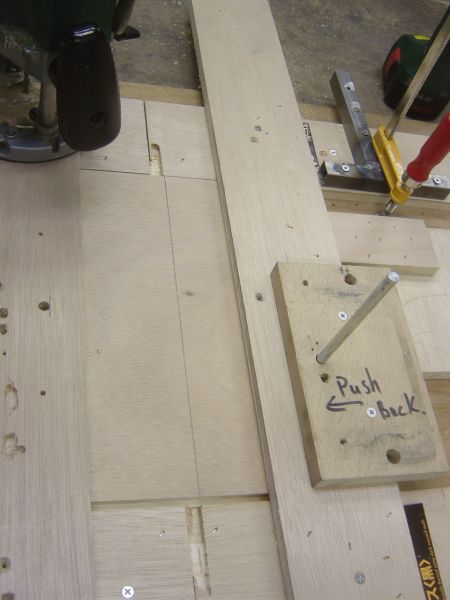
I made up a spacer block so the next one would be the same as the first one.
![]()
Nothing fancy, but it works well.
![]()
Now I know each board will start from the same point.
I only had one clamp to use on this jig, I have a toggle
clamp...................somewhere....
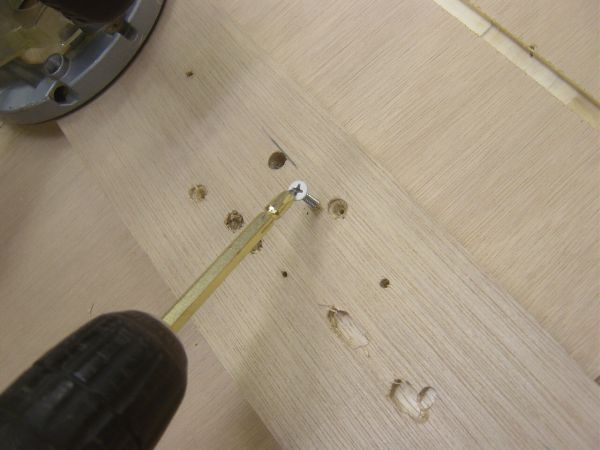
so I just used one screw to hold the board for the first two cuts,
then I can use the clamp I have for the last 12 cuts.
Now I did not want a hole in my cabinet, so I place the screw where the shelf
dado would go.
Cut the dado, and the hole will disappear behind the shelf.
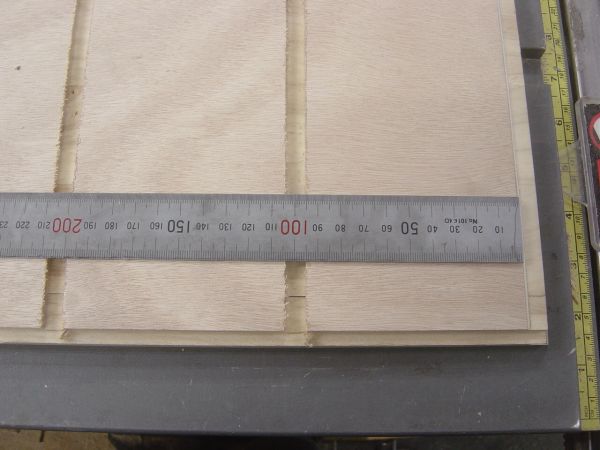
Here is the first dado cut, 95 mm for the inside edge of the cabinet
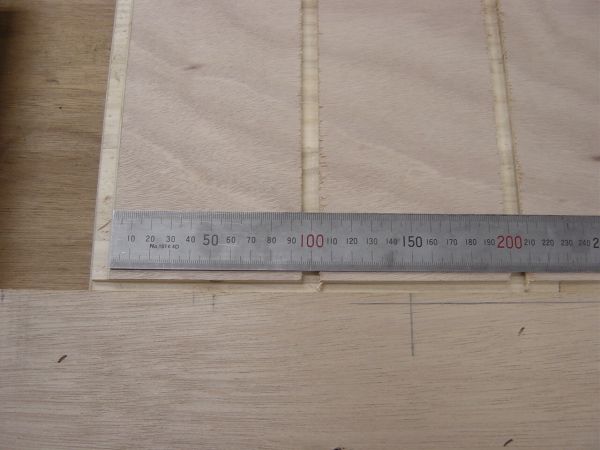
Here is the last dado cut, 95 mm from the inside edge of the cabinet.
With 14 dados to do, even if my jig was out by half a millimeter that would be 7 mm out by the last cut, but is was dead on. Yes, you could say I'm pleased!
All done for now!
I got some more done, but I also tweaked my jig a bit.
I put a resting place for the router at the beginning of the cut, this saves me
moving it off the jig each time. I also put a stop block there, and while not in
the pic yet, I put one on the other end too.
To make things move easier, I waxed the sides of the router and the jig rails
Boy what a difference! The router slides so much easier!
You have to be careful, you do not want wax on anything you are going to paint
or stain.
With a new 6 mm bit, things are going well!
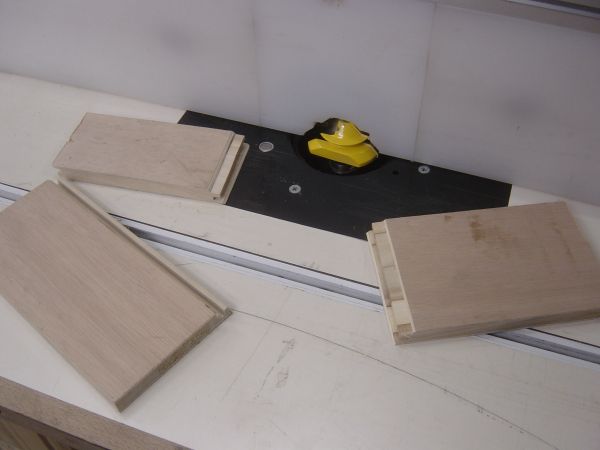
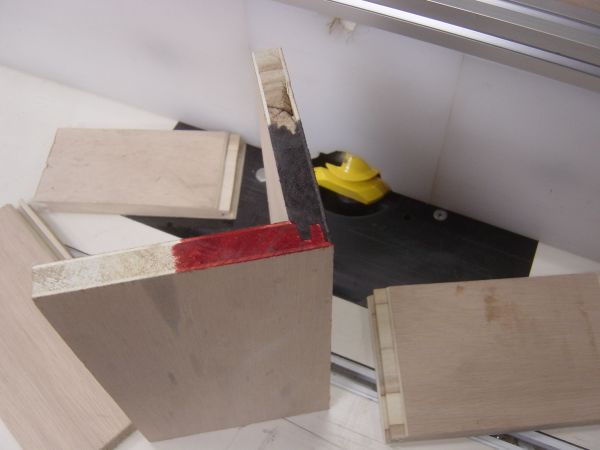
OK, I got all the pieces cut, and I did a test run.....
Well it all seems to fit together, now I got to get the glue out!
I sure had to cut up a lot of these shelves, and it was sure nice having a SCMS
to do this one.
I cut 4 pieces at a time, and it went quickly.
Well, there is one done, two to go, and then the trim for the front edges.
I got the other two done

Now all I have to do is put the strips on the front to cover the plywood edges,
and make the pieces that will stop the bottles from rolling off the shelf.
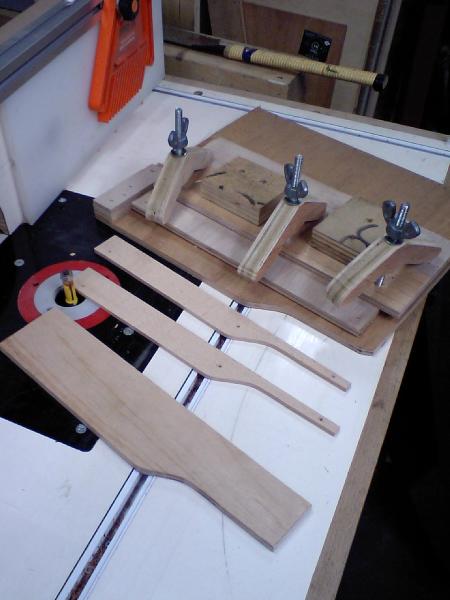
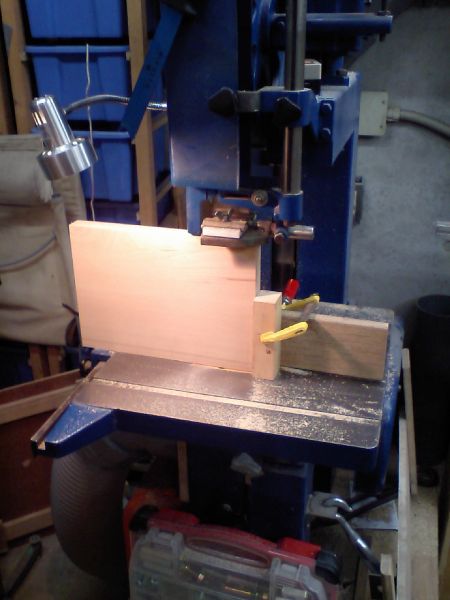
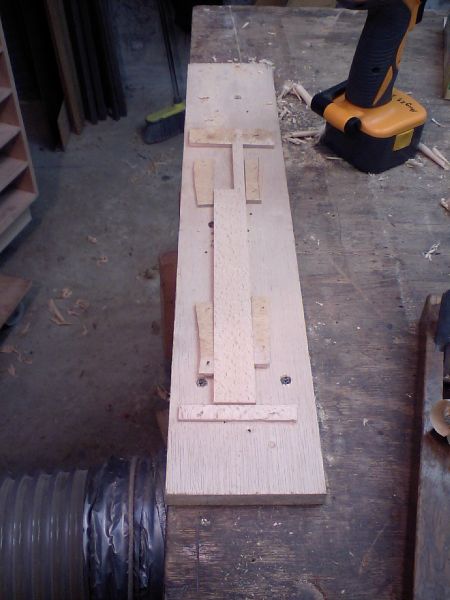
The vertical strips I did first, that went well, but the horizontal pieces made me come up with a jig to do them.
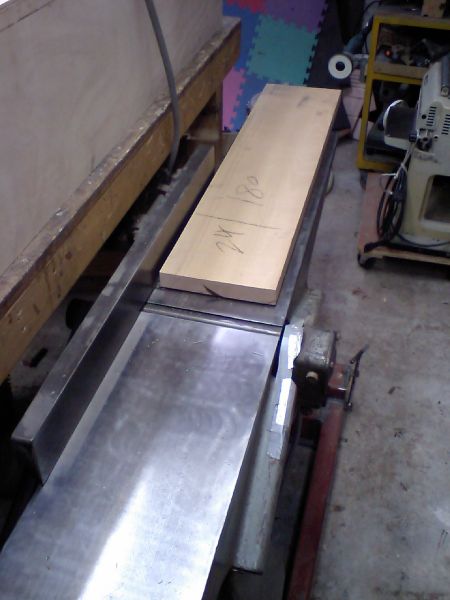
I needed the pieces to be fat on one end and then thin on the other.
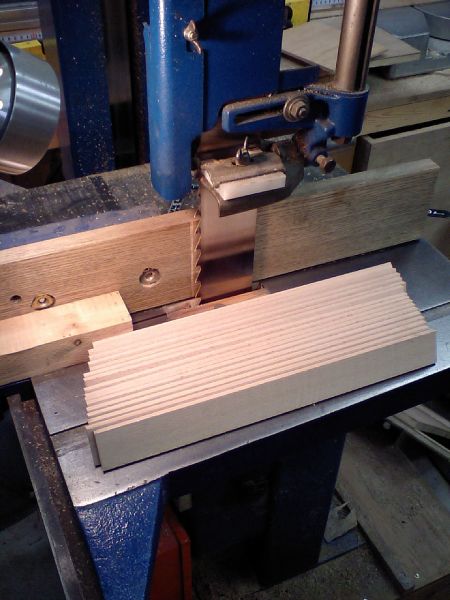
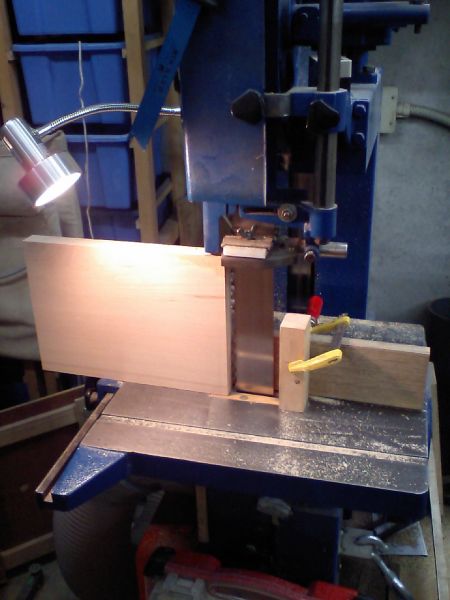
I jointed the board, and put it through he thickness planer (it was twice the
length of the wood in the pic) cut the piece to length, and then sliced them up
on Big Blue.
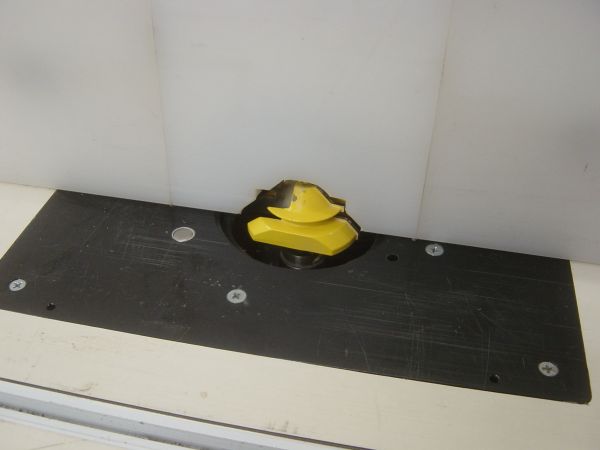
Now I made up a jig to route them on the router table.
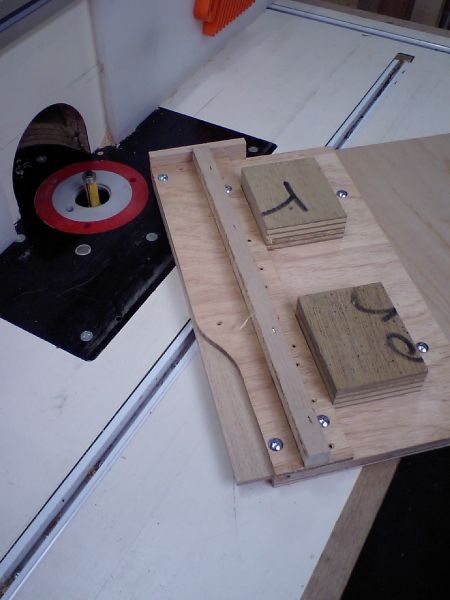
The jig holds them in a template and then I use a straight cut bit with a
bearing on it to get the shape I want.
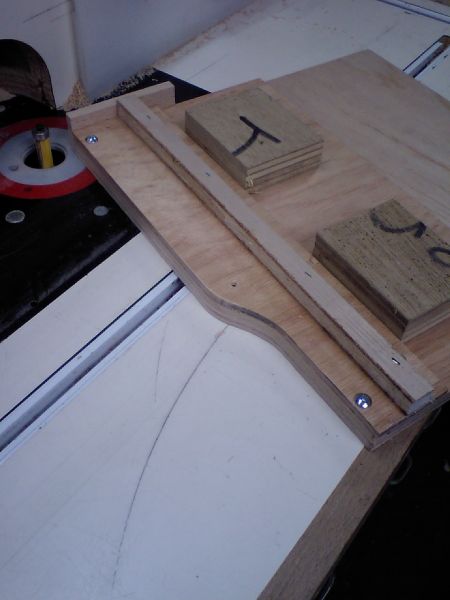
After routing.
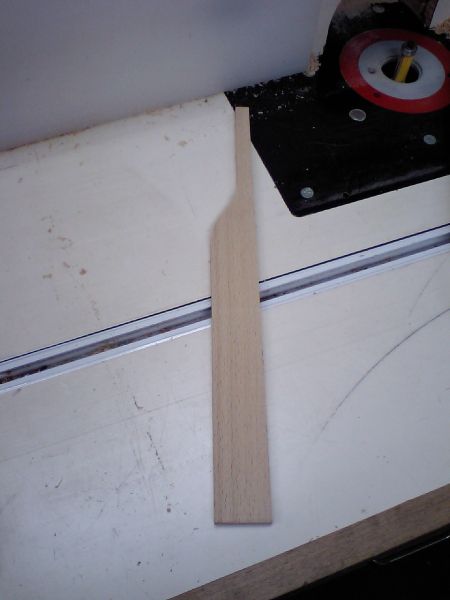
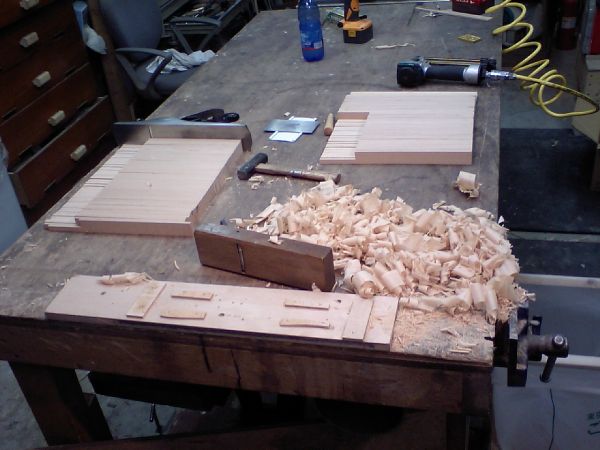
That is what one looks like finished.
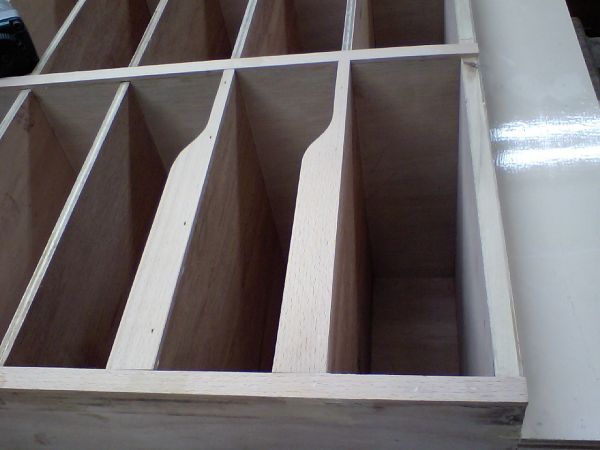
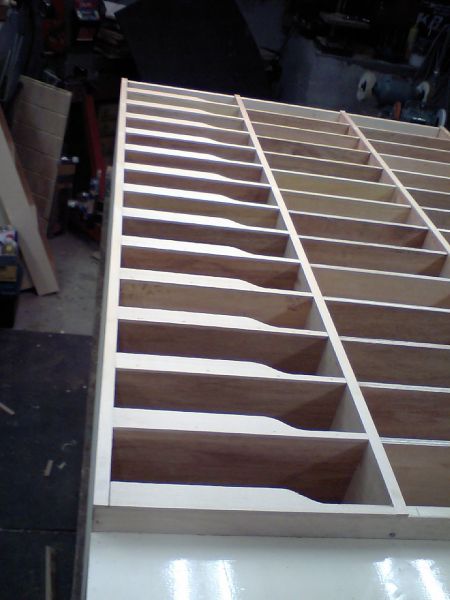
Here are two on the shelf fronts. You see the shelves are only 9.5 cm wide, so
some of the fatter bottles would be hard to get in and out of the shelf, this
way, I have a spot to take them in and out, but the bottles are also prevented
from rolling out (think earthquakes).
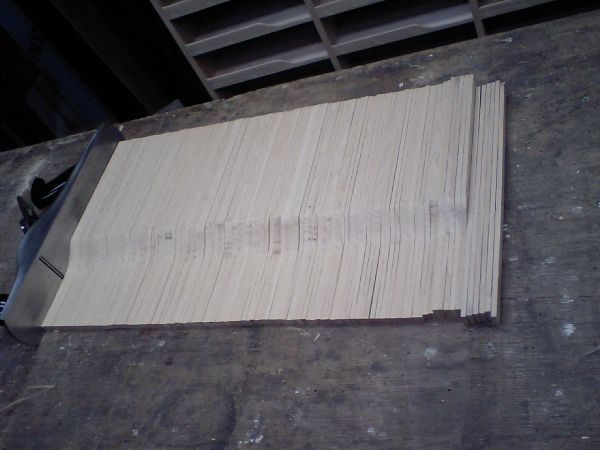
Well that is 15 done, I need 120 more.............
OK a boost in Production!!

I can now hold two in the new jig and they are more secure.
Plus they come and and out of the jig a lot faster!
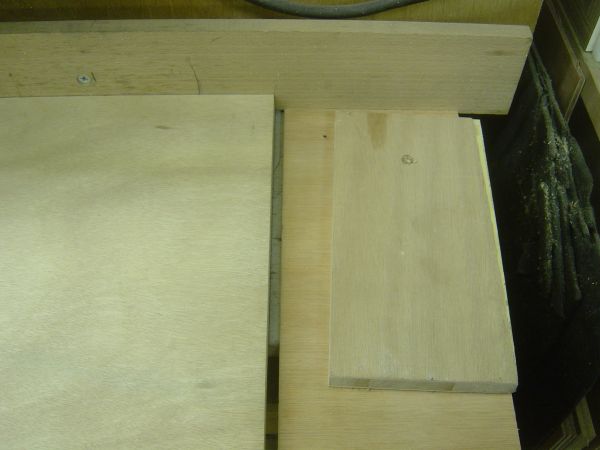
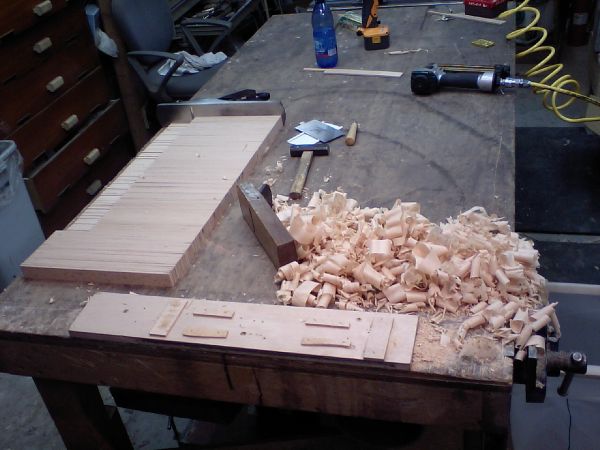
I took the stock I needed to make the rest of the fronts and jointed it, then
cut it to length
Once cut to length, I decided to cut a notch, to remove a bunch of the waste, so
they would be easier to route.
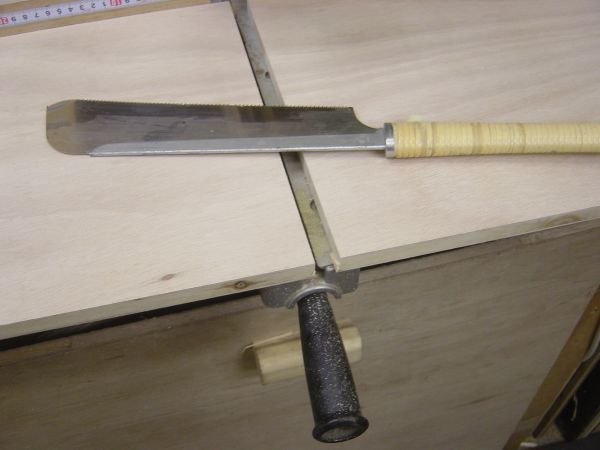
It is sure nice to have the right tool sometimes! Big Blue just hogs through
this dry Beech like nothing doing.

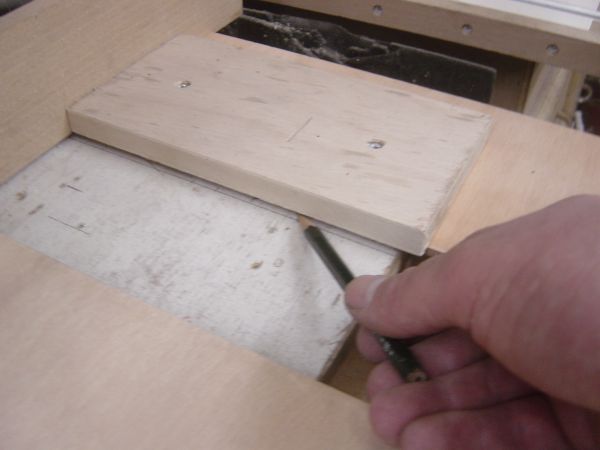
There are all the pieces cut, now they need to be shaped and then planed smooth
on one face.
I don't own a drum sander, so I made up this little jig, and got out my trusty
old refurbished Japanese hand plane (yep the one I bought for $1 used)
Half way there.........
Whew, all done!
There they are, all shaped!
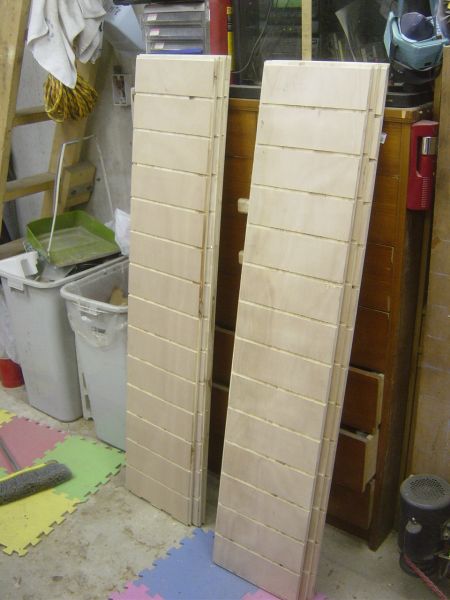
Here is the first unit all done...........
Another view.
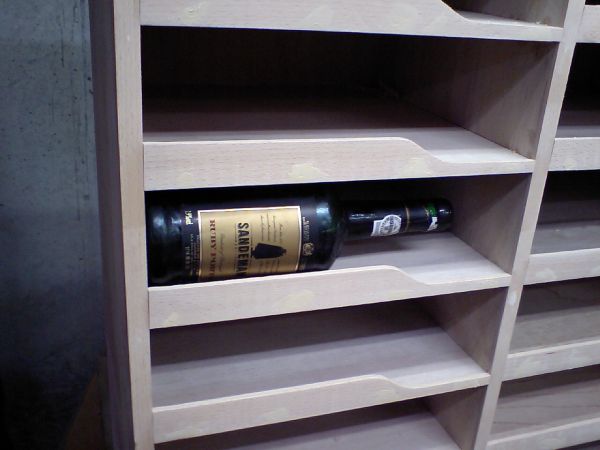
This is how the bottles will fit in there
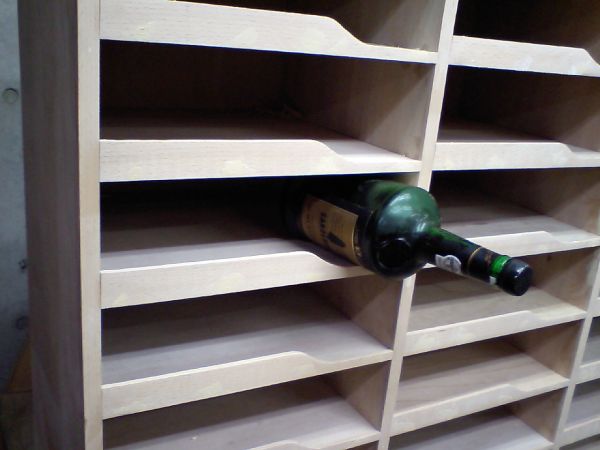
and the cut outs will let the bottles be removed.
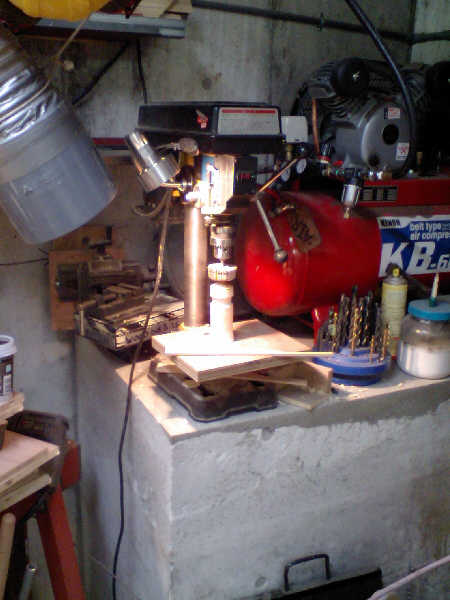
I had a flapper wheel that goes on a drill, I put it in my drill press, but I
was concerned that the chuck might fall off the drill press,
so I turned a support on the lathe, and set it up like this, worked
GREAT!!
I used it to round over the edges of the front pieces, so that no one gets a
sliver when reaching for a bottle of wine.
This is the spot the three new shelves will go.
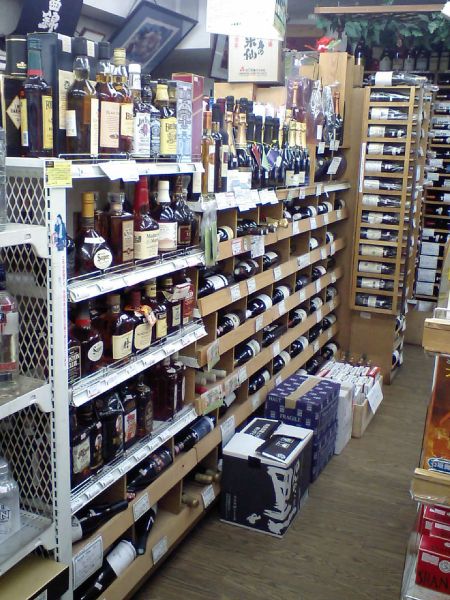
Opposite end view.
This is the spot that the new humidor will be going, so all that wine will move
into the new shelves.

Another view
OK, here is the first shelf on it's way up out of the Dungeon..........
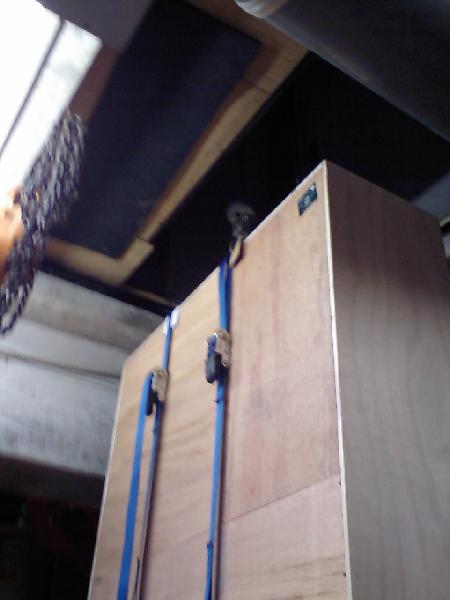
Just hanging around......
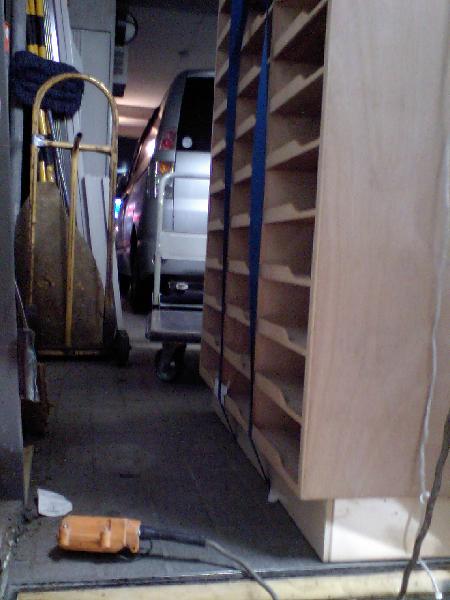
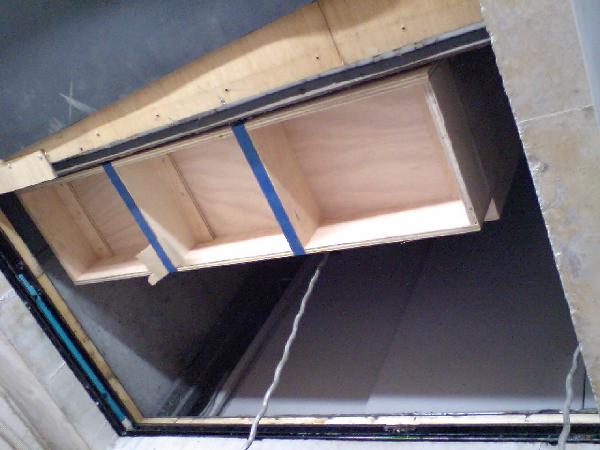
Looking out the hatch, the shelf has landed.
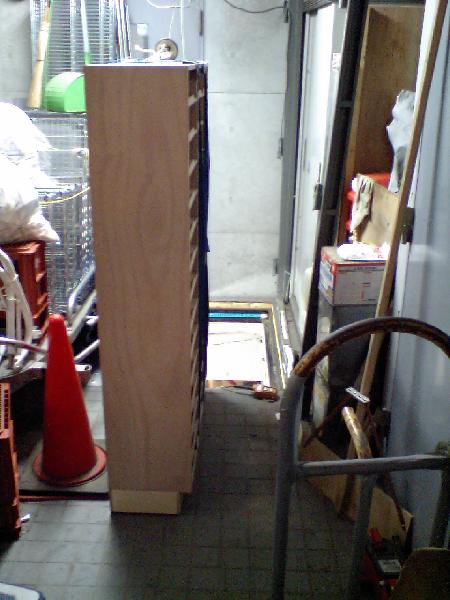
Looking back towards the hatch.
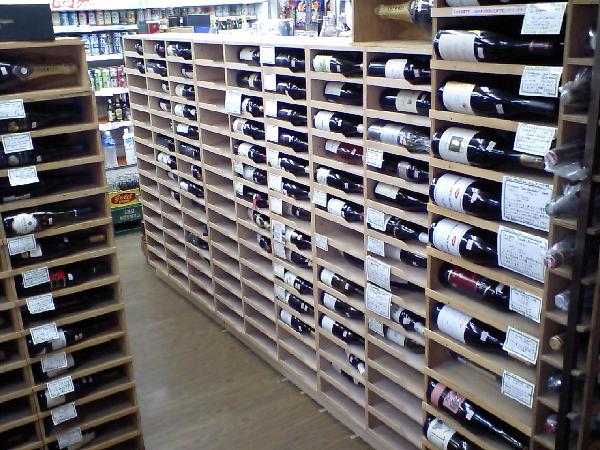
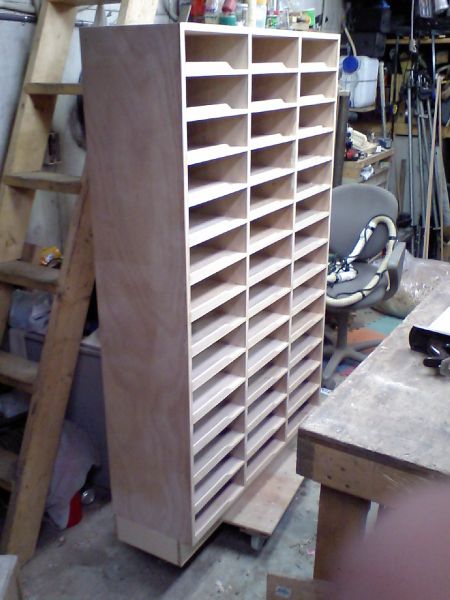
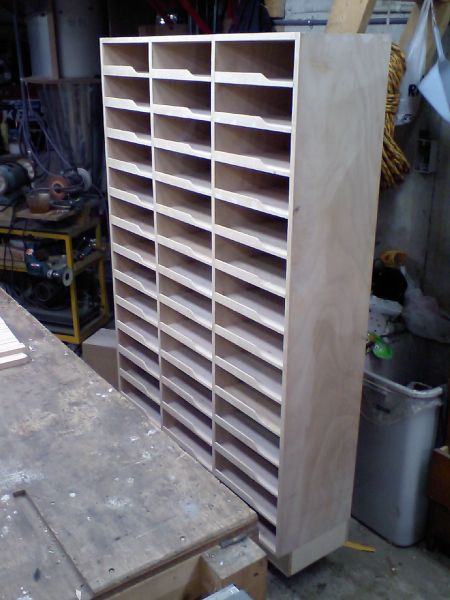
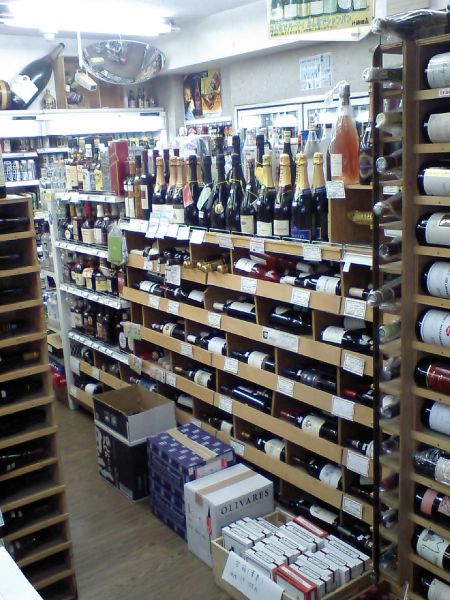
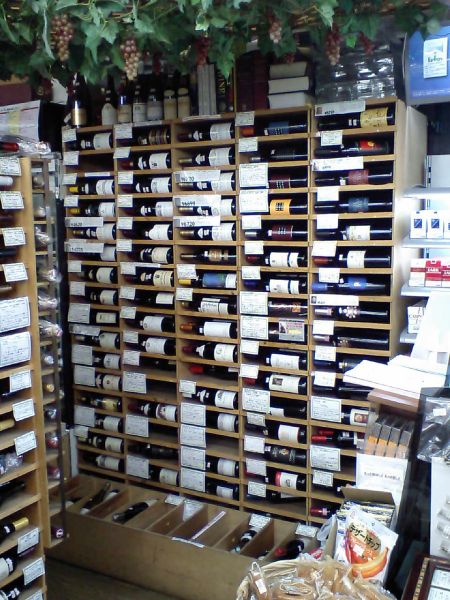
OK there they are!!!
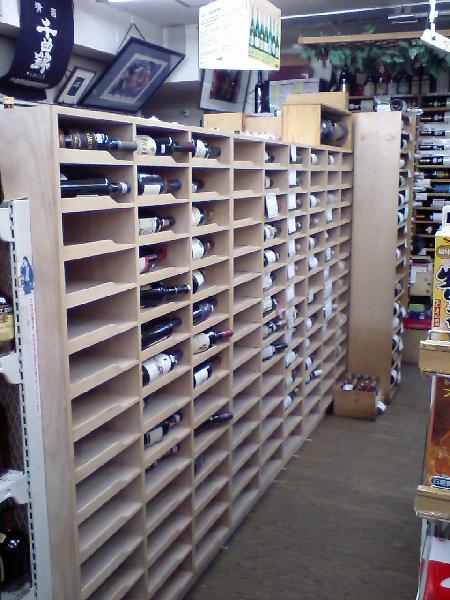
Another shot of the new shelves in the shop!!
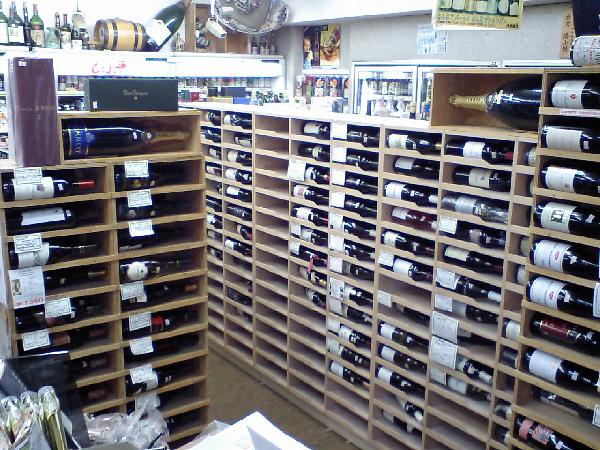
Lots of spaces to fill!!
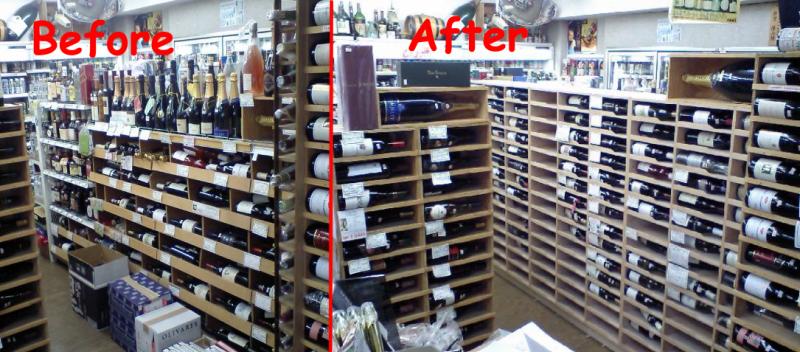
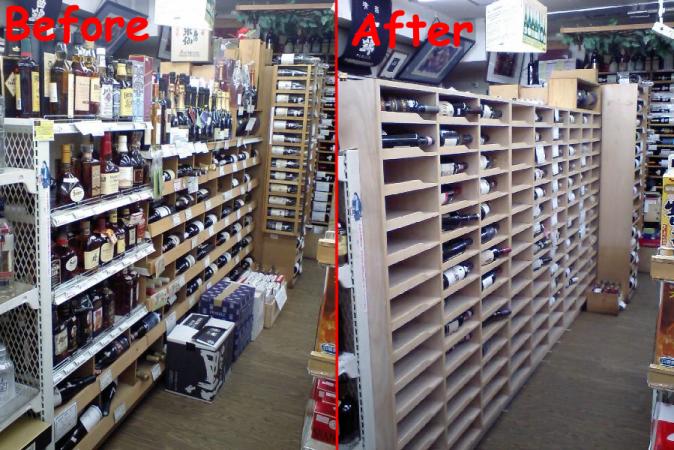
Some before/after shots
Cheers!