_____Stu's___Dungeon__
Joyful Honda
Treasure
Lesson Room Cabs
In the beginning
2
3 4 5
6 7 8
9
10 11
12 13 14
15
Jointer1
Jointer2
Router
Table1
Router Table 2
The Doors
Do
Pa
Give Me A Brake
Cyclone
Cyclone 2
Cyclone
3
Cyclone 4
Liquor
Shop Reno Tenjinsama Shrine Tree Tour
Beer Shelves
Wine Shelves
Five Cuts
Drill Press <NEW
DoPa 2007 <NEW
Turning
Jean Francious Escoulen
Eli Avisera Demo Day One
Eli Avisera Day Two
Lathe Stand!!
Turning
Roughing
It
Sharpening Station
Bowl Blank Processing
Captured Hollowing Rig
<NEW
Logging In Tokyo
Woodlot Woodlot
2006 Woodlot
3 Woodlot 4
Chainsaw Mill
Chainsaw
Mill Mk II
What the heck, a new year, a new page...
Page 12!!
Welcome to the newest Dungeon dweller....
My lovely wife and I went to Costco to do some shopping, we got a bit of a late start, but when we got there we were looking around. I spied something in a wooden crate, and sure enough, it was a fairly large (hey, this IS Japan) air compressor.
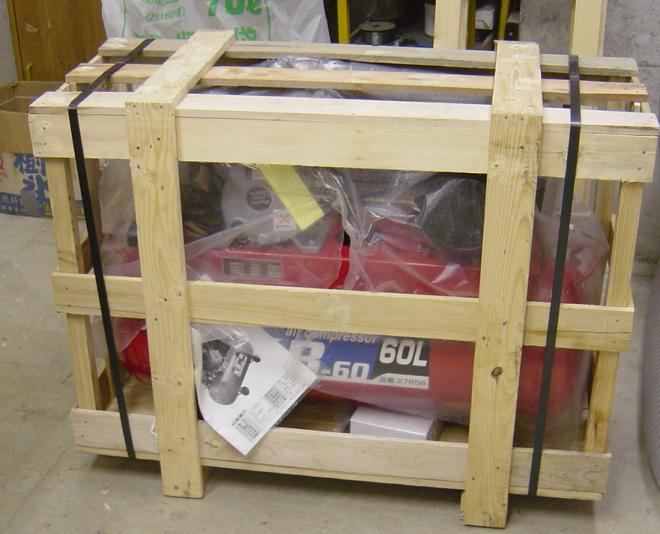
I got it down to the Dungeon with ease, I'm getting really good at that...

Here are the specs on the unit, 100V 9 Amps, 900Watts, runs to 8 Kg/cm or 115 psi.
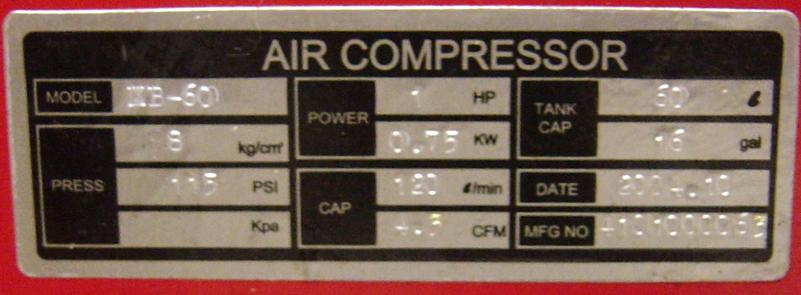
The tag from the unit, 60 liters or 16 gallons
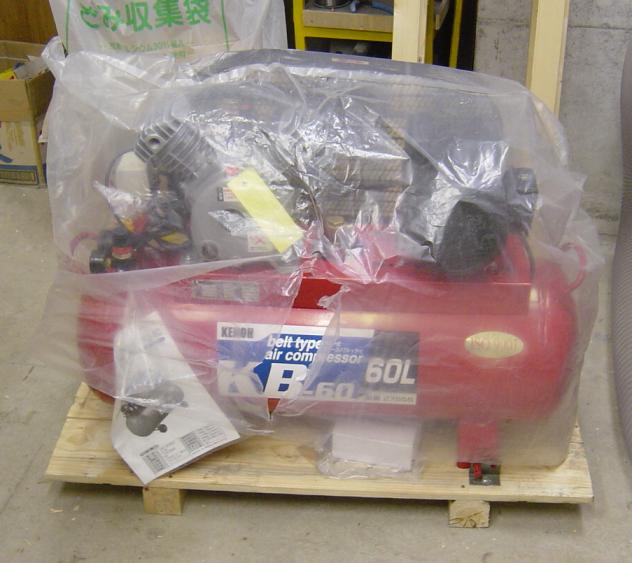
Almost off the crate

Just about there...

All ready to roll!
The biggest thing I notice over the small portable compressor I have now, an "Oil-less" one is how quite this one is, man, what a difference that is going to be.
I have a spot to build it in, I need to do a bit more thinking on the subject, as the compressor still has to be accessible for oil changes, and draining the tank, but I want it built in.
Lee Valley stuff arrives!
My kids went to Canada to visit their grandparents for the
Christmas break.
I took the opportunity to use them as couriers to bring back an order of
stuff from Lee Valley tools.
One of the things on my list of stuff was the Lee Valley planer knife sharpening
jig.
I go it, and it does look slick.
A guy named Dough Abbot showed me his Planer
Knife Sharpening Jig and
in there he says to lap the surface of the this jig, as the bumpy paint the use
on it could throw the bevel off.
I took his advice and did this, here are the results....
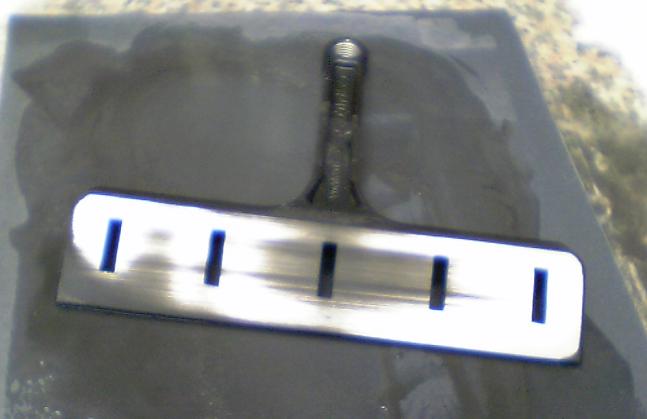
Sorry the pics are not any good, I took them with my cell phone.
In this pic, I'm just getting started
This is the right side of the jig, it does not seem to be as flat as the left
side.
This one corner I could not get flat, but I don't think it will matter.
The very middle had a bit of a dip in it, but I lapped it out
You can really see this corner is lower than the rest of the jig.
about one hour and 6 sheets of sandpaper later this is about as good as it got.
Well maybe a little better
While I was at it, I lapped the bottoms of the clamps flat too, they were not
too bad.

All ready to go!
I only had up to #1500 paper, the piece that comes with the tool is amazing!
I got to find a local source for that PSA backed sandpaper!!
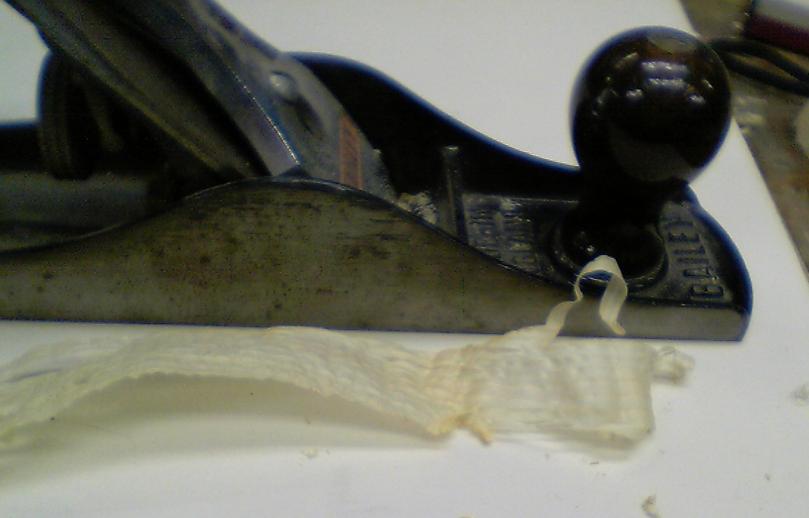
I then took my plane and spiffed it up, that is the shaving I got after using
the plane blade sharpening jig I also got.
The shaving measured 0.007 mm Thin!
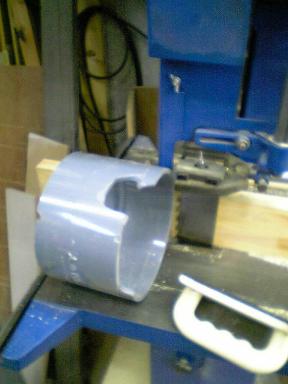
I needed a way to cut up the 6" PVC pipe that I7m going to use for my DC/Cyclone.
The pipes long heavy and not easy to cut, this is what I came up with...
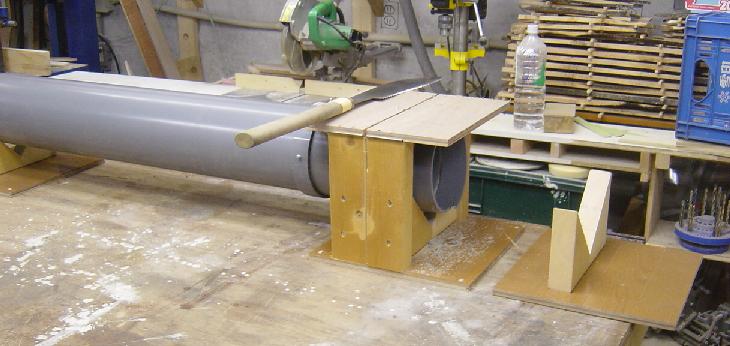
The "V" blocks are screwed to the benchtop, they can be moved to suit the length of the pipe
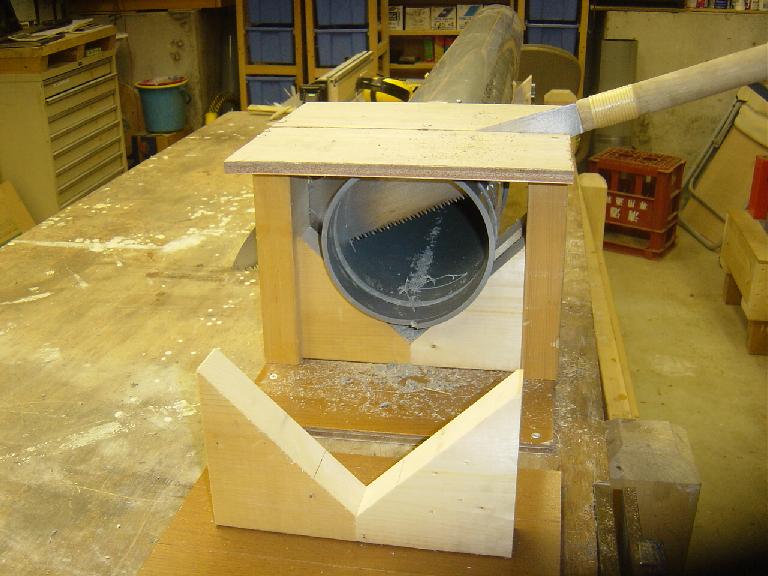
Here I just wanted to try it out and I trimmed off a few inches
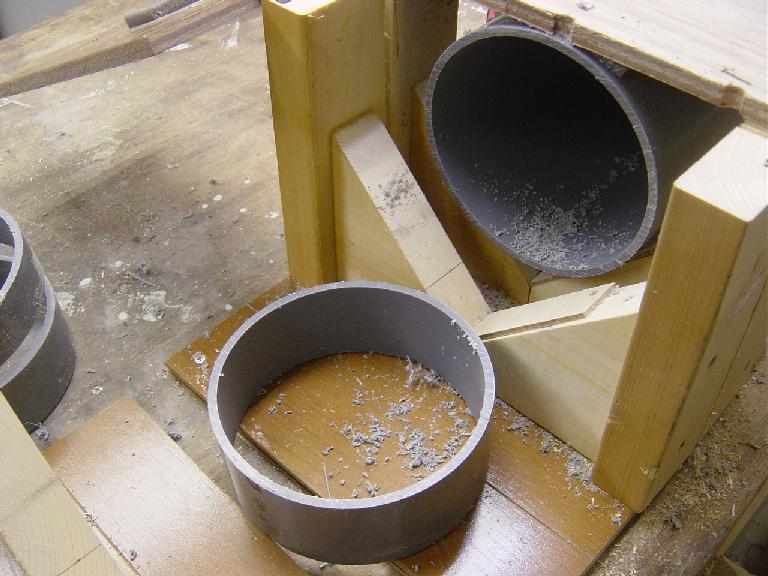
The cut is done, easy low-tech, I like it!!
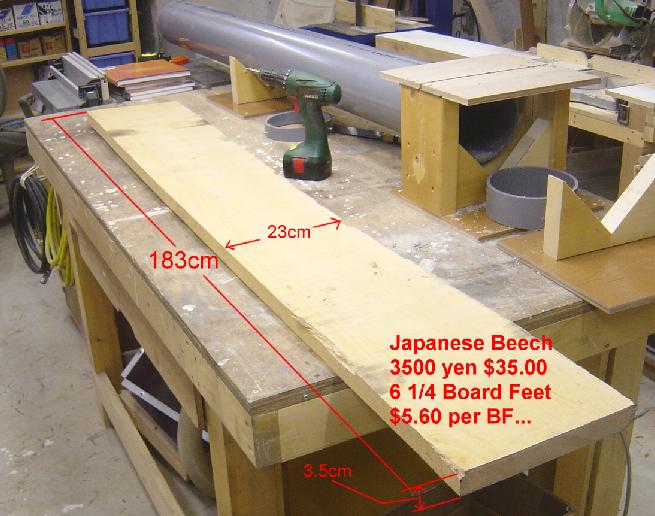
I bought my first piece of hardwood today, not bad, I'm going to get more of it
in the near future.
This Beech should make good doors for the cabinets, I hope!
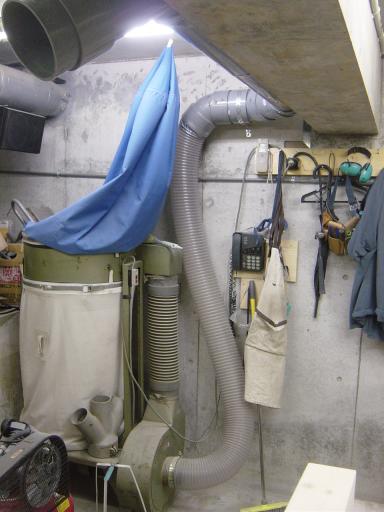
On to the Dust Collection ducts...
Now that I can cut up the large pipe, I thought that I might as well get cracking on the ducting for the DC.
I'll run it from the DC, up to the ceiling, then across the
shop to the opposite wall, in the middle of the ceiling
I'll put a "Y" that will have the first drop, this will server the
Table Saw, and the jointer planner.
Looking at the DC corner from the edge of the bench, in front of the SCMS.
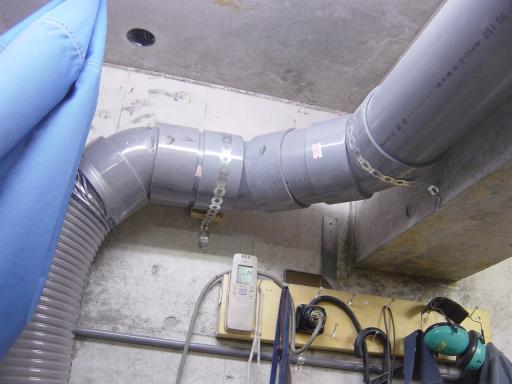
The first corner, this will be the take-off point for the Cyclone when it gets
built,
I'm using two 45s for each corner to keep the flow going!
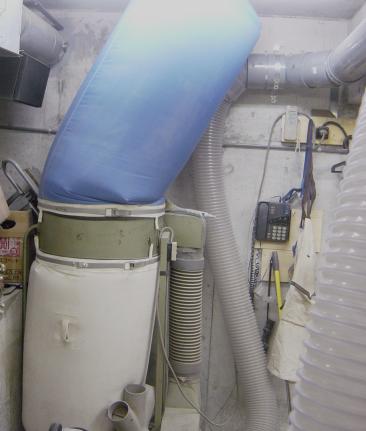
The bags are a little bit too tall :)
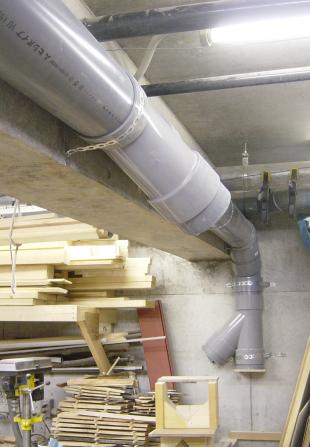
Looking from the DC corner to the opposite wall, The "Y" there on the
wall will be for the router table.
At the top of the picture you can see the center drop.
Lots more to do, but at least I've got it started!!
Oh crap....
I'm going to have to make some blast gates for the system, I got the idea to use a straight connector for the pipe, cut it in two and put the blast gate in the center of it. I thought I would use Big Blue to do this, BAD idea...
Sorry I took the pic on my cell phone, the coupling spun, and broke......
AND....

took a bunch of teeth with it!!!
Man am pissed at myself, what a bonehead move..... !!
Now BB cuts VERY ragged, I filed the busted teeth flat, and tried to reset the bent ones straight again, but I don't think it will be the same....
I guess I'll have to buy another blade, and use this one for cutting up junk boards etc.
From now on, only WOOD get near BB.....
CRAP!!
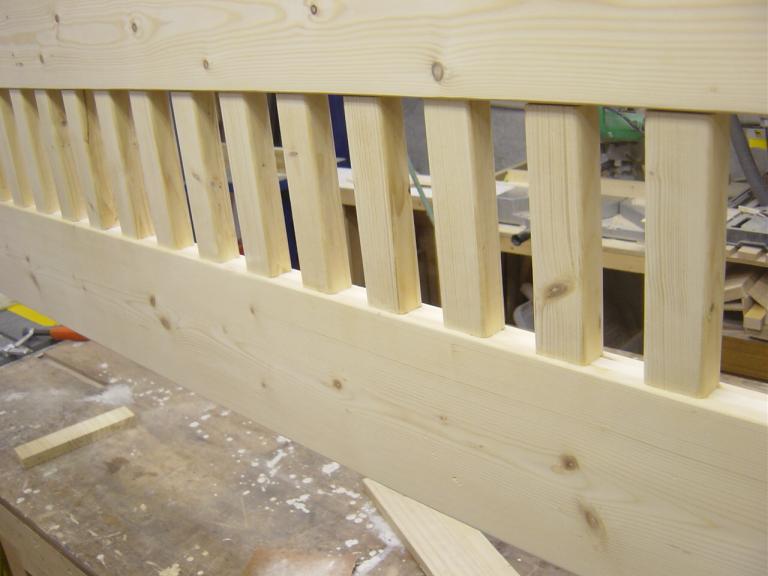
Three years in the making...
Well, OK, I'm just now getting around to finishing this bed that I started for my lovely wife and myself..
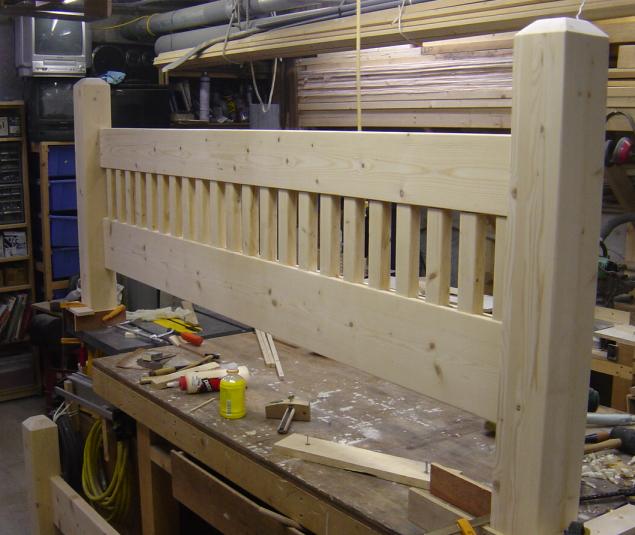
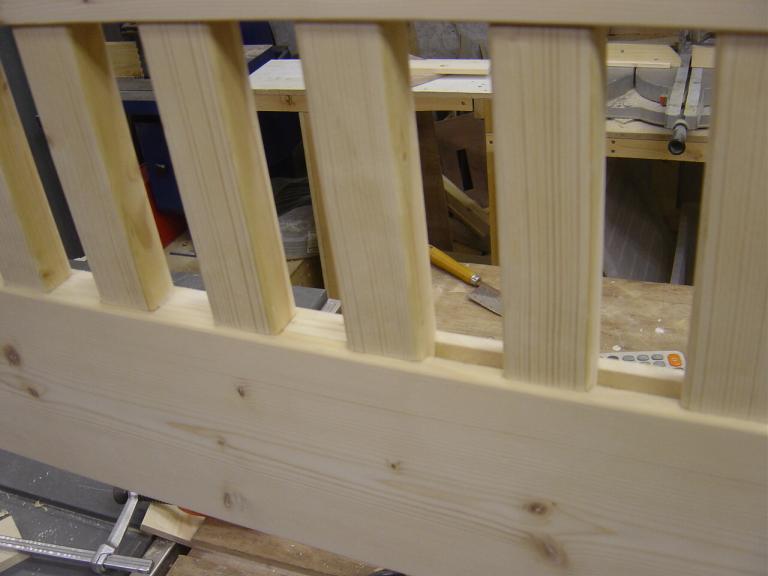
This is the headboard, I'm just filling in the spaces between the slats.
I started this bed a long time ago, so it is made from 2x4s,
2x6s, and 2x10s.
All pine, I did not have a jointer, or planer back then.
This was made with a table saw and some hand tools, so please forgive the
somewhat crude construction.
I used the dado blade in my table saw to cut the groove in the edge of the
board, and then I made the stubs on each slat on the table saw as well with the
dado. It worked fairly well, except I had a gap between each slat. Last night I
filled those in with some small sticks. It is sure nice to have that jointer and
planer to quickly dimension the wood for this.
There all done, should make keeping it clean a lot easier!
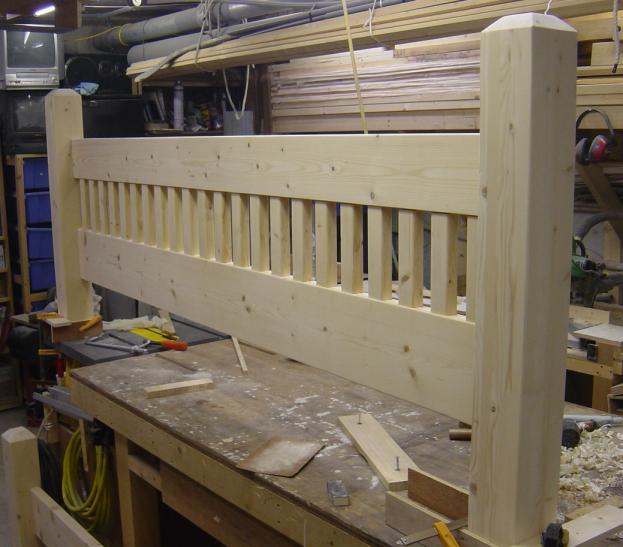
All filled in and sanded, now I'm going to wax it.
I decided on wax for a number of reasons, one is ease of application, no big
mess,
and I like the way it makes the wood look, just a bit of a glow.
The second reason is my wife has some allergies, and a few of
the other pieces
I've made have made her a bit sick for a while, the fumes coming off a new
piece can linger for a while.
This will be our bed, so I figured it would be better if she did not get sick
sleeping in it.
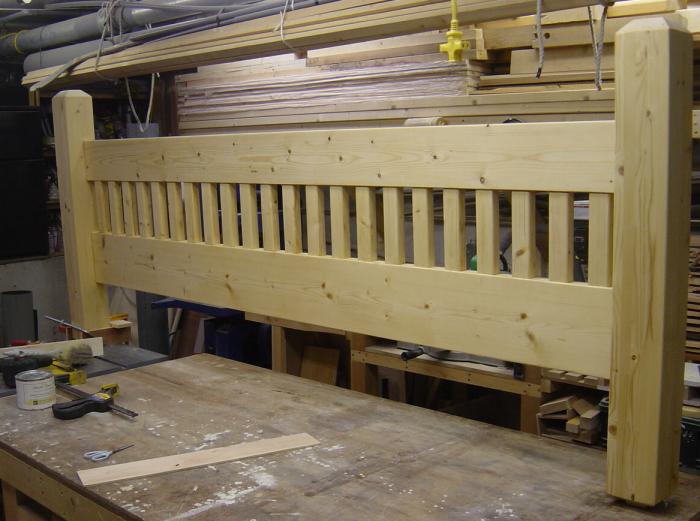
There, the first coat of wax on the bed, now I need to get out the buffer and
try to shine it up a bit.
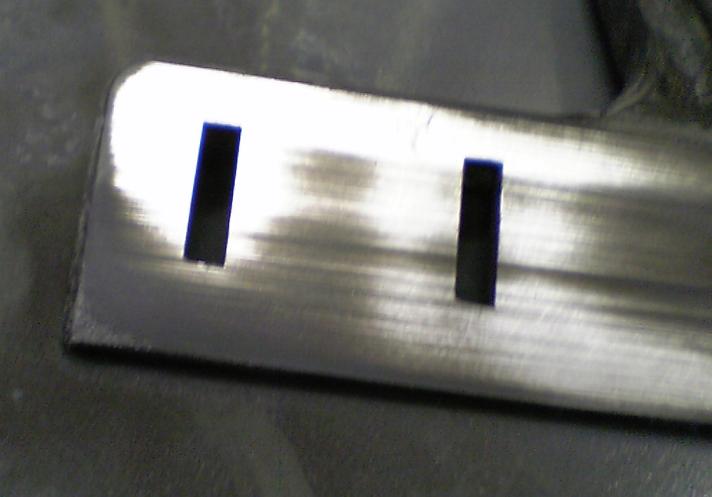
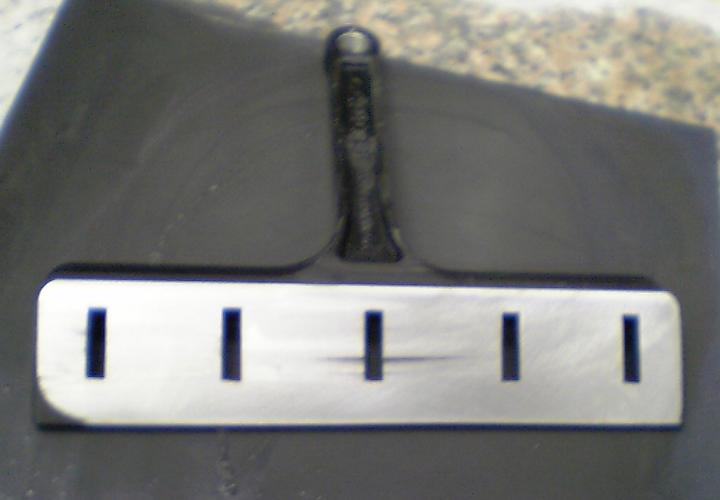
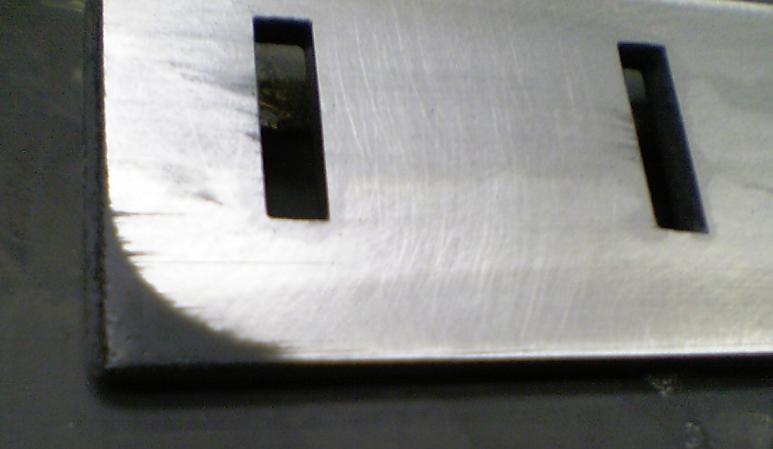
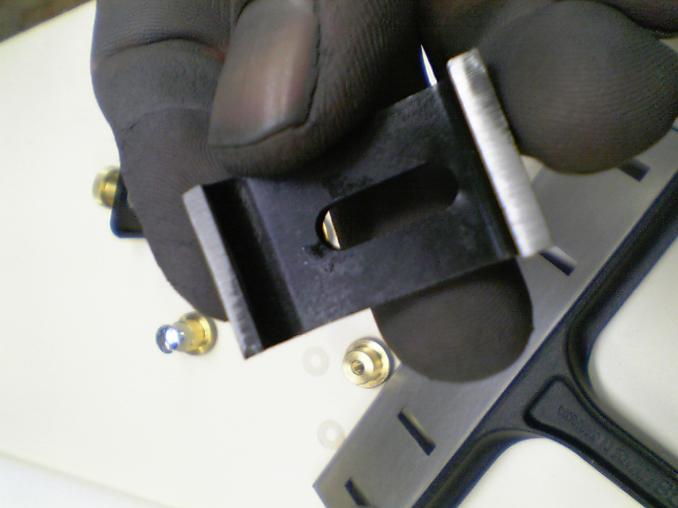
Bandsaw Blade Guides
The guides that came with Big Blue were worn out, they needed
to be replaced,
but when I asked Hitachi about it, they were not sure that the guides for the
newer saws would fit
(looked to me like they would, but who knows)
I decided to make my own...
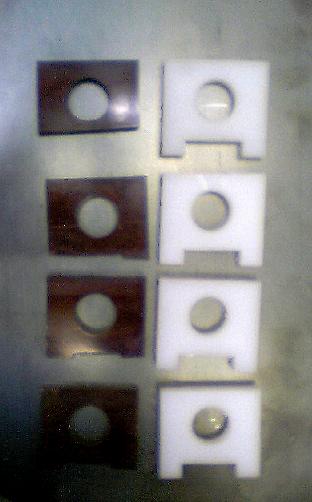
The new ones are made from that white plastic stuff, UHMW (ultra-high molecular
weight)
You can see the old ones on the left, and the new ones on the right.
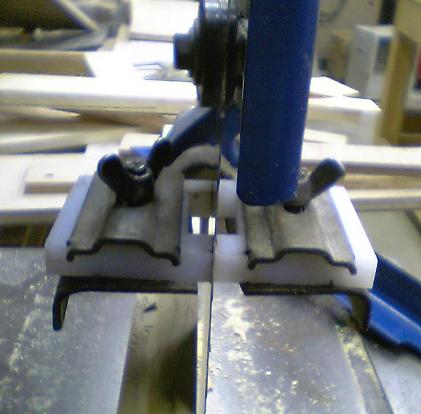
They went on the saw without any problems, and seem to work well.
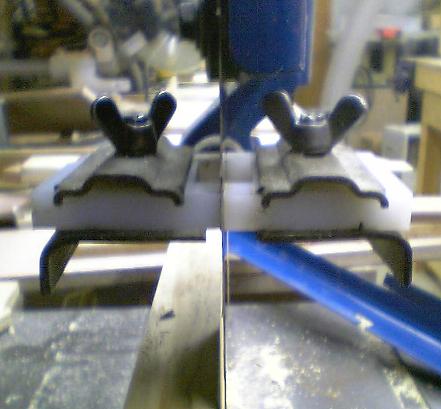
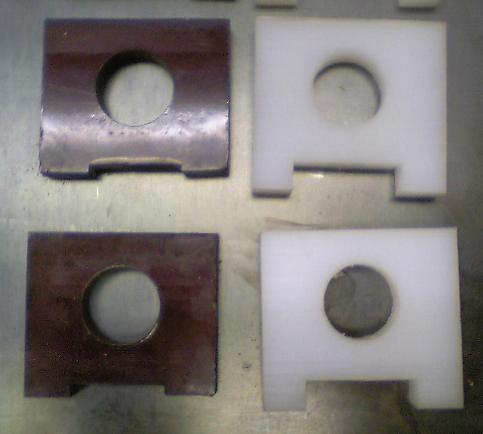
A close up